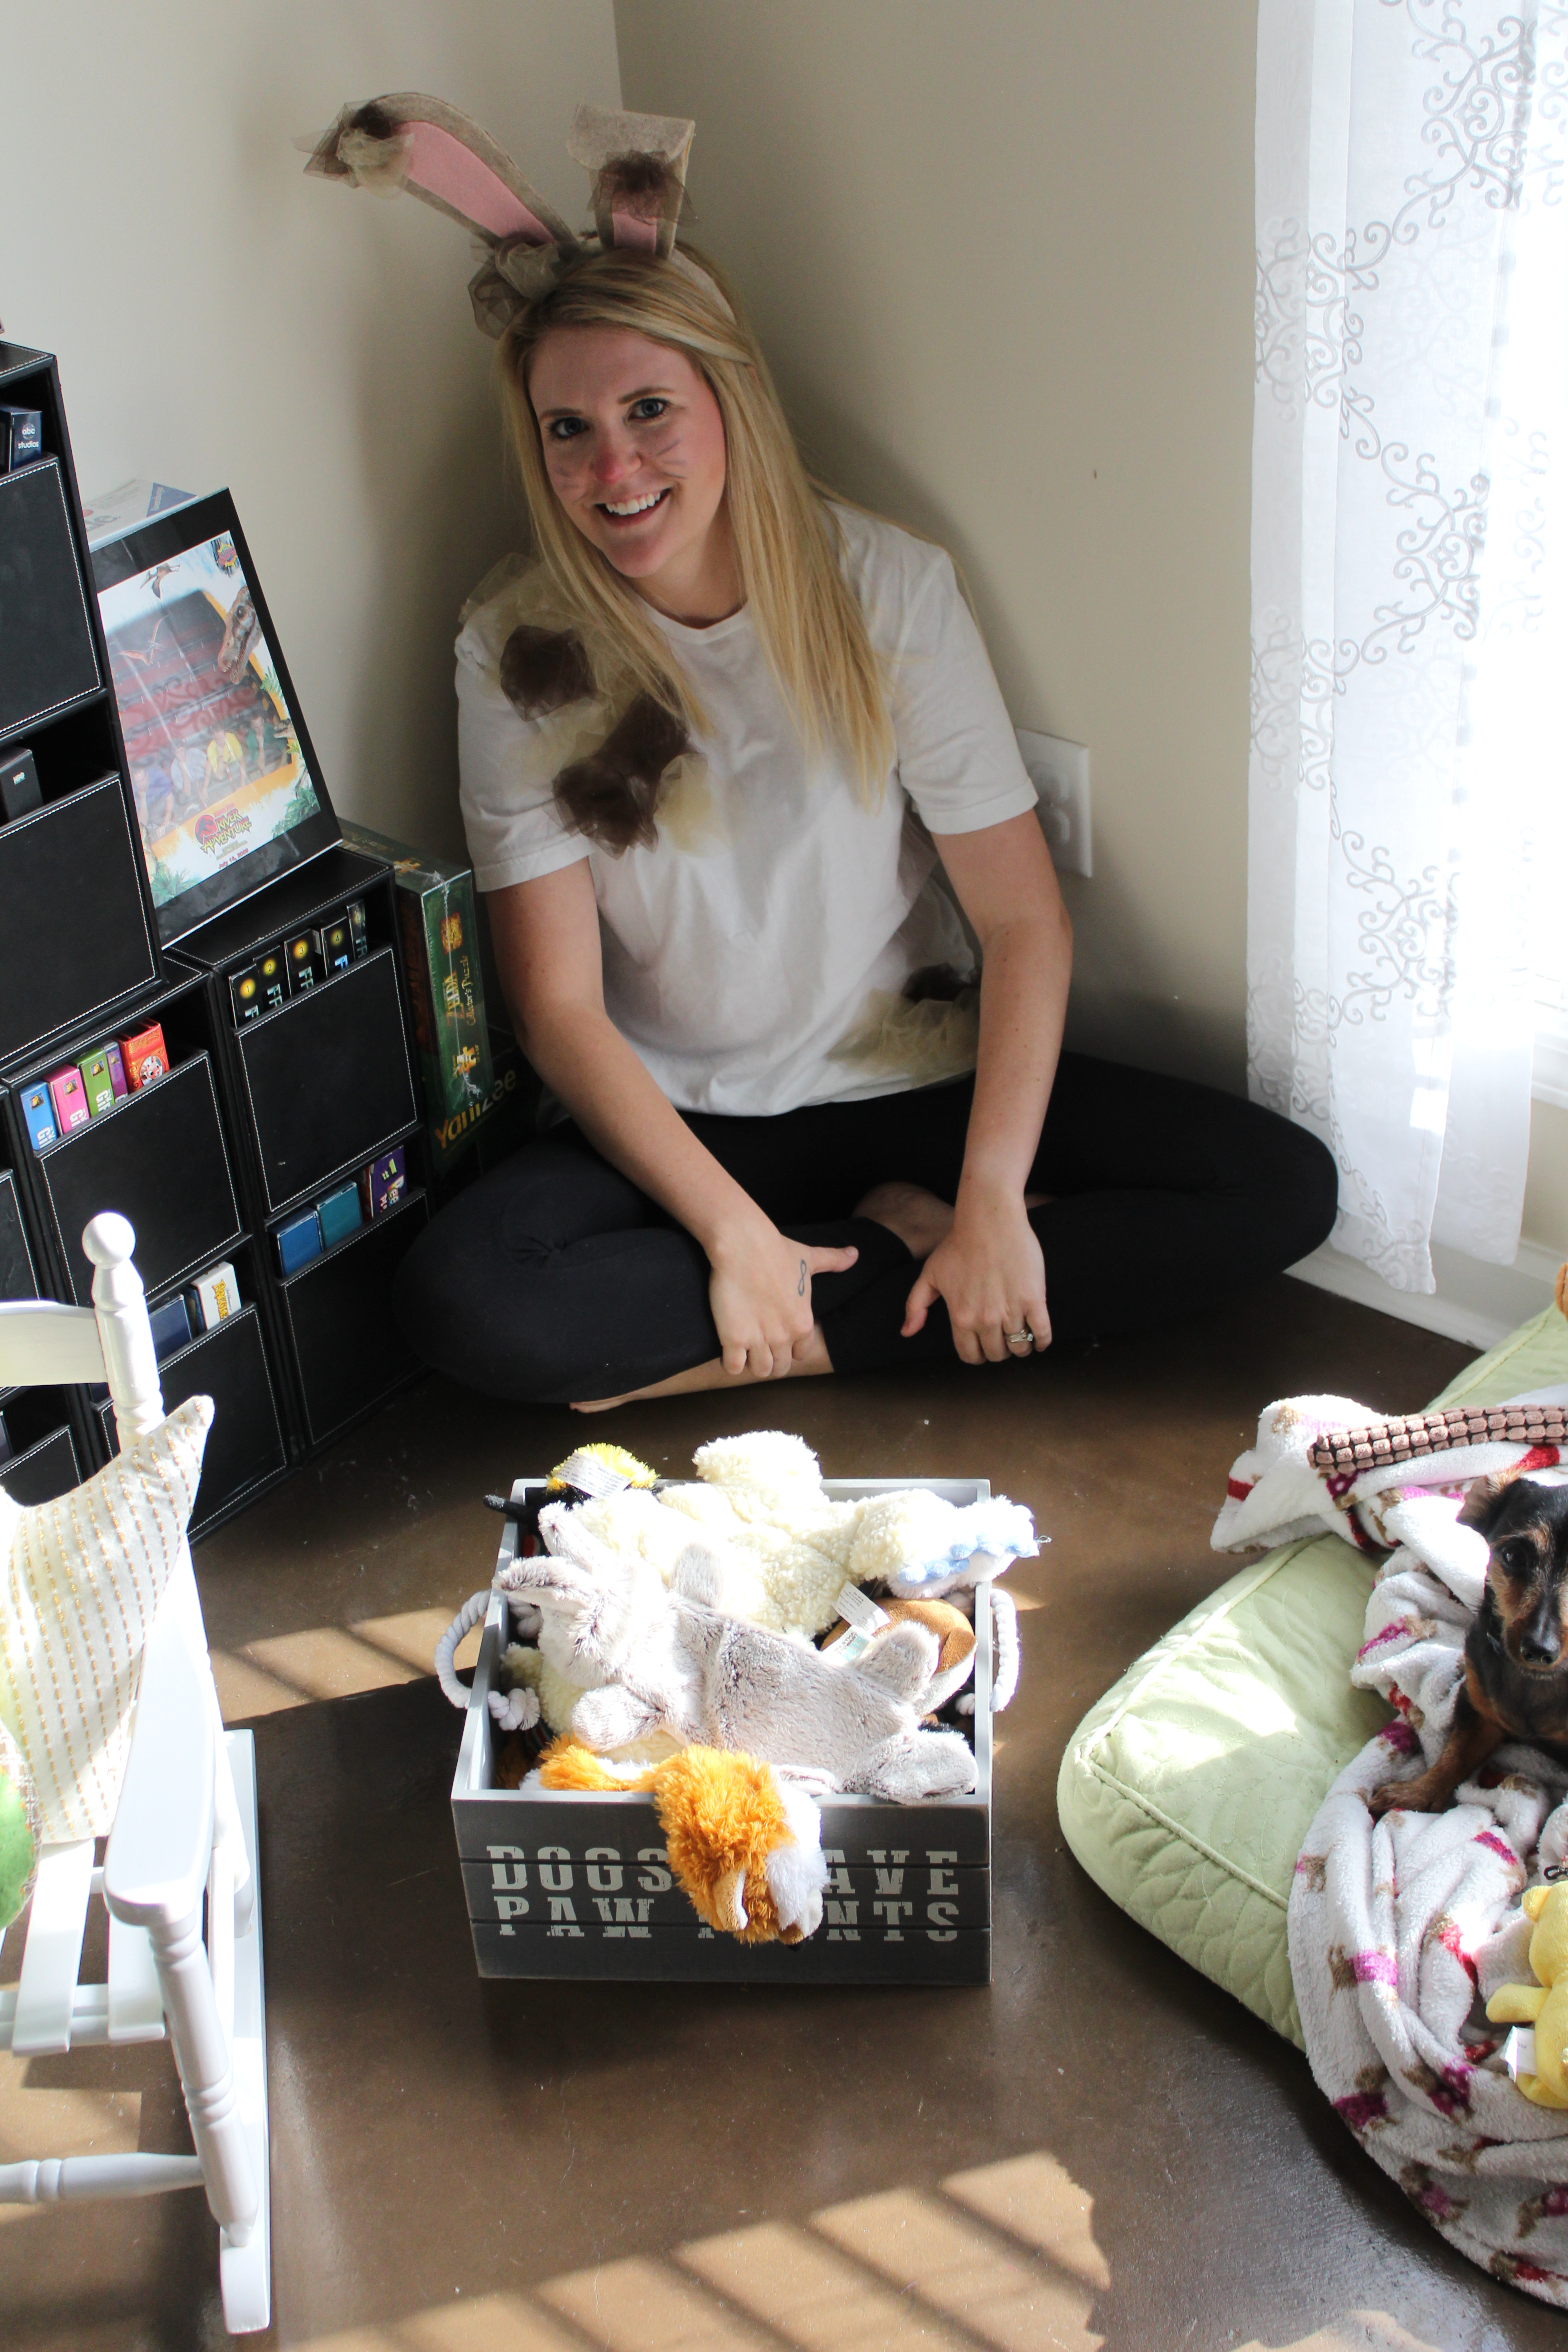
A fun fact about me is that I absolutely love Halloween! I love the spooky decorations, I love a good horror movie and I really love dressing up for the night! To celebrate this festive night, I am celebrating with a fun week of blogging that I have entitled Blog-O-Ween! Join me over the next five days as I share with you 5 fun, DIY costumes that are easy, budget friendly and found at your local Goodwill!
Let’s kick off the week with my first costume, a Dust Bunny!

For this costume you will need the following:
An Oversized White T-Shirt (Goodwill)
1/4th of a Yard of Tan Tulle (Hobby Lobby)
1/4th of a Yard of Brown Tulle (Hobby Lobby)
A Large Sheet of Light Brown Felt (Michaels)
A Sheet of Pink Felt (Michaels)
4 Tan Pipe Cleaners (Michaels)
A Plastic Headband (Dollar Tree)
Scissors and a Hot Glue Gun

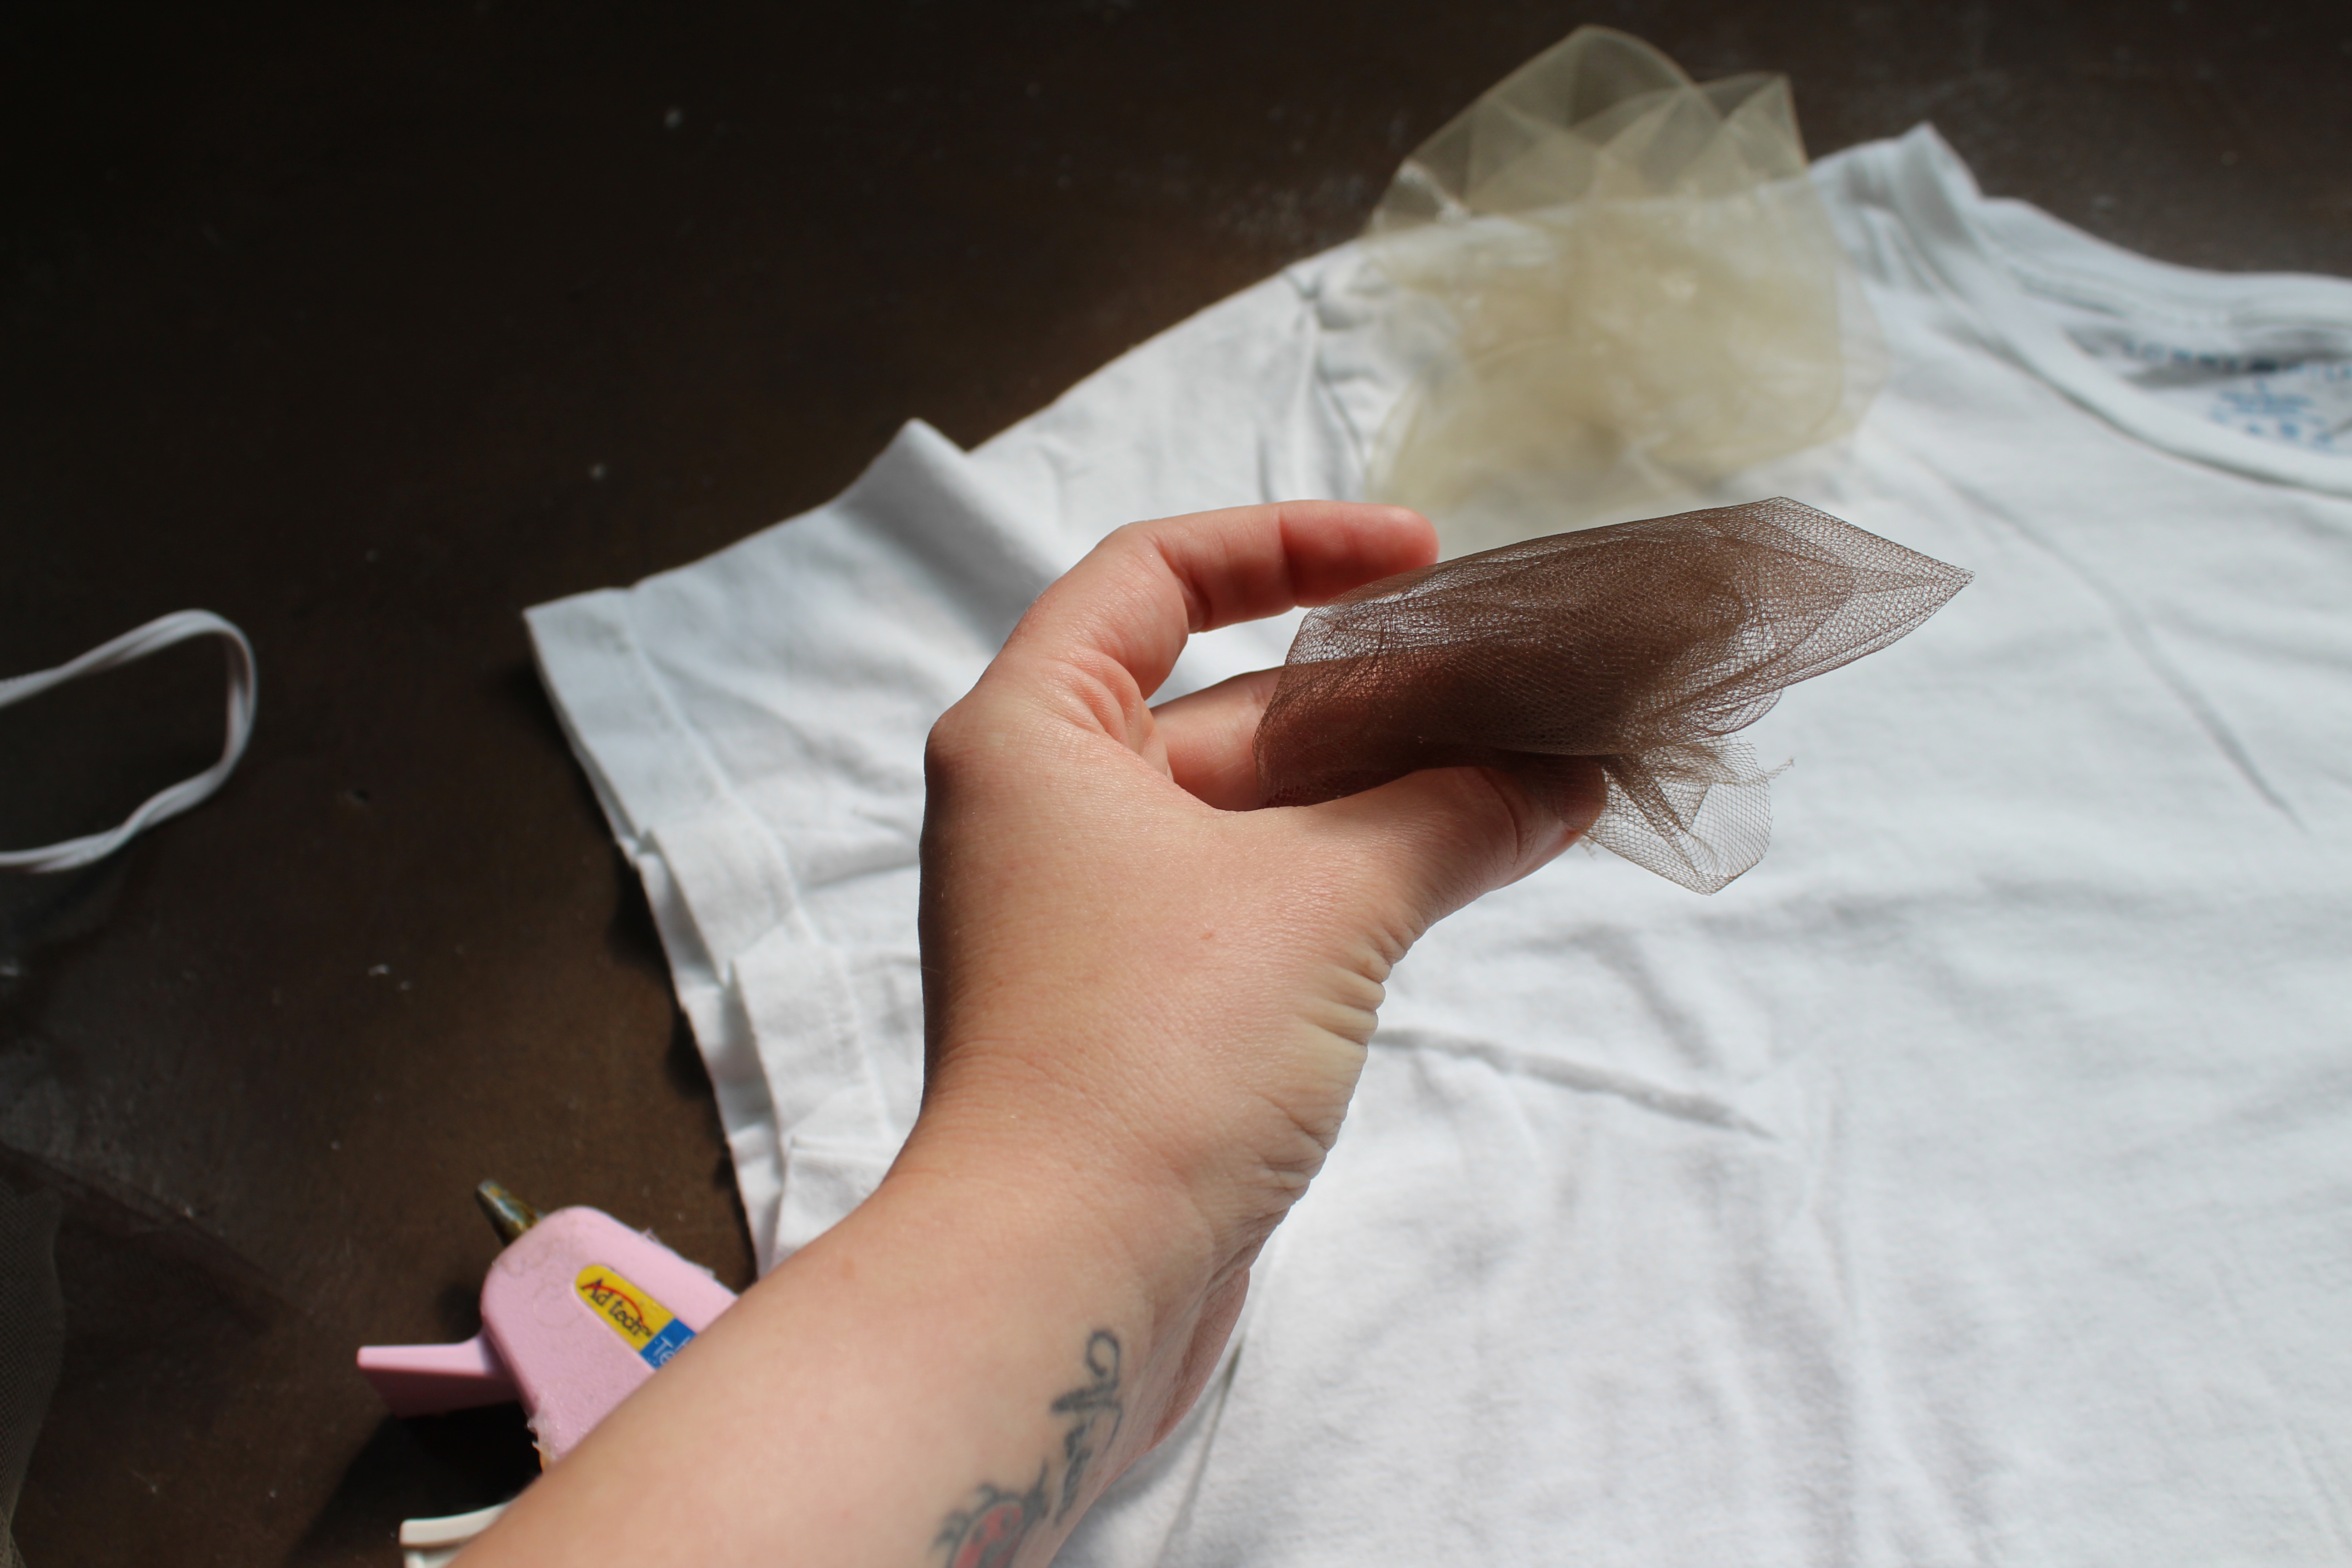
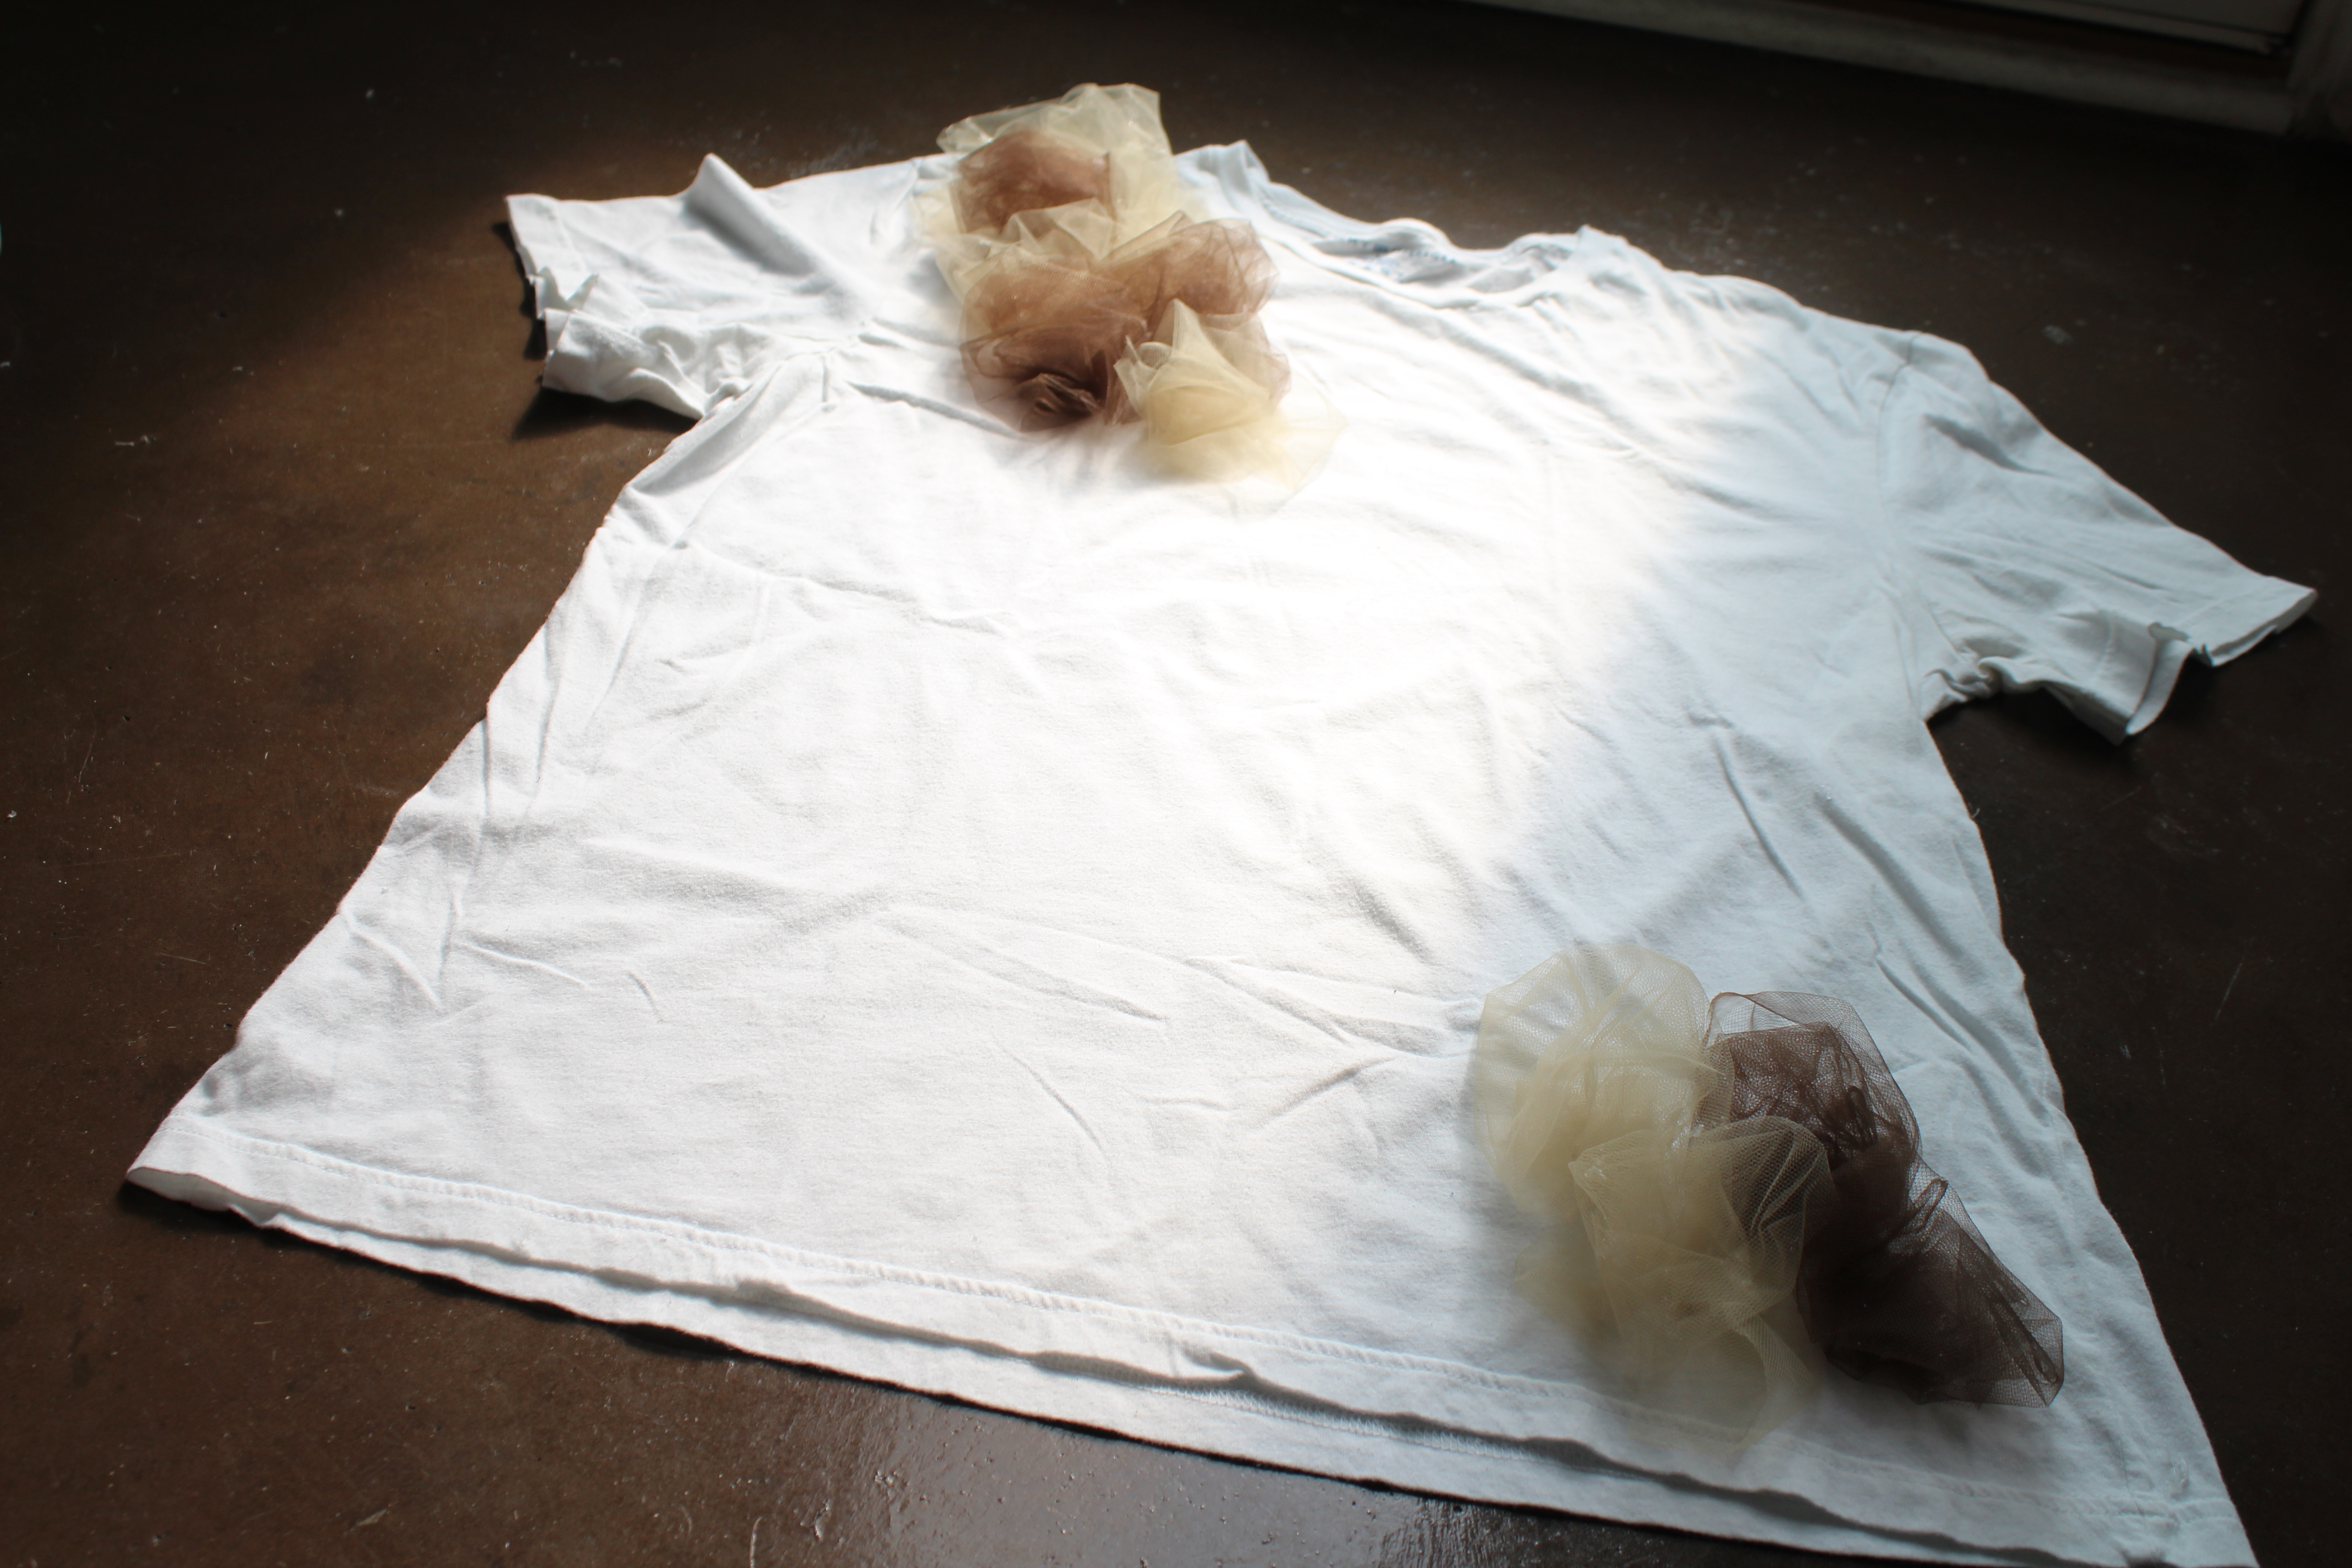
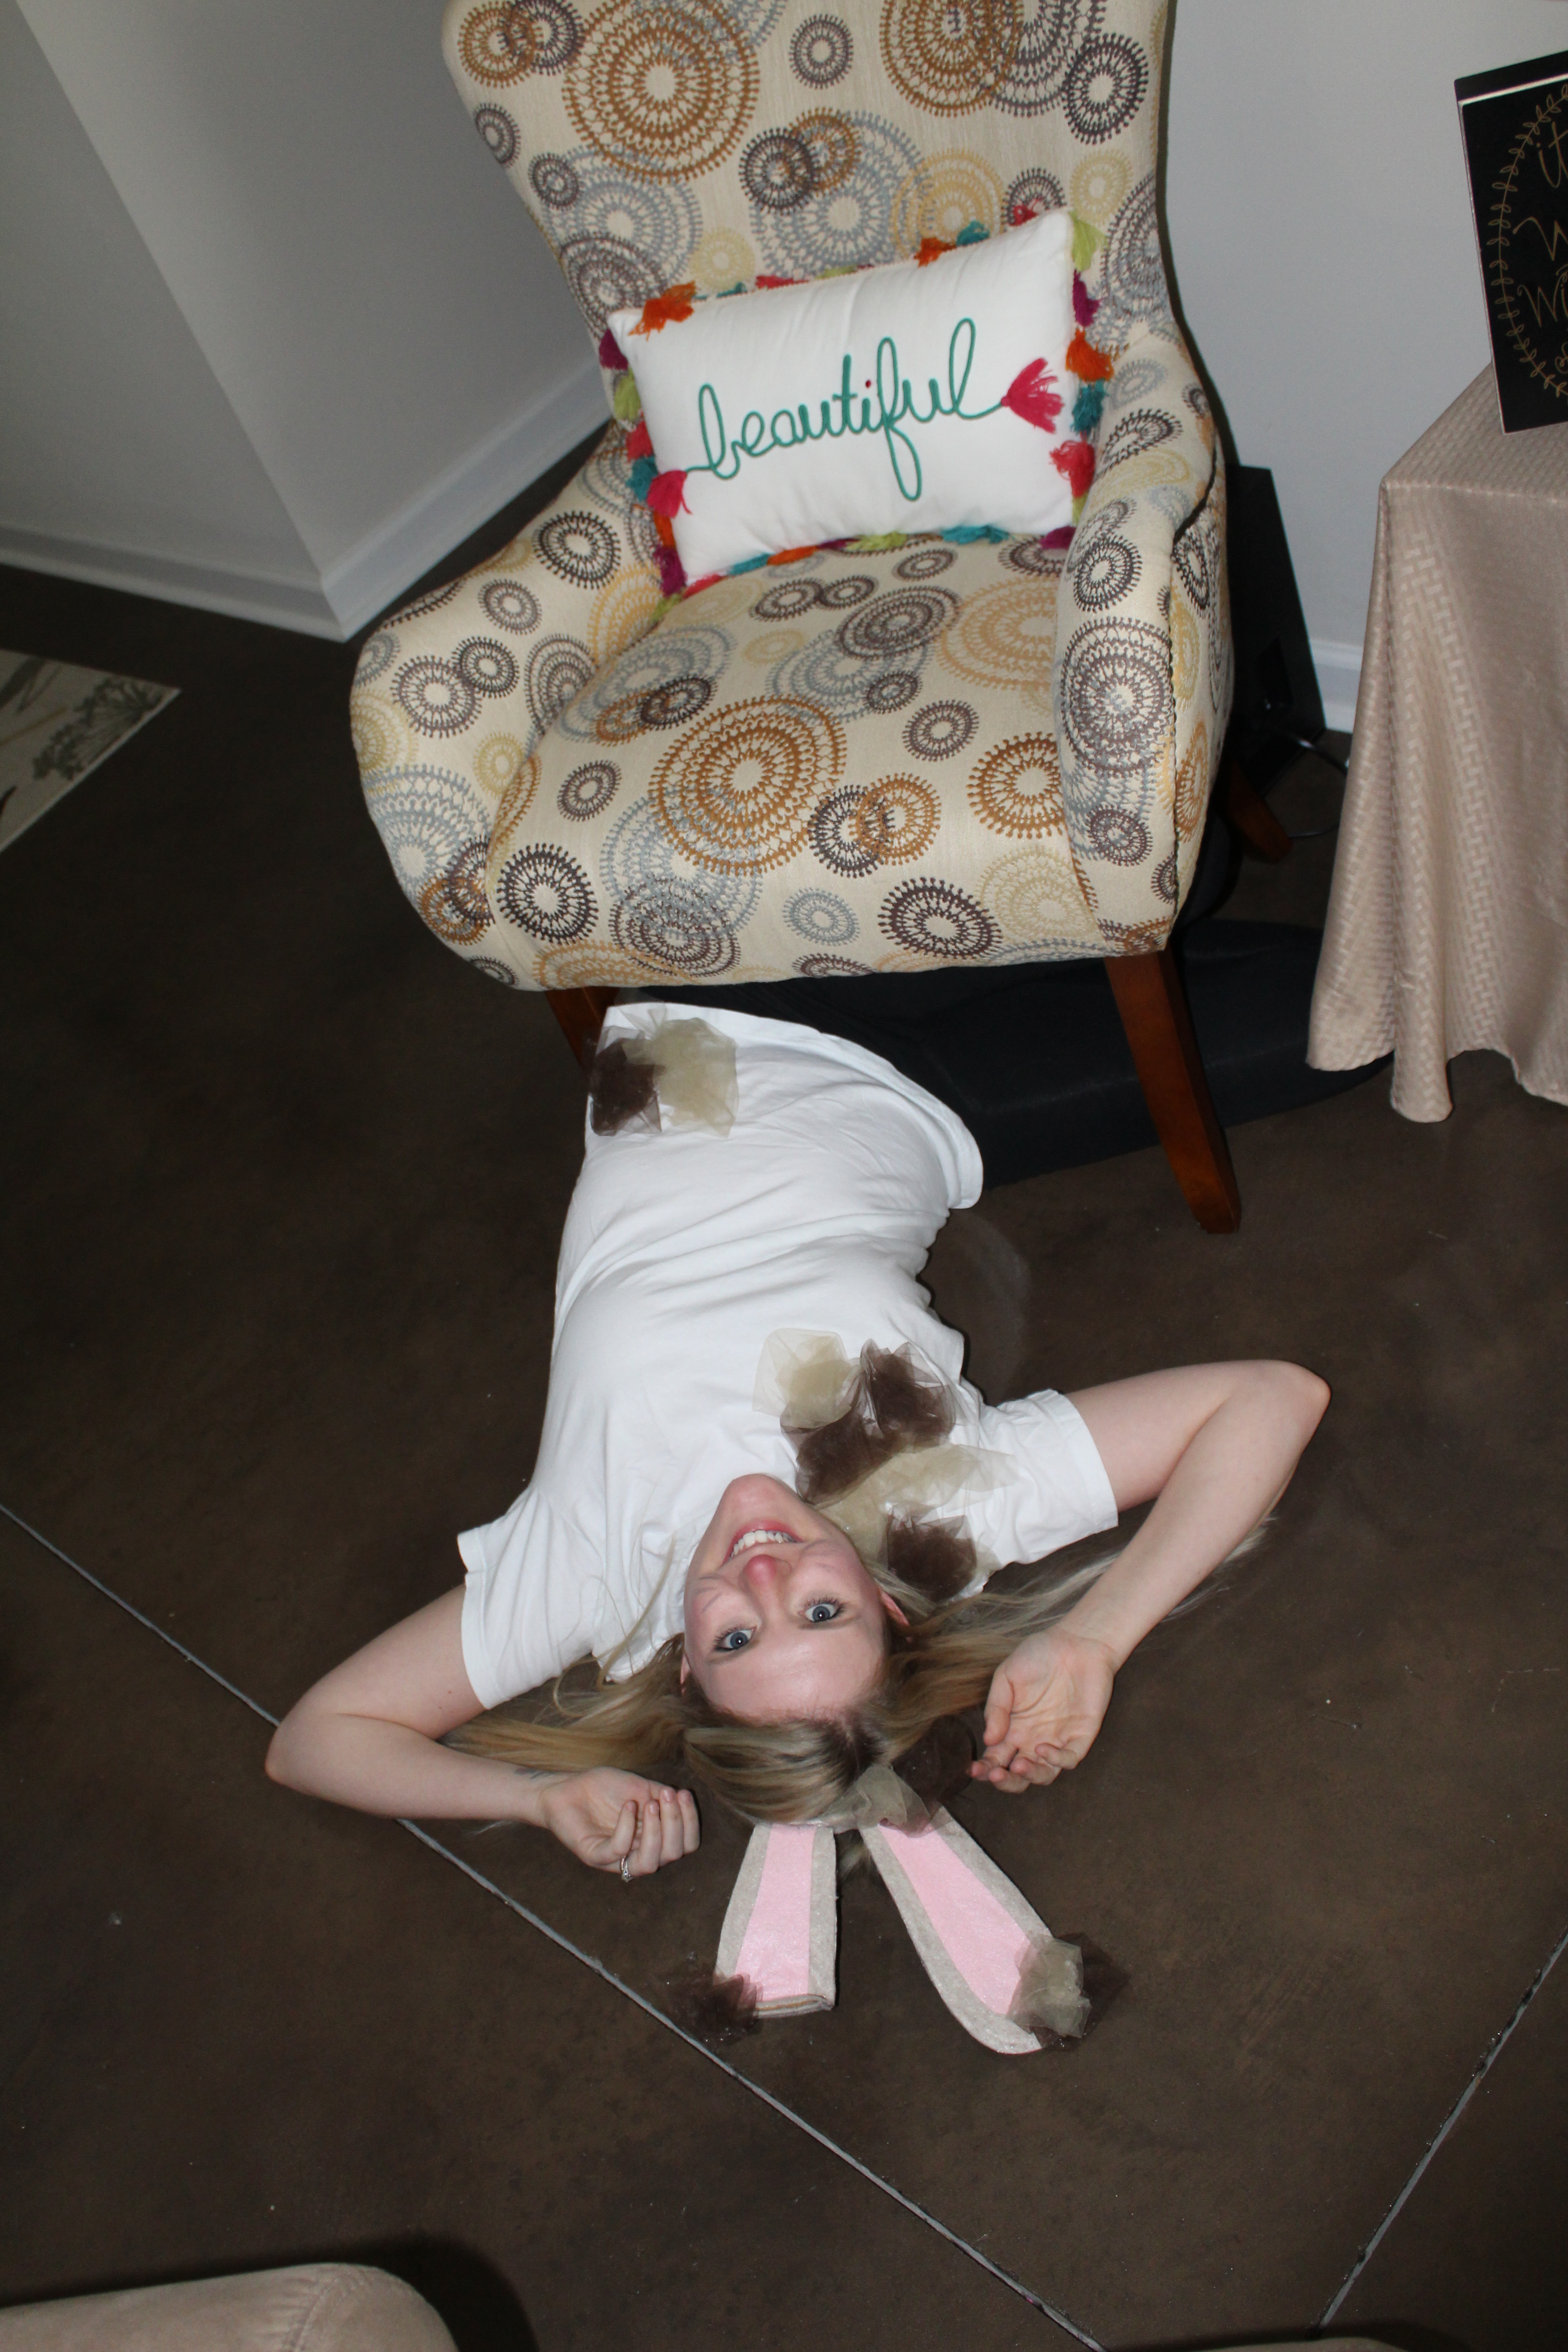
Step 1: Lay your t-shirt flat on the floor. Cut your tulle into small pieces. Once cut, bunch the tulle up and hot glue it onto the shirt. I alternated the color of the tulle so it looked “dirty.” While you can glue it onto the shirt in any pattern that you like, I did two different placements on my shirt. DO NOT use on the tulle on the shirt. I saved a few small pieces for my ears.
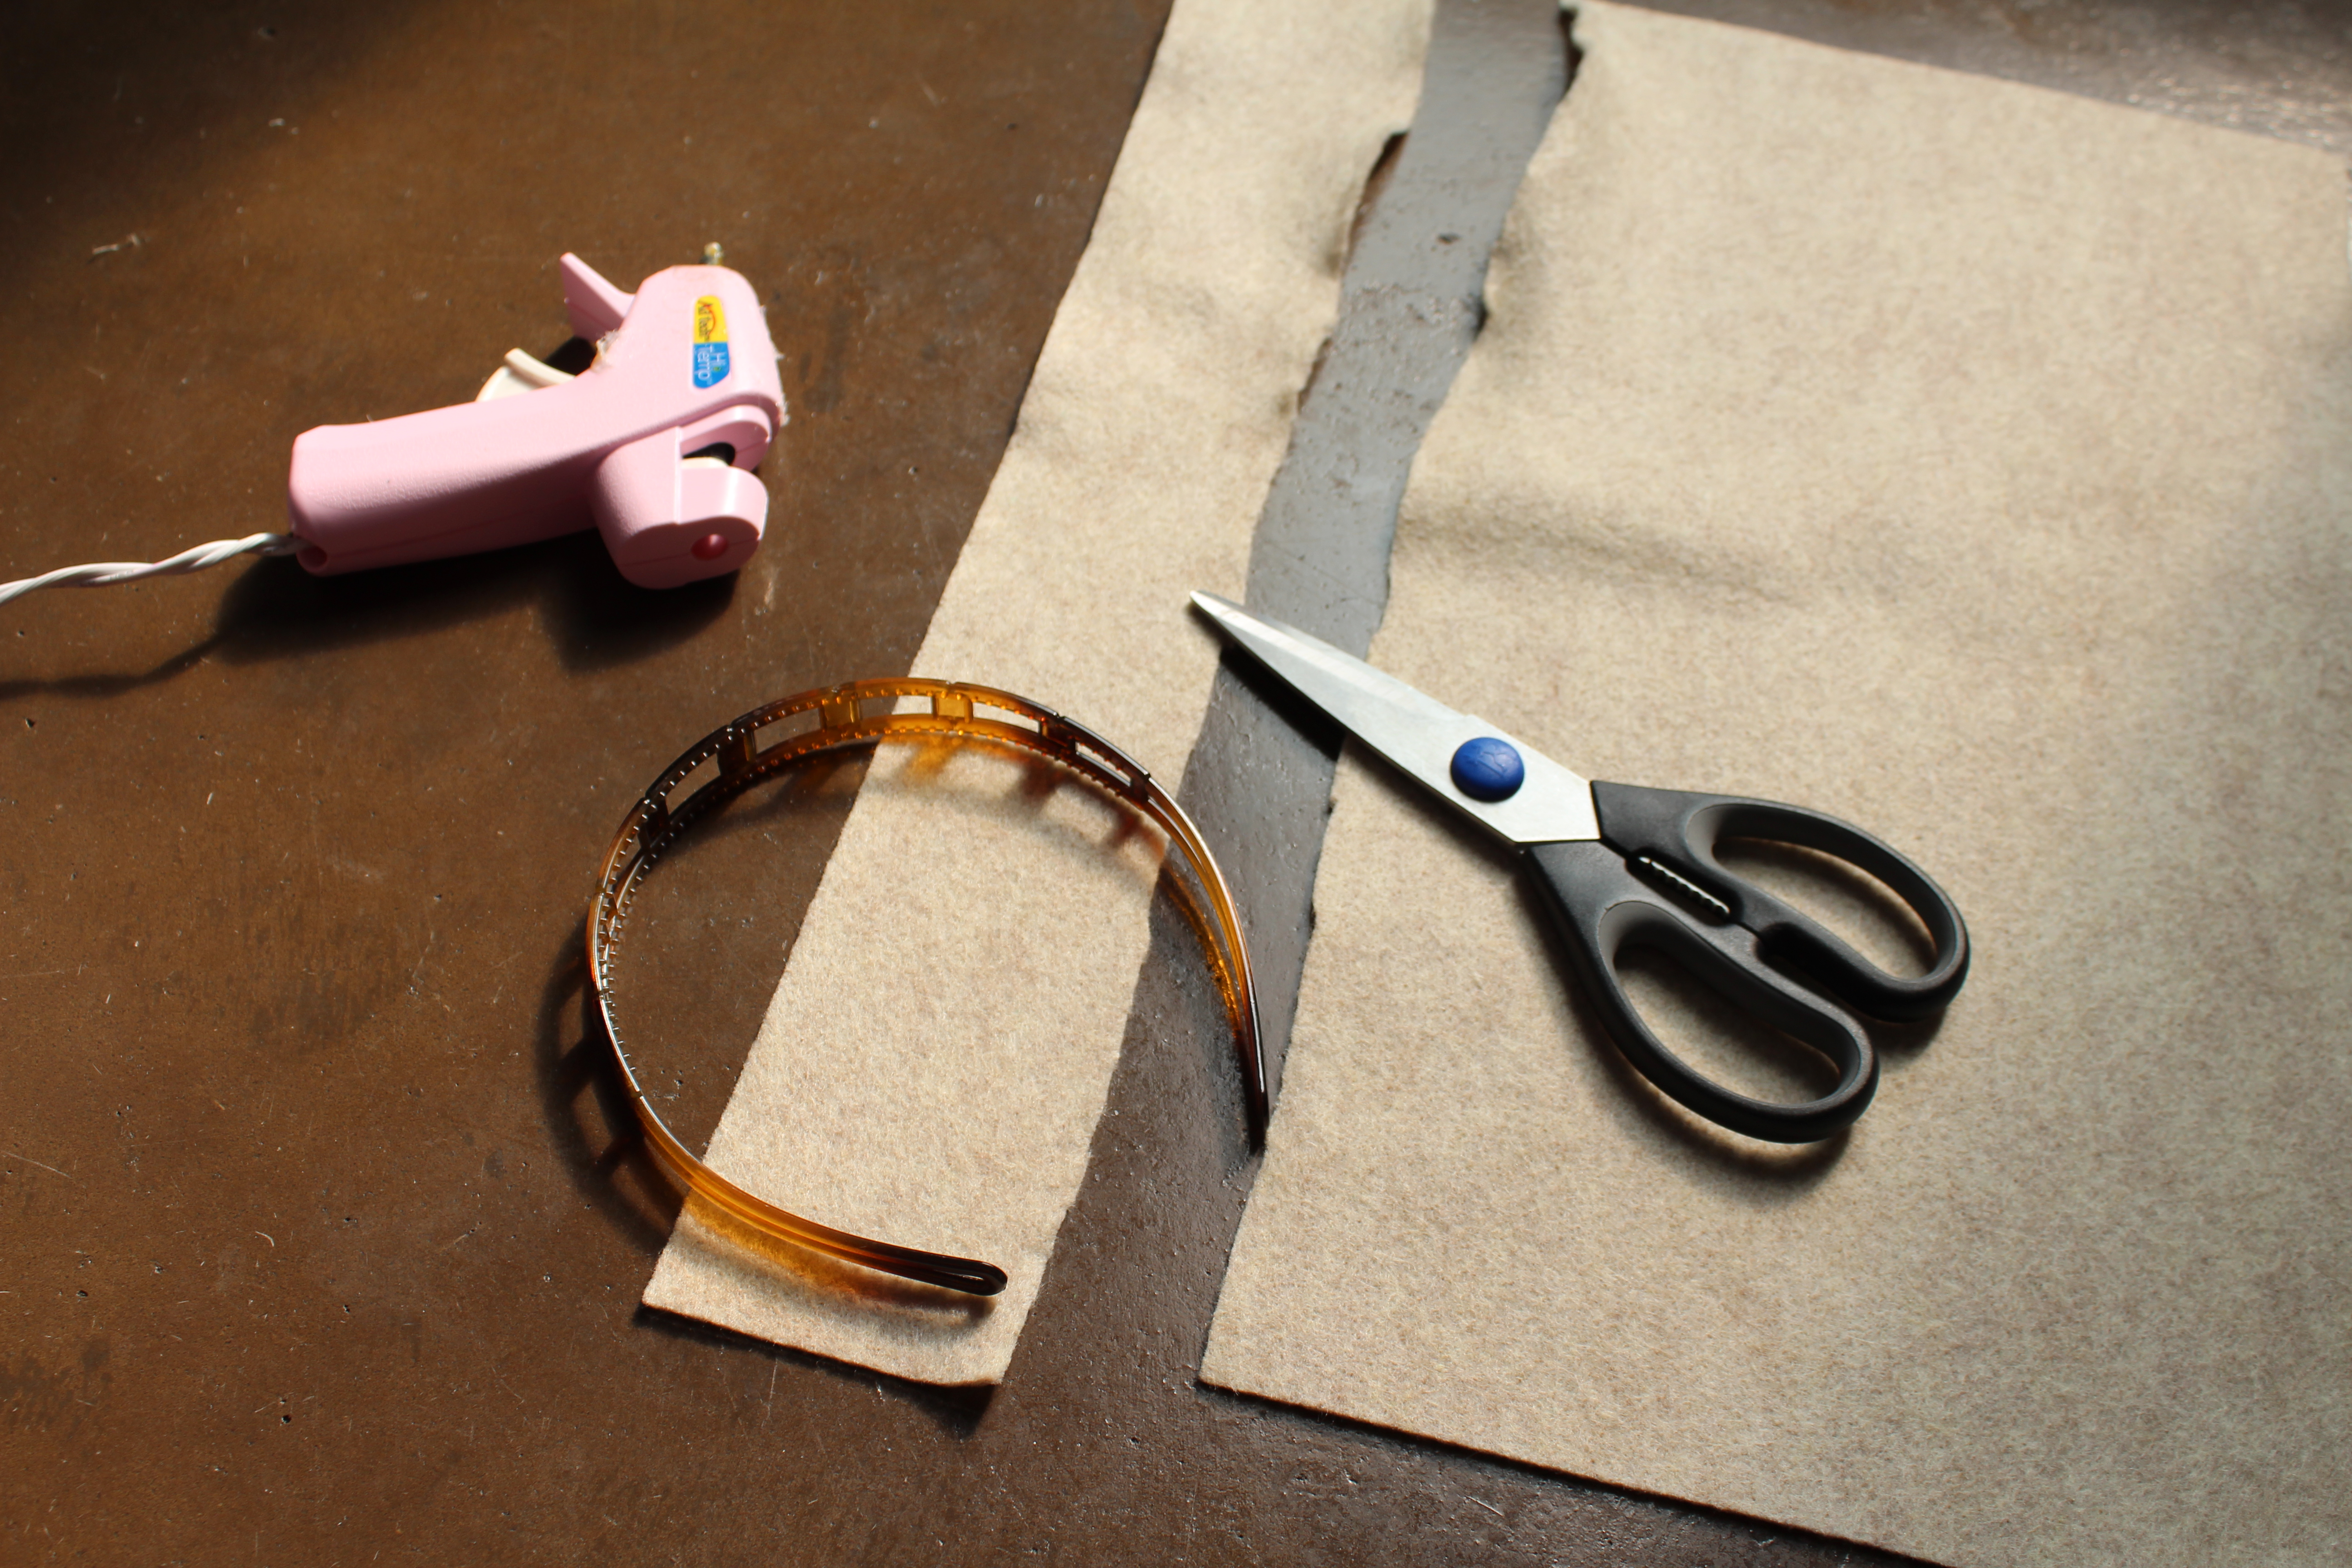
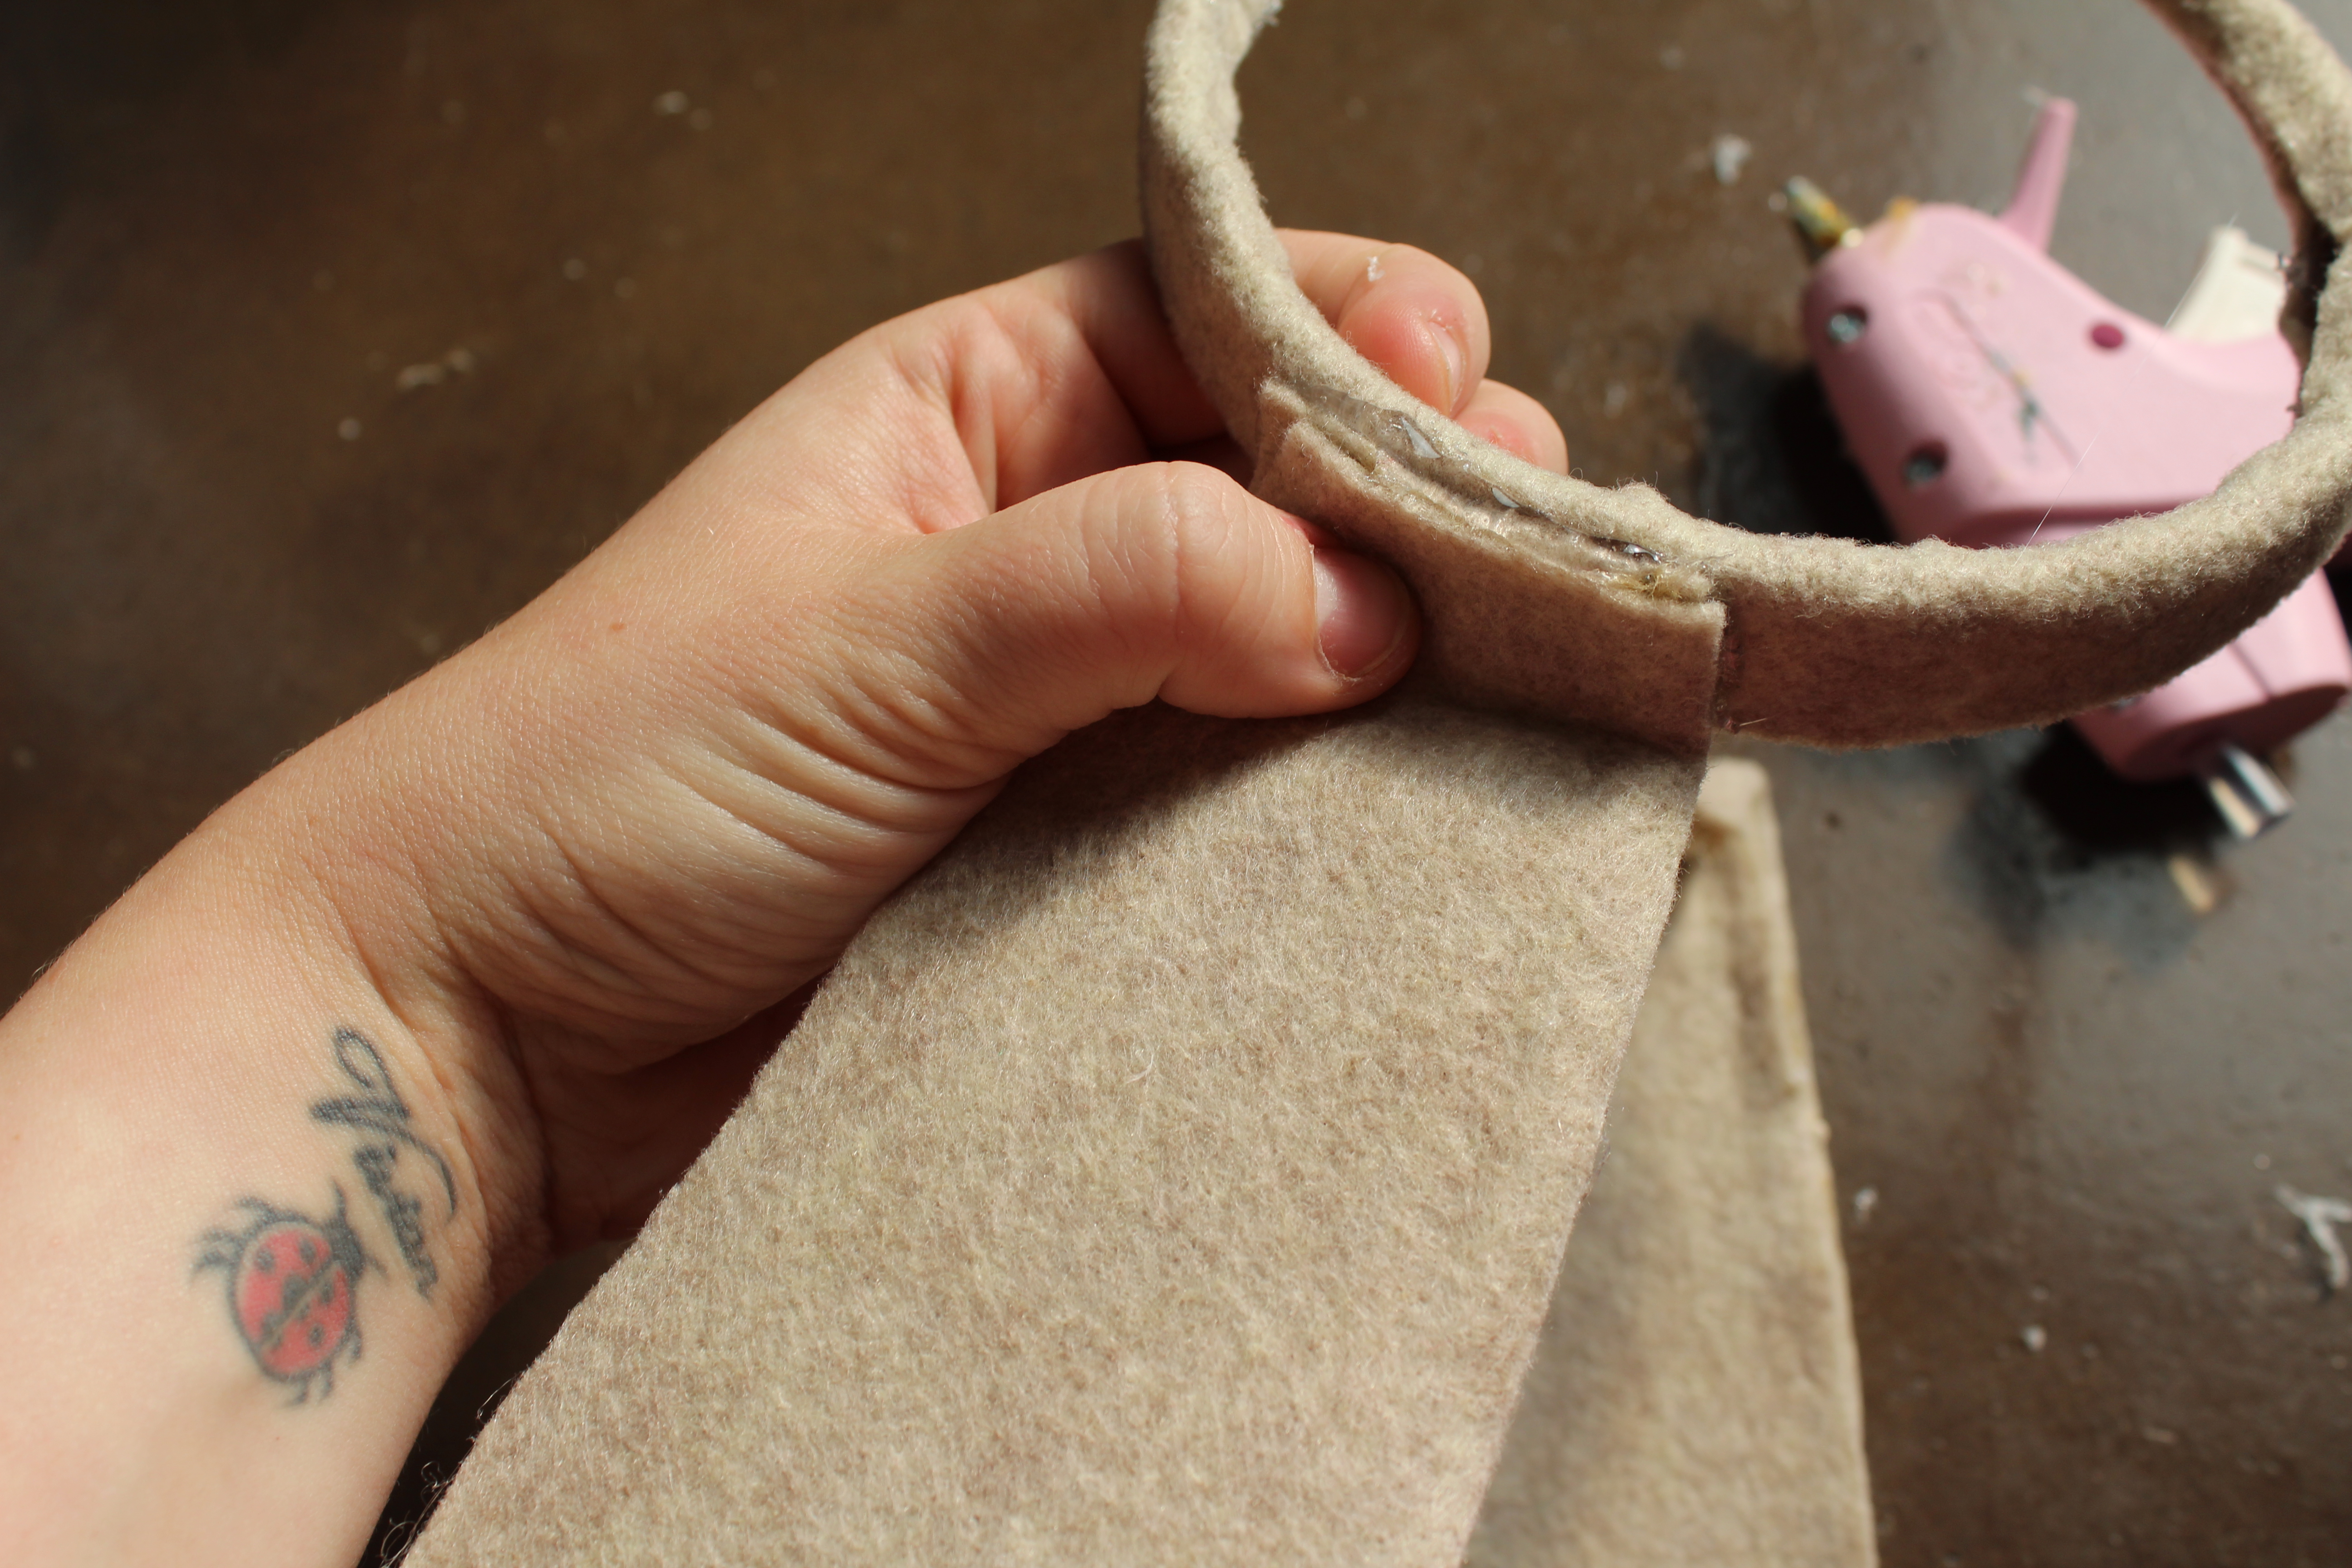
Step 2: Cut a small strip of the light brown felt. Make sure that it is wide enough to wrap around the headband. Glue the end of the headband to the felt. Continue gluing around the headband to the felt. Once glued, trim off the extra felt and then wrap and edges around the bottom of the headband.

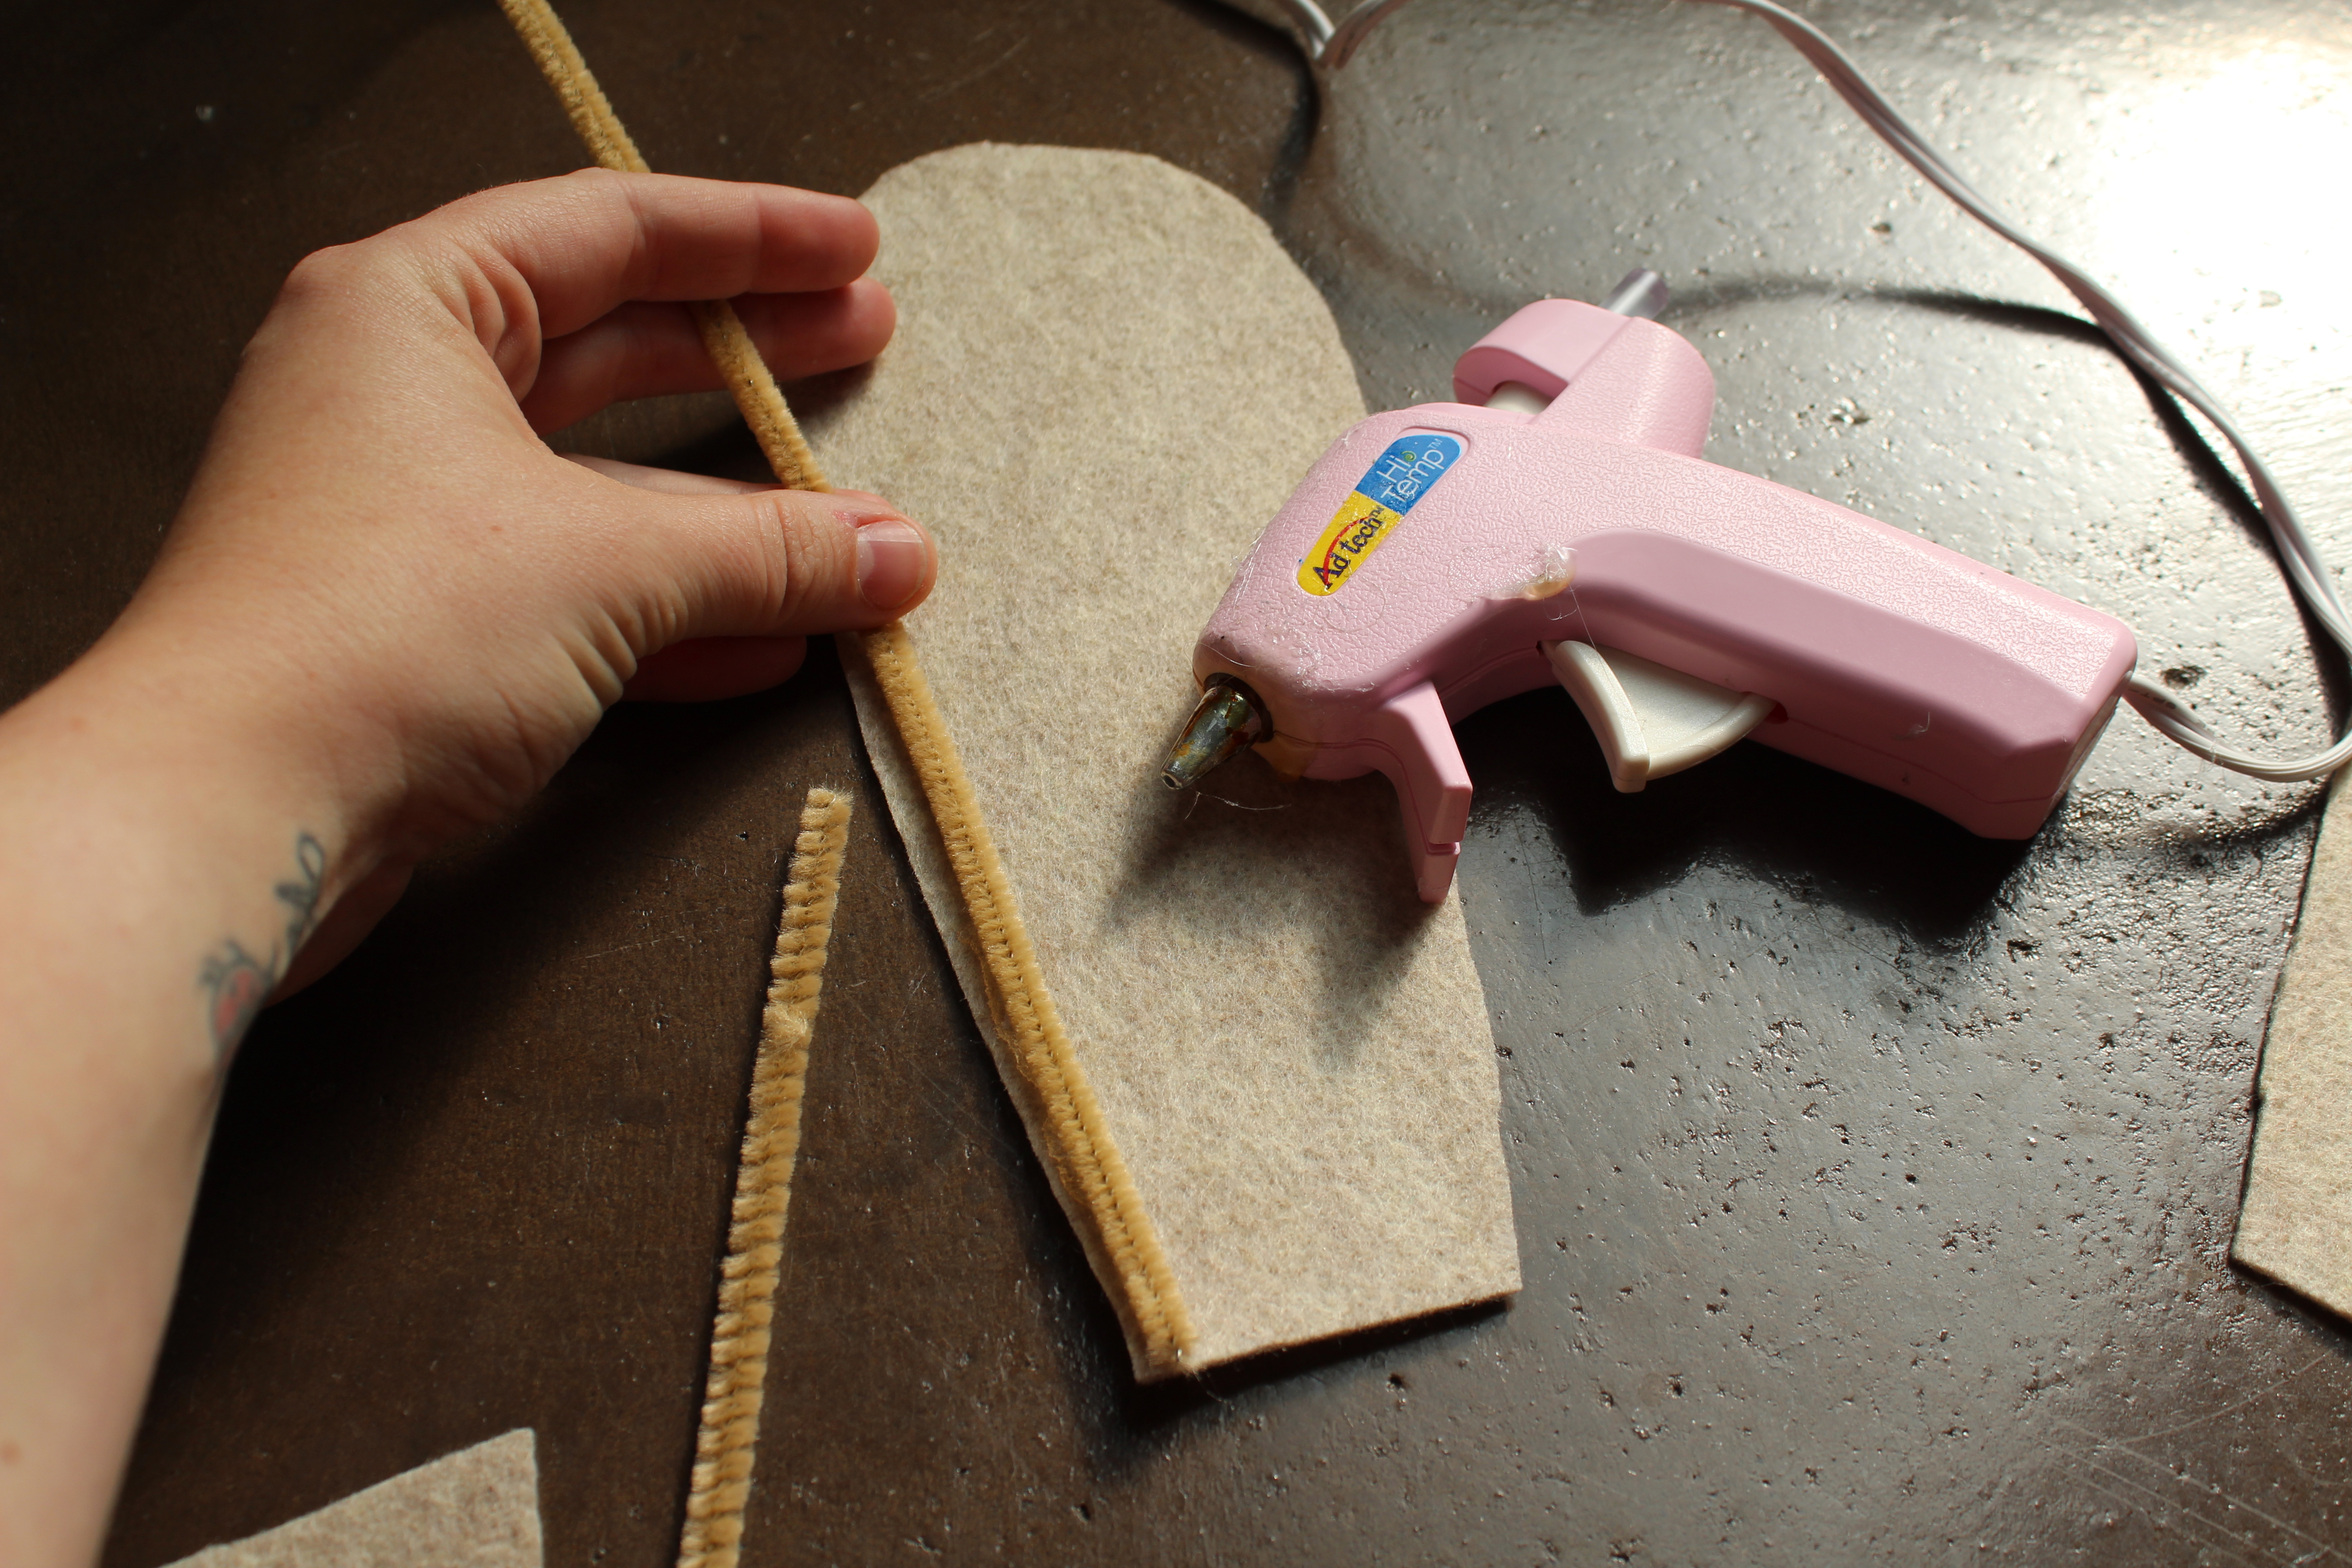
Step 3: Use the remainder of the light brown felt to cut your ears. I did not use a guide but rather guesstimate the size and shape. I folded the felt in half so that I was able to cut the front and back at the same time. Once I had cut one set of ears, I used one as a guide to make sure that the ears were the same size.


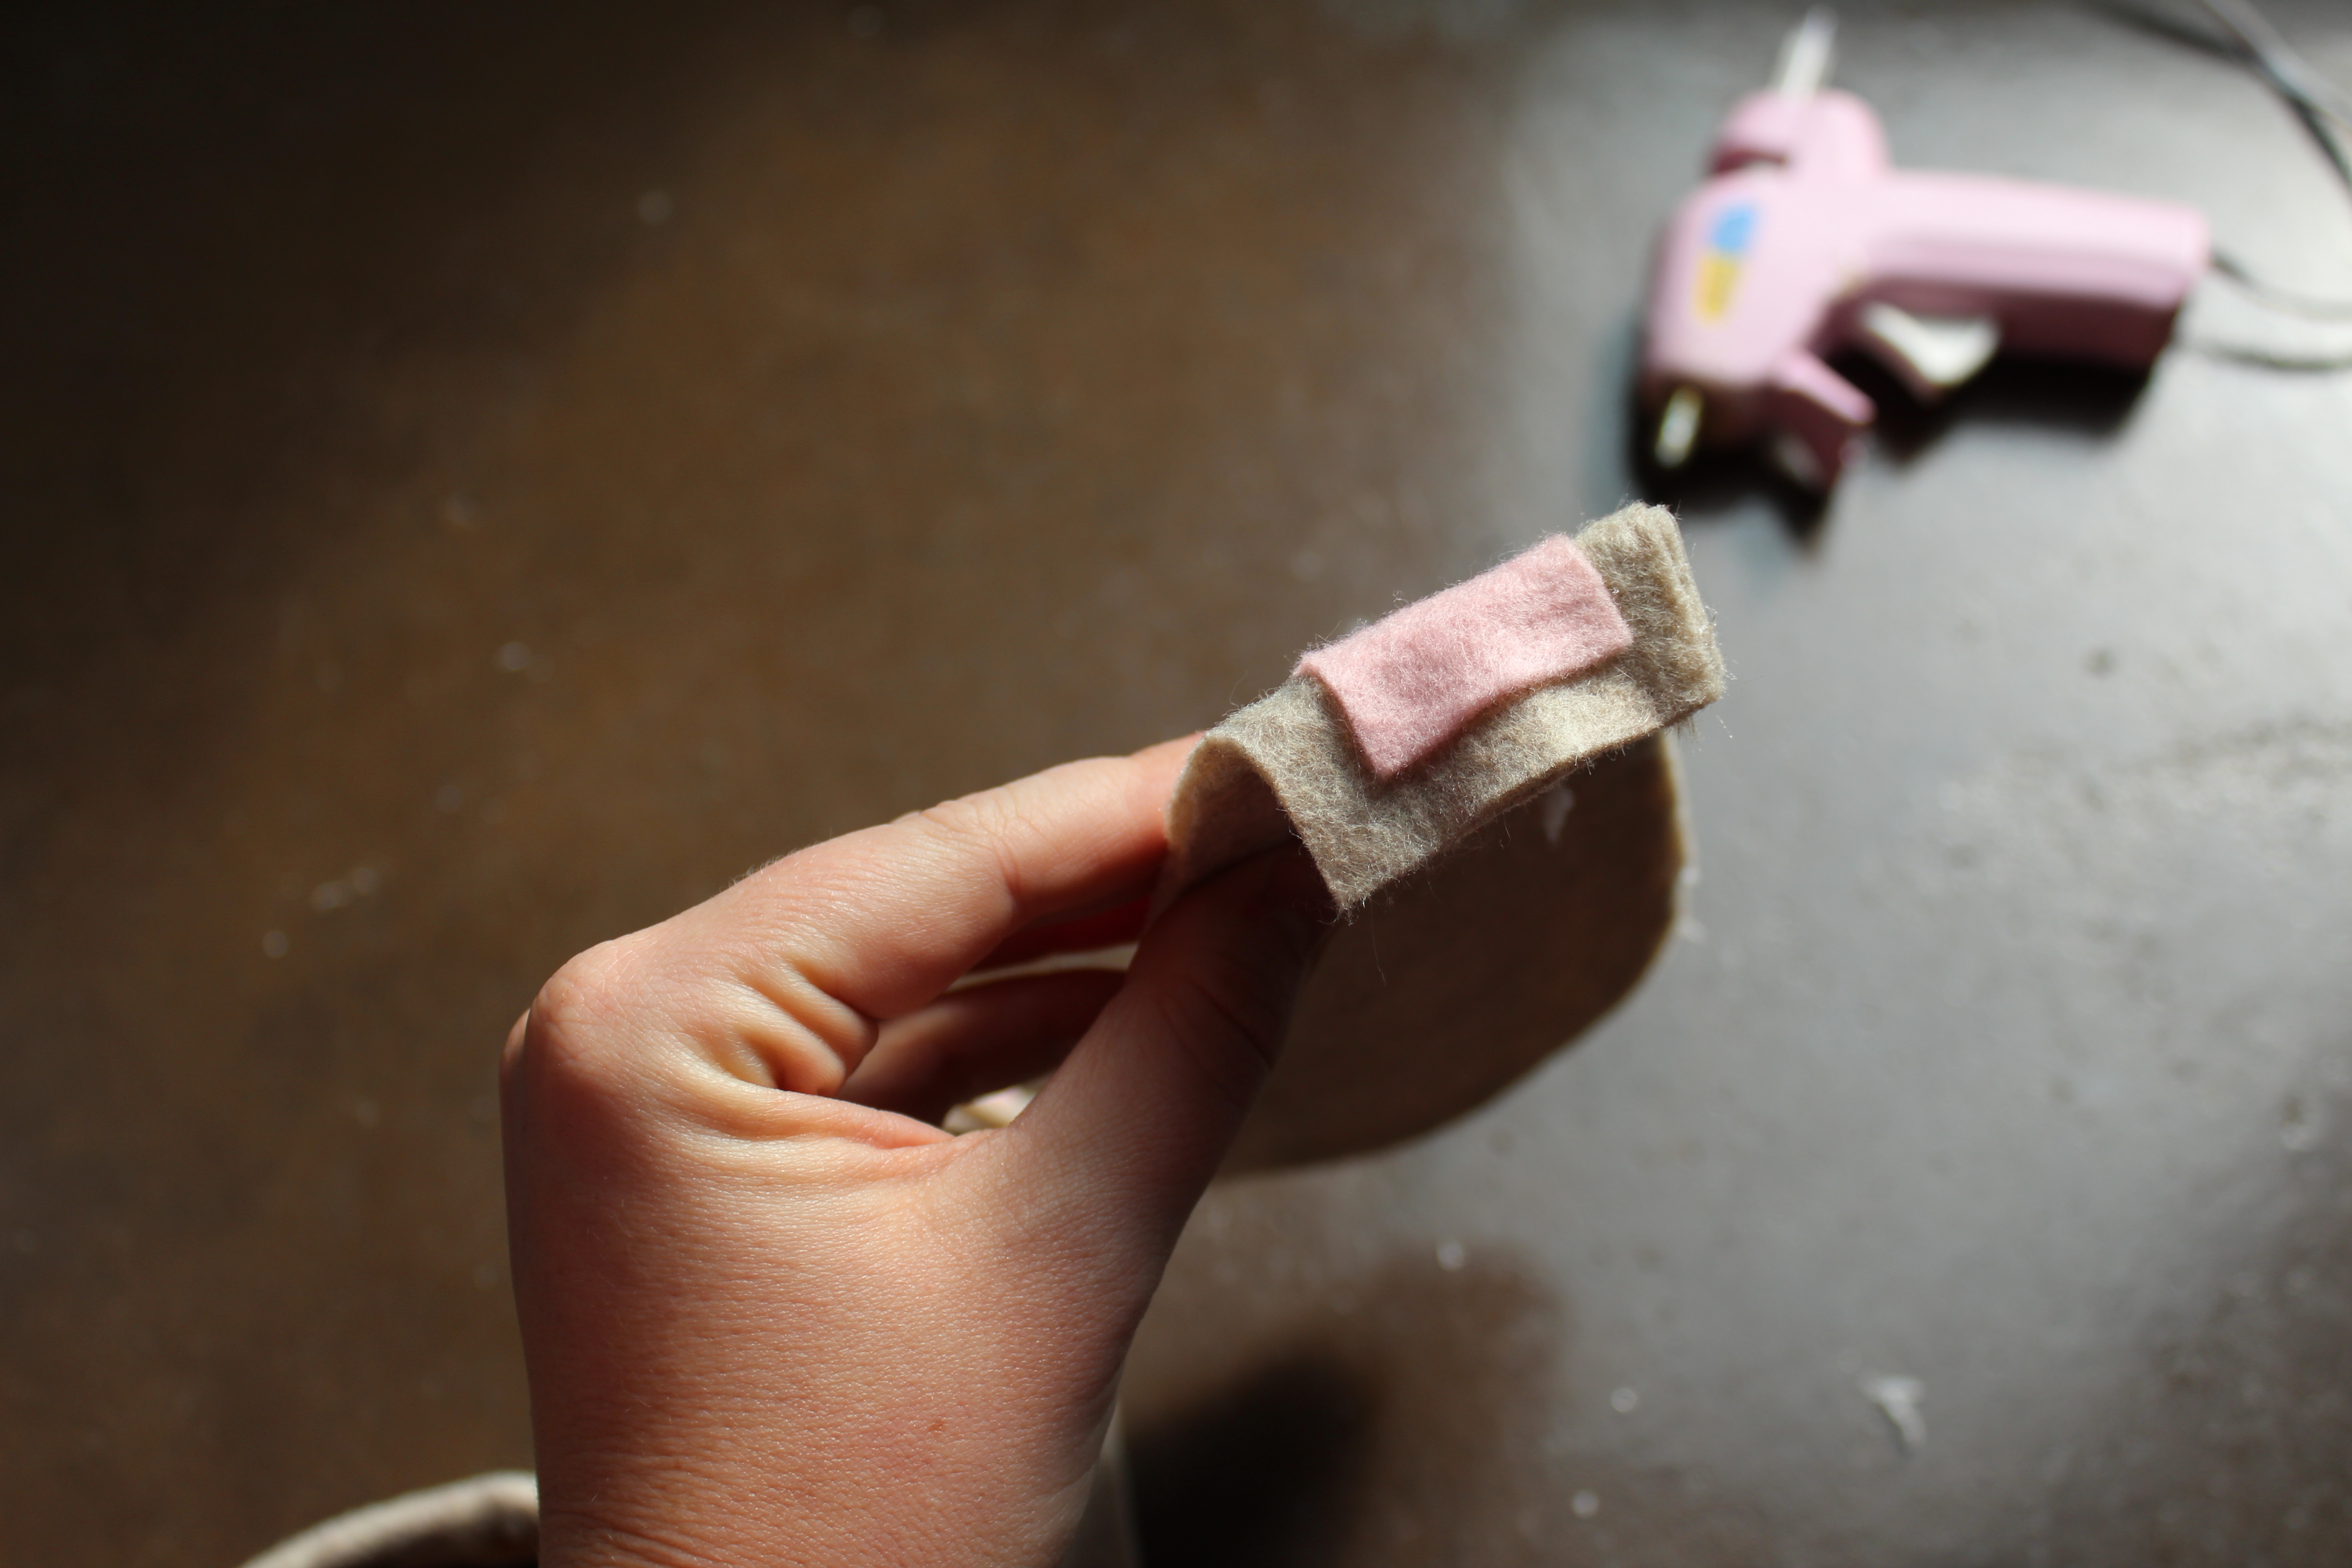
Step 4: After your ears have been cut, hot glue a pipe cleaner to the edge of one of the ears. After it has been glued, attach the other side of the ear, sealing the pipe cleaner inside. Once the base of the ear has been made and sealed, use the pink felt to cut a middle for the ear. I guesstimated on my pink felt as well but, if it would make you more comfortable, you can always measure and mark where you need to cut. Hot glue the pink to the center of the ears.

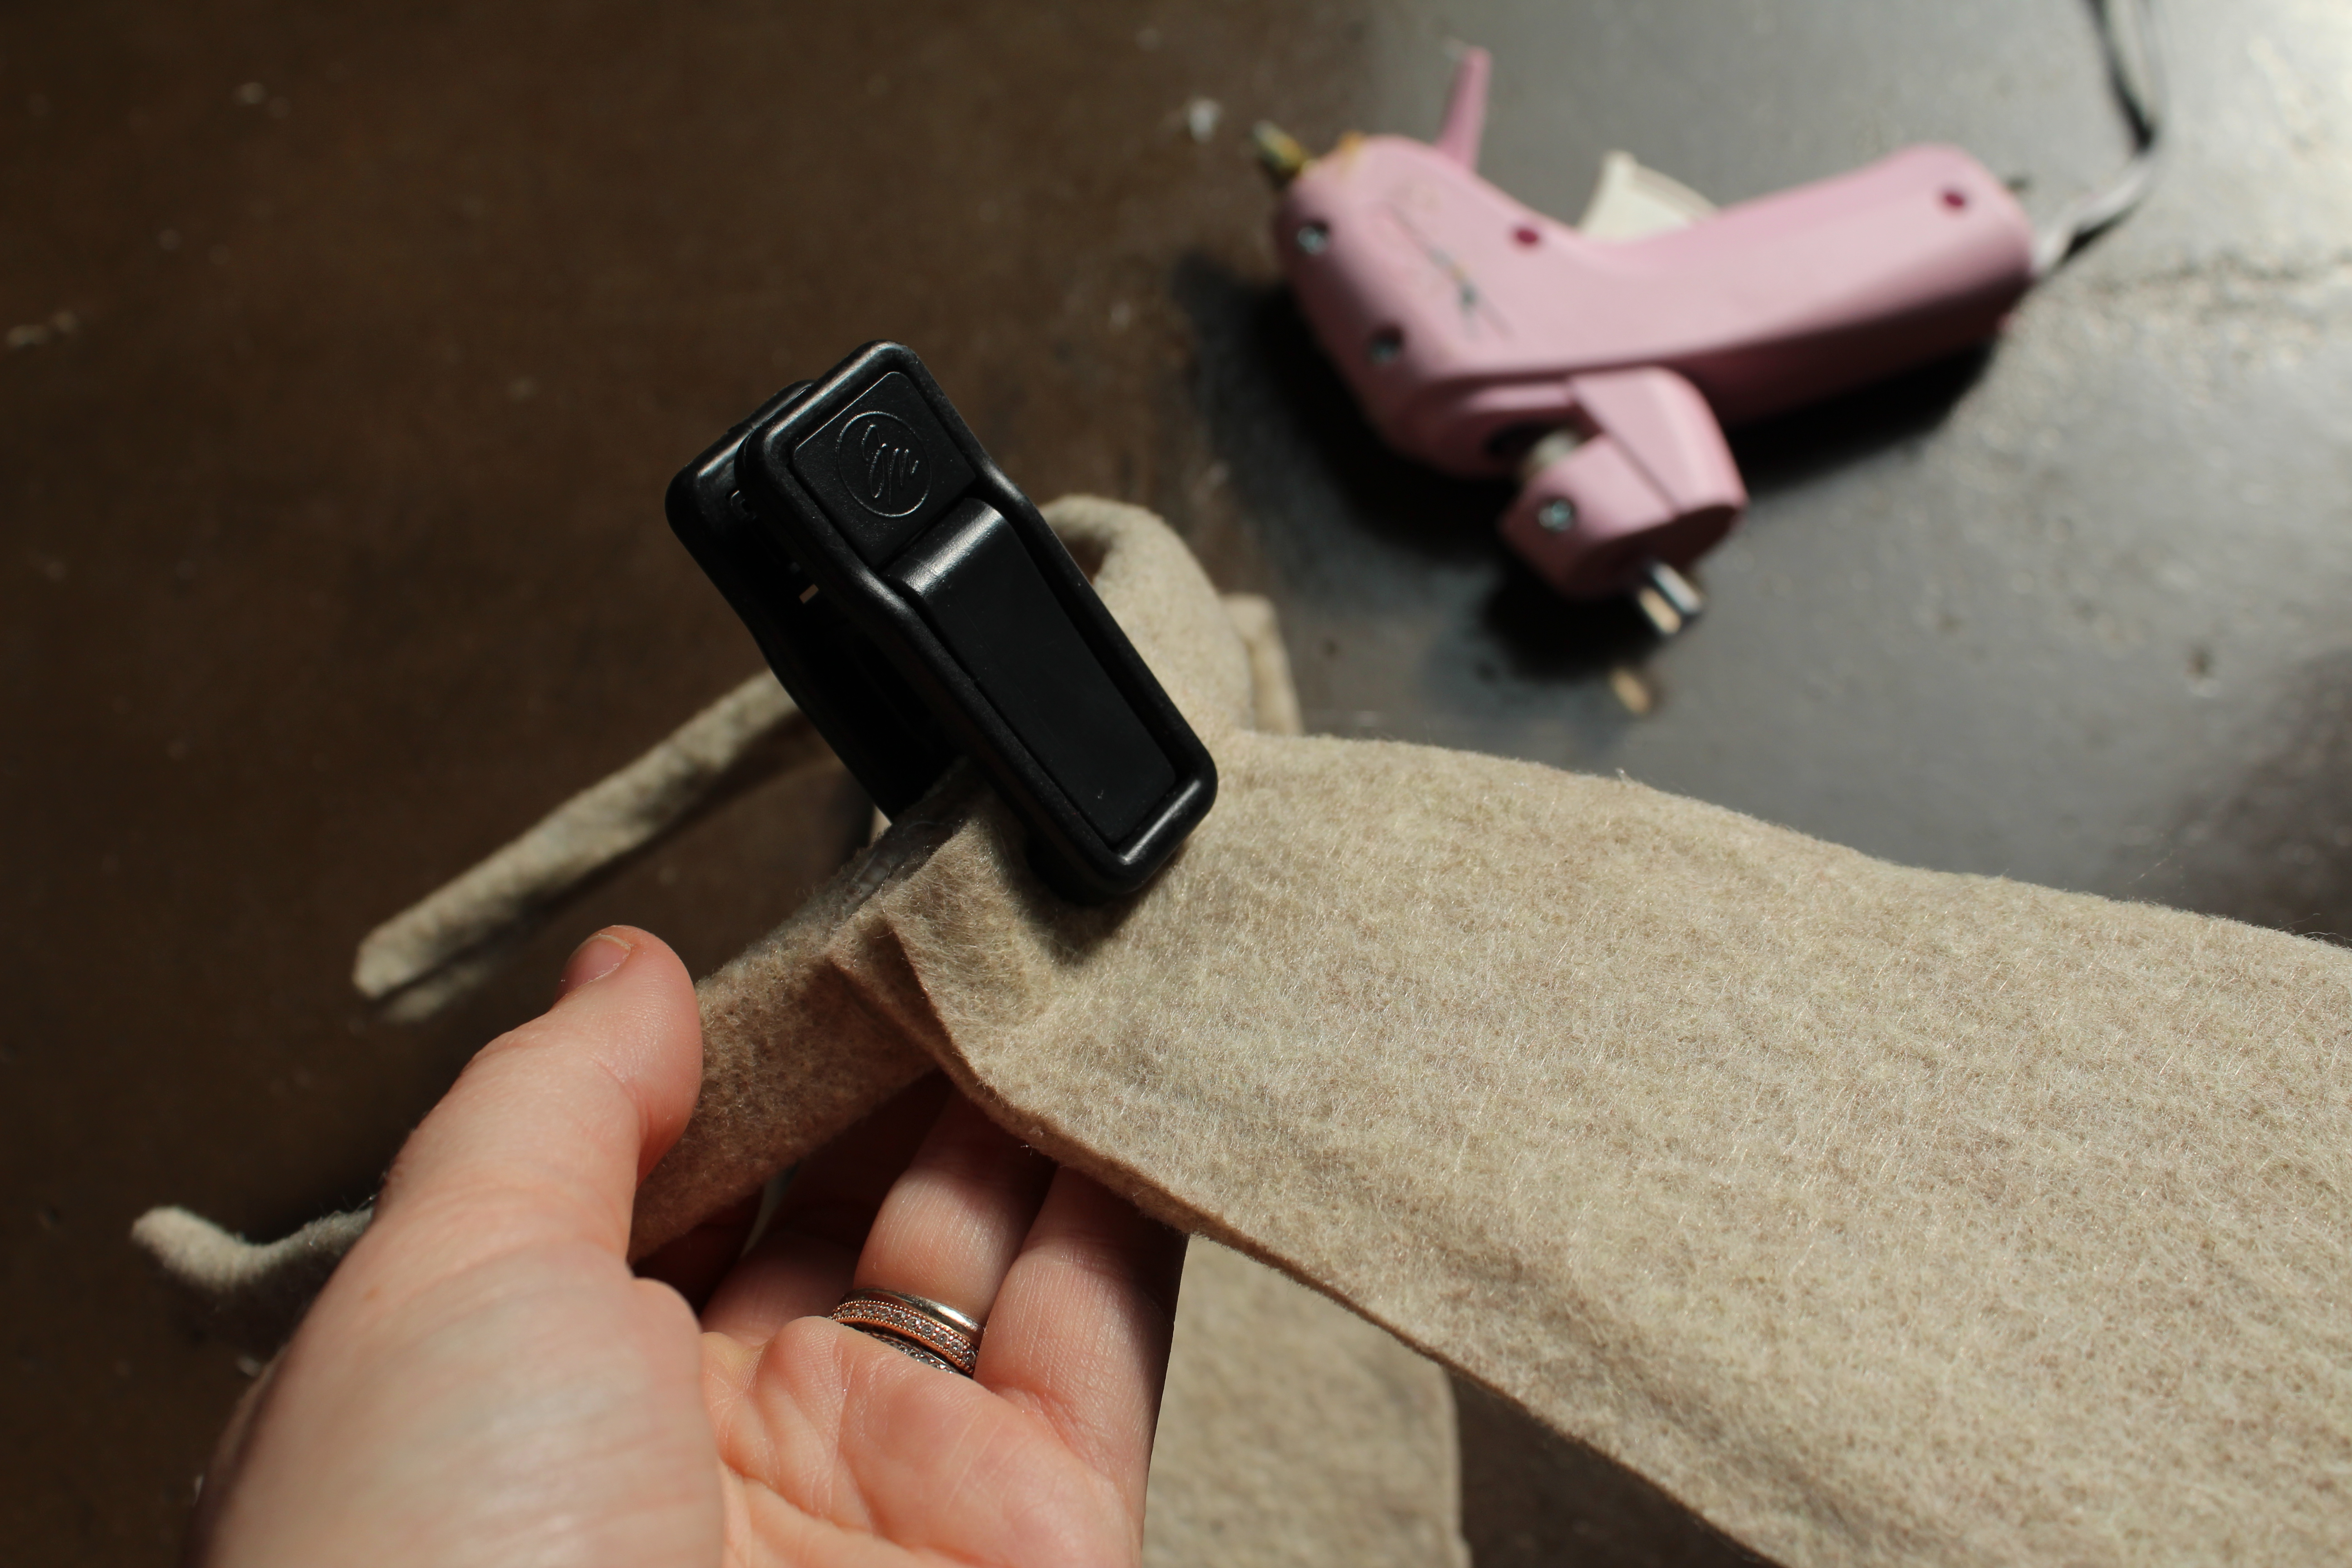
Step 5: Fold the bottom of the ears to create a base. This is how you will attach the ears to the headband. I used a TON of hot glue to make sure that it was attached well to the headband. I then used a clip to hold the ear in place while the ear dried. I left the clips on for 24 hours so there was no chance of the ear falling off!
Step 6: Attach the last few pieces of tulle to the ears to complete your “dusty” look! You can attach them wherever you like to give your ears their own personality!
And that’s it! Super easy! Total cost of this costume was less than $7!
To complete my look even further, I used a lot of blush on my nose to give it that bunny pink color and I used a black eyeliner to draw whiskers. Once completed, have fun with your costume! Hang out with all of your other dust bunny friends under a chair, in the corner of the room or under the bed! Just try not to get swept away!


1 thought on “Blog-O-Ween: DIY Dust Bunny Costume”
Comments are closed.