
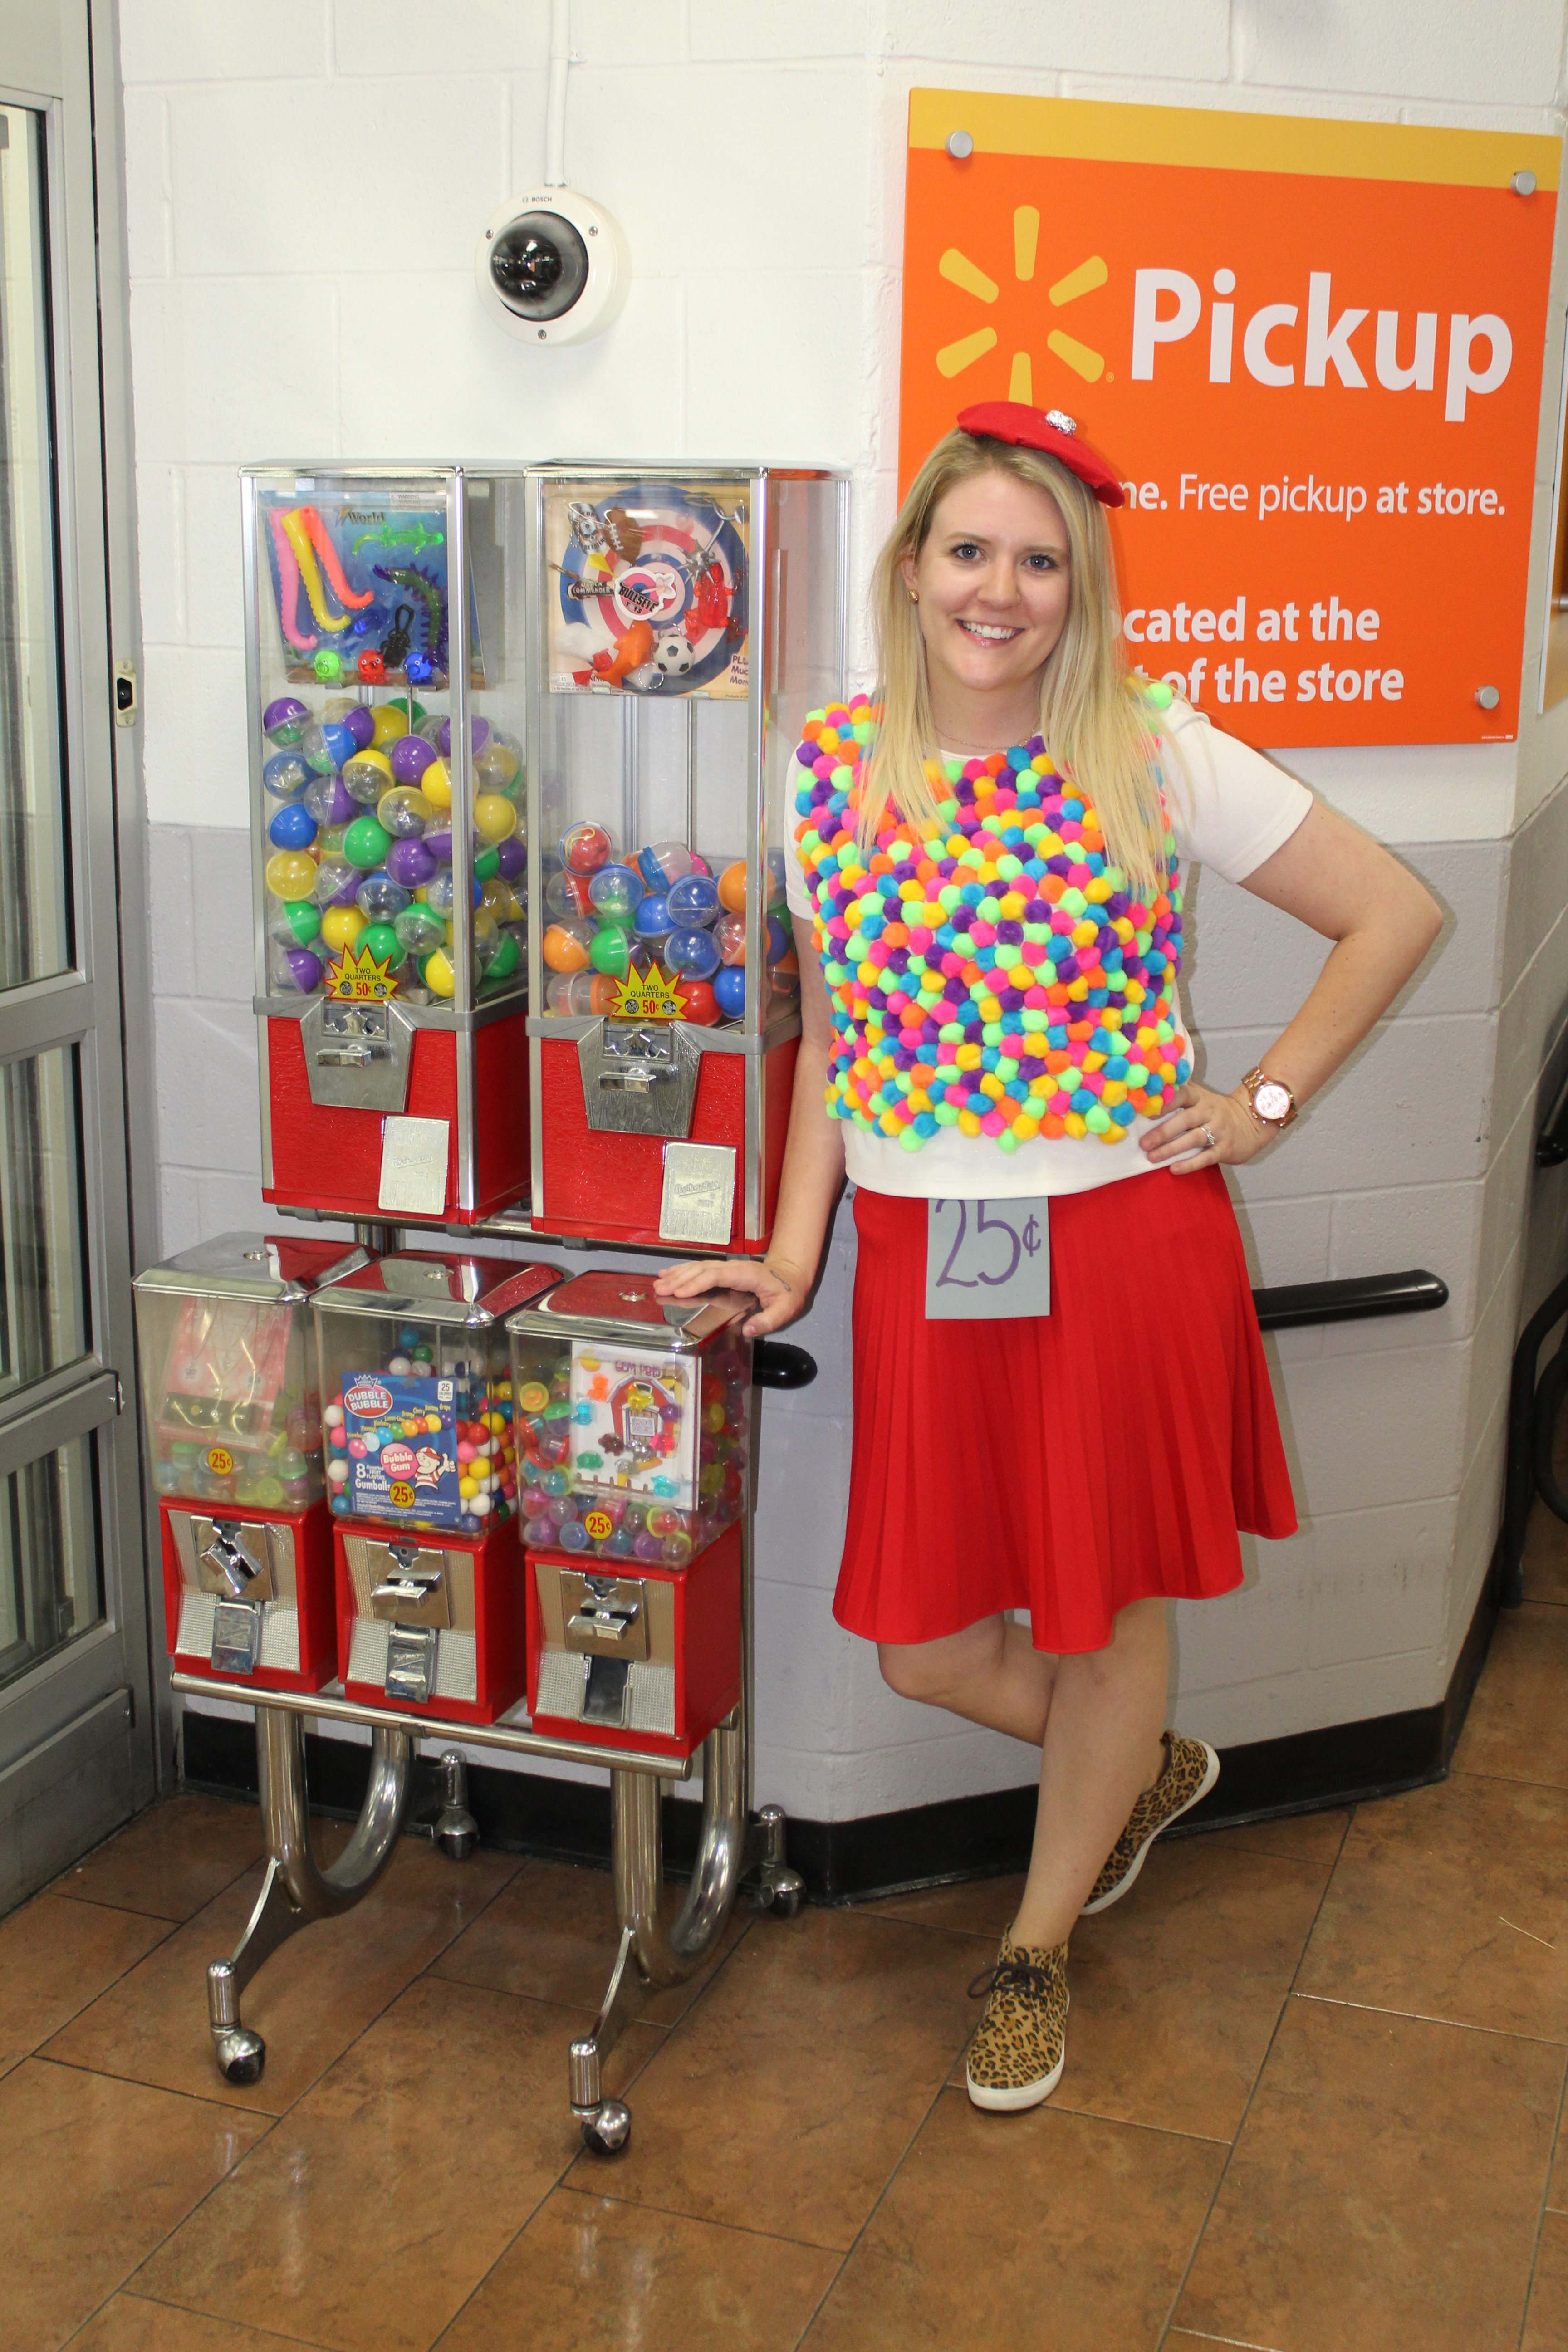
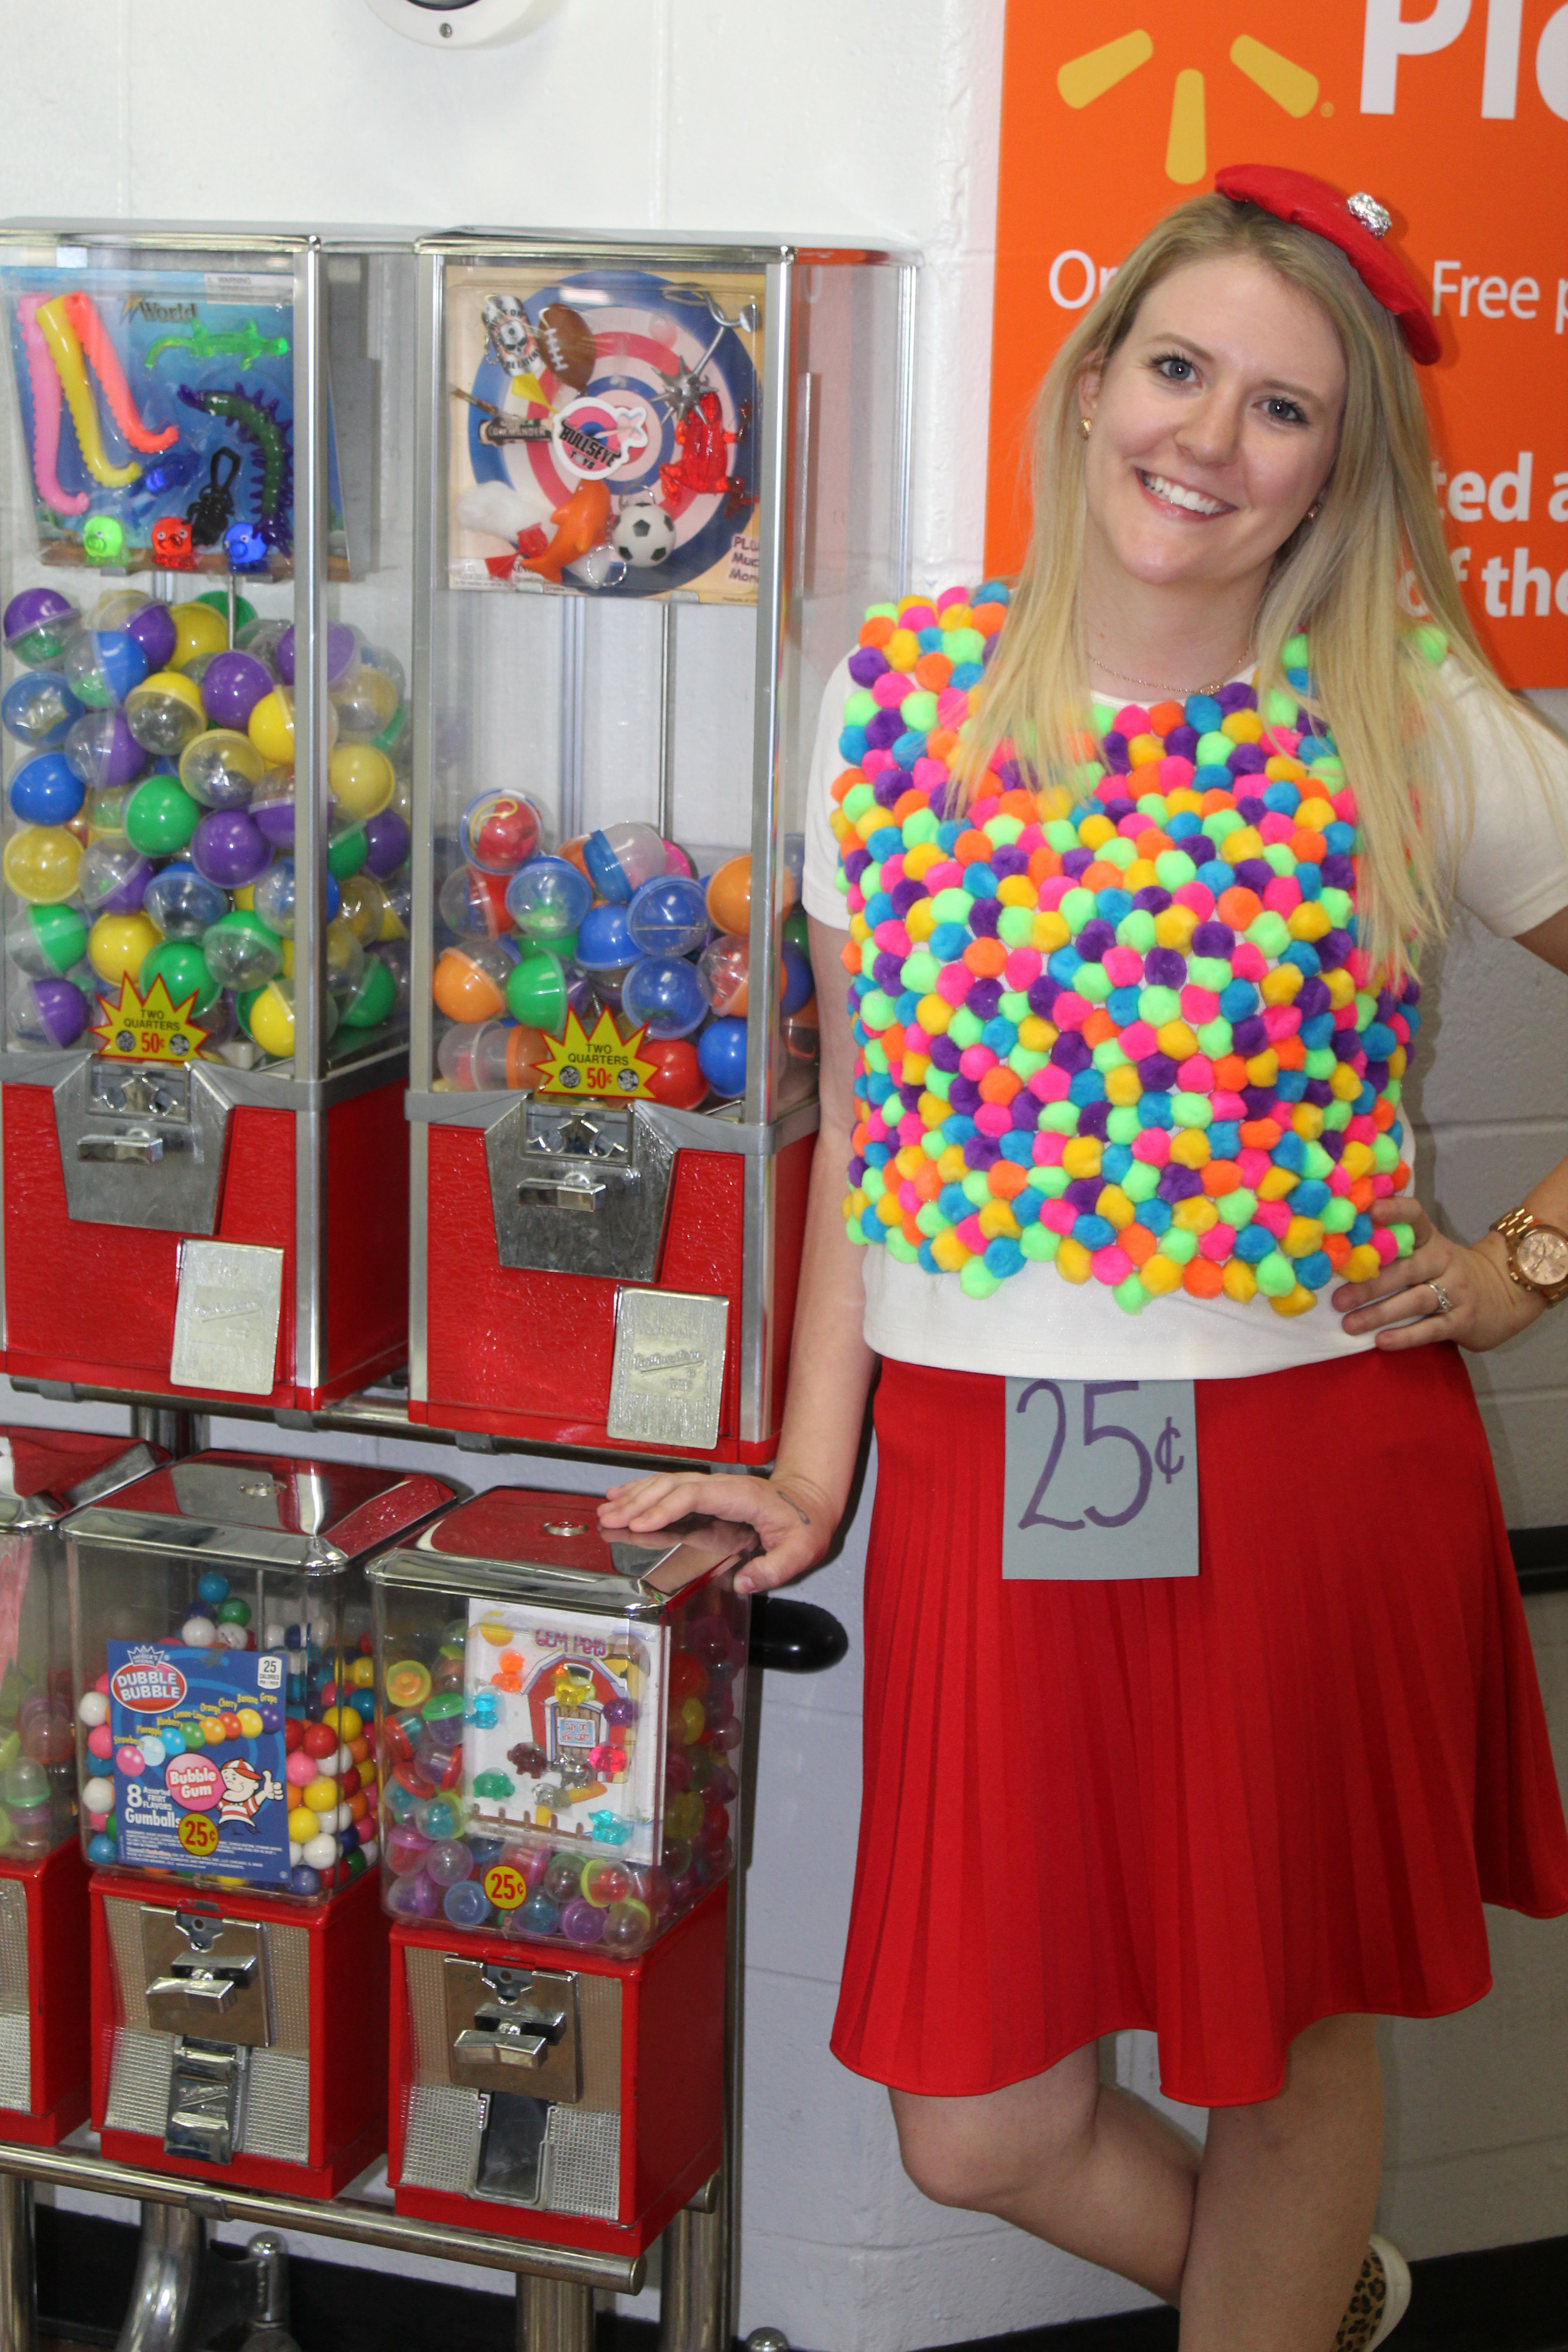
When I was younger, one of the things that I loved most about visiting the grocery store was a trip to the gumball machine. It was a treat that my Mom did not usually say no to and I loved the thrill of the surprise! Would I get a pink gumball? Maybe a blue one? It was always an exciting part of my visit.
Now that I am older, I still love an occasional treat from the bubblegum machine but, my sweet Vivi definitely enjoys them! When I found this gorgeous red skirt at my local Goodwill, the wheels started turning and I knew that I could make my very own Gumball Machine Costume!
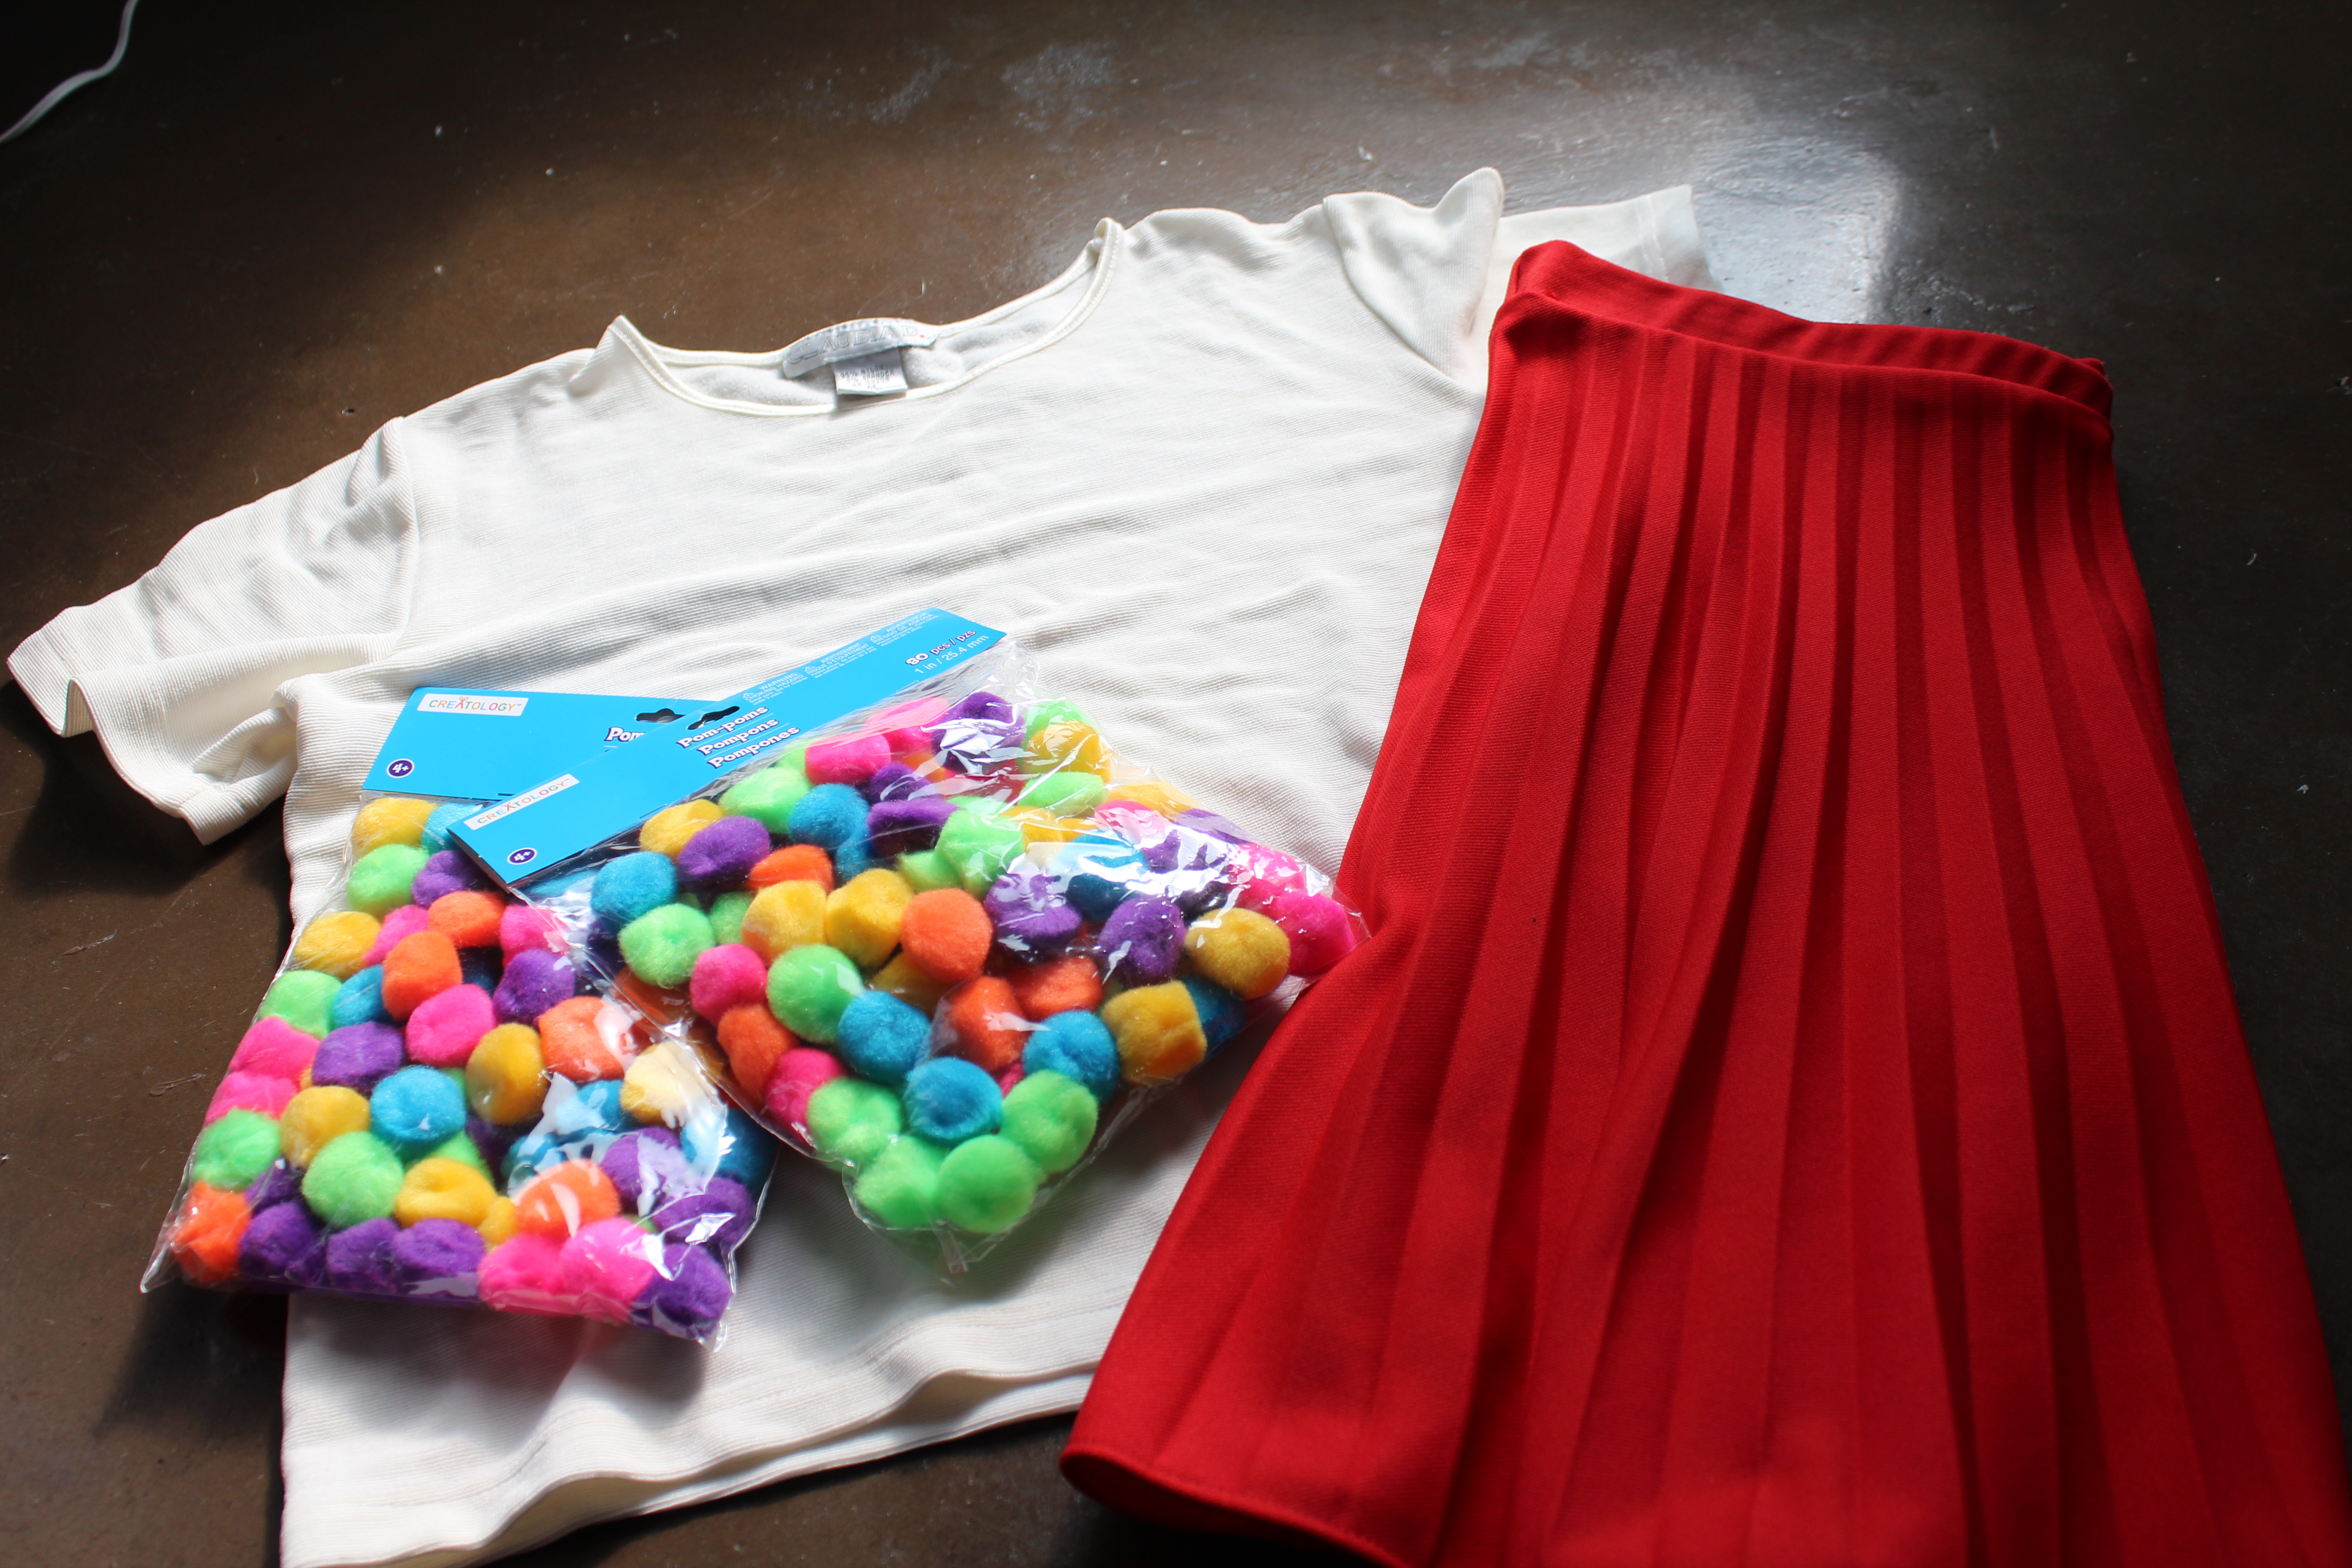
Here is what you will need to get started:
A White Tee (Goodwill)
A Red Skirt or Red Pants (Goodwill)
Colored Pom-Poms (I used four bags from Michaels)
A Piece of Red Felt (Michaels)
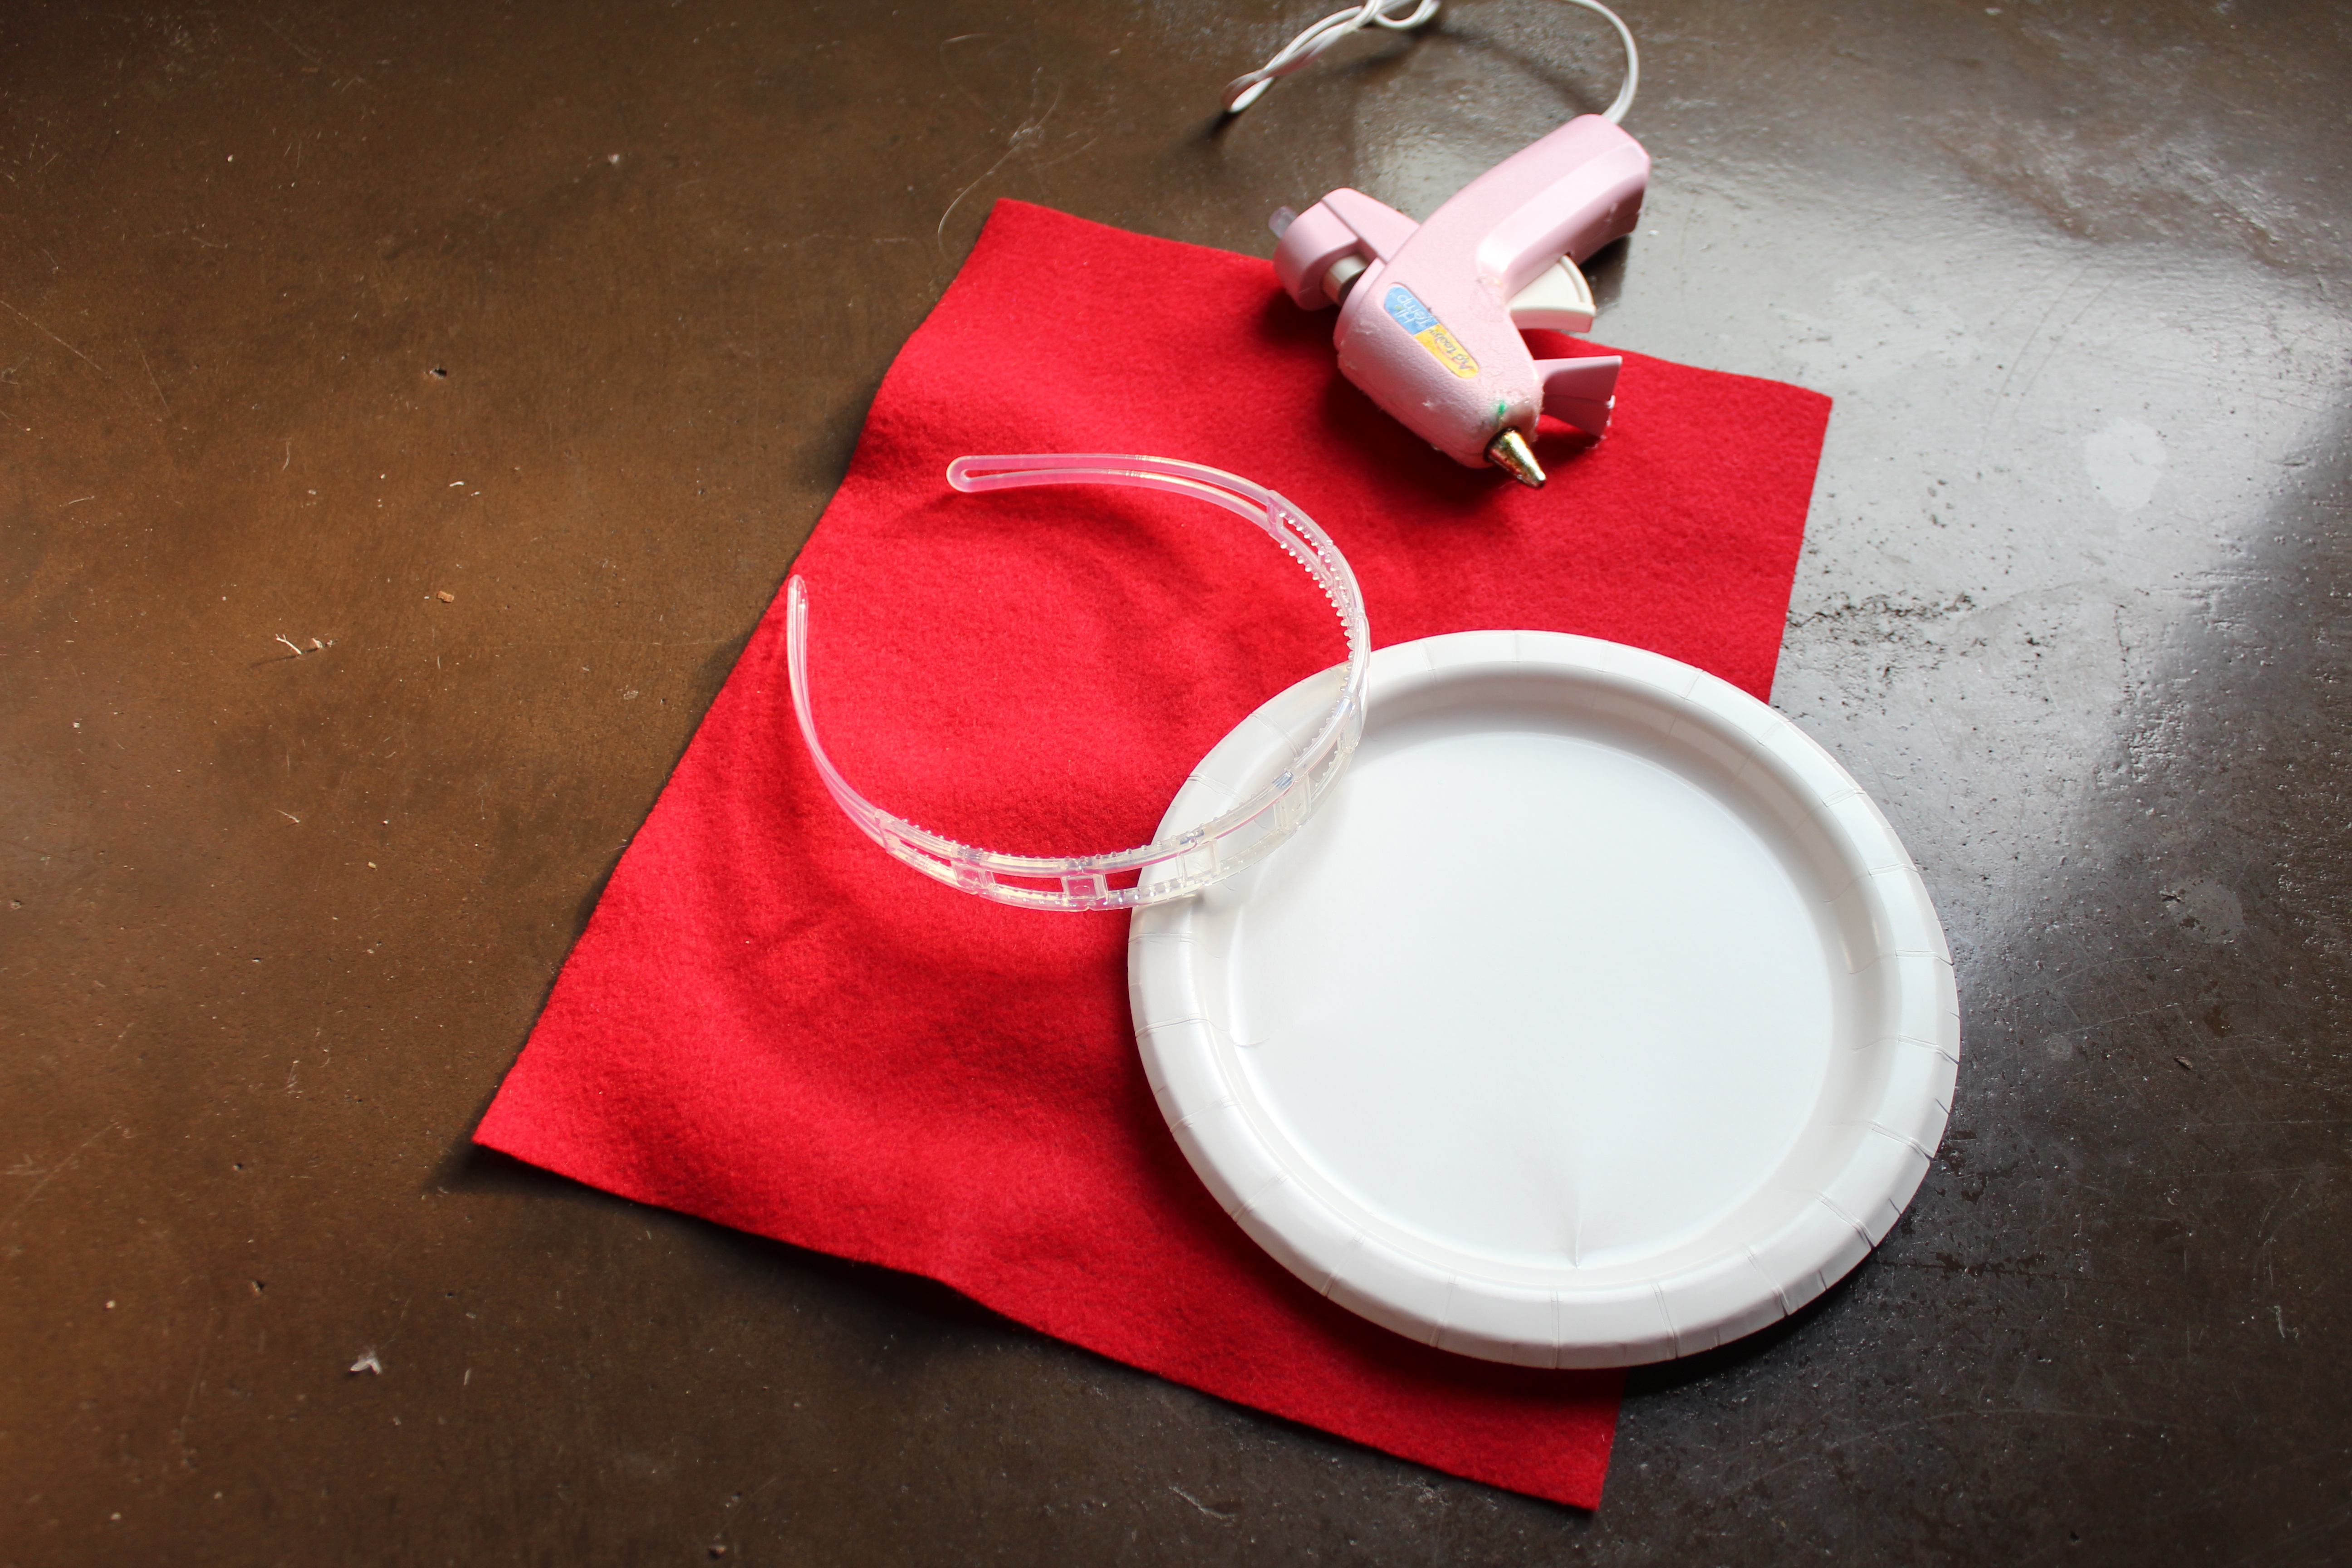
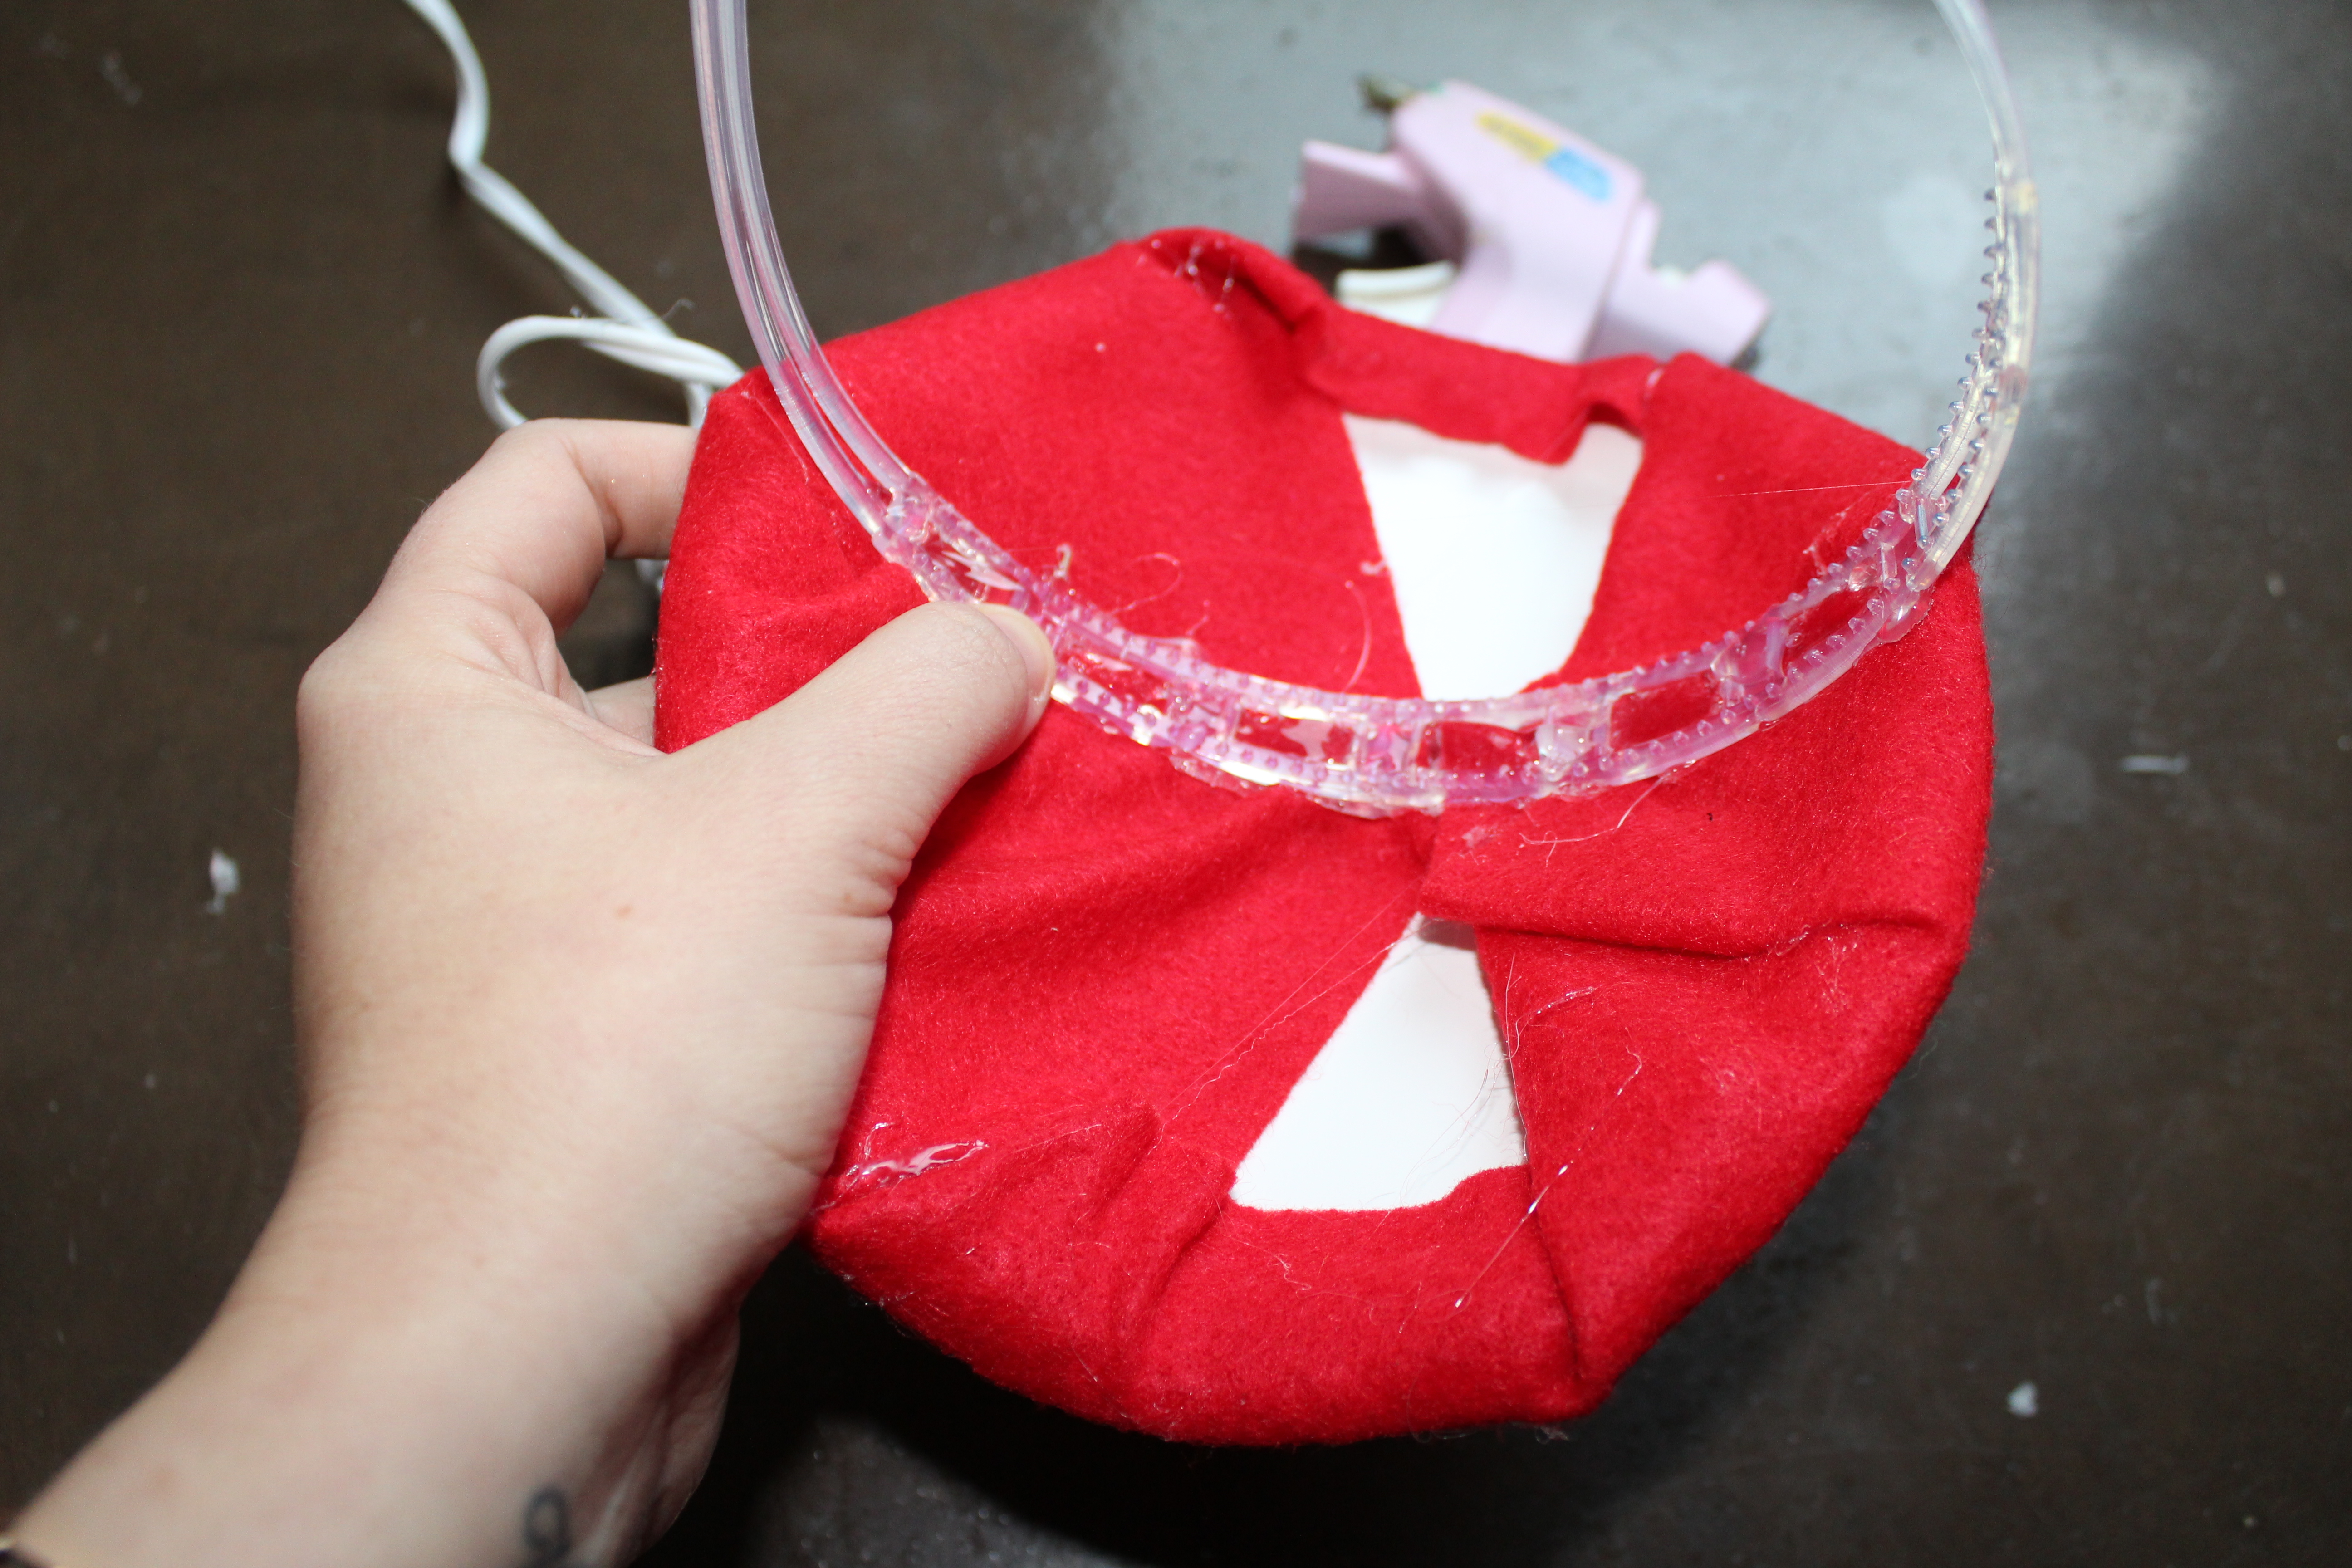
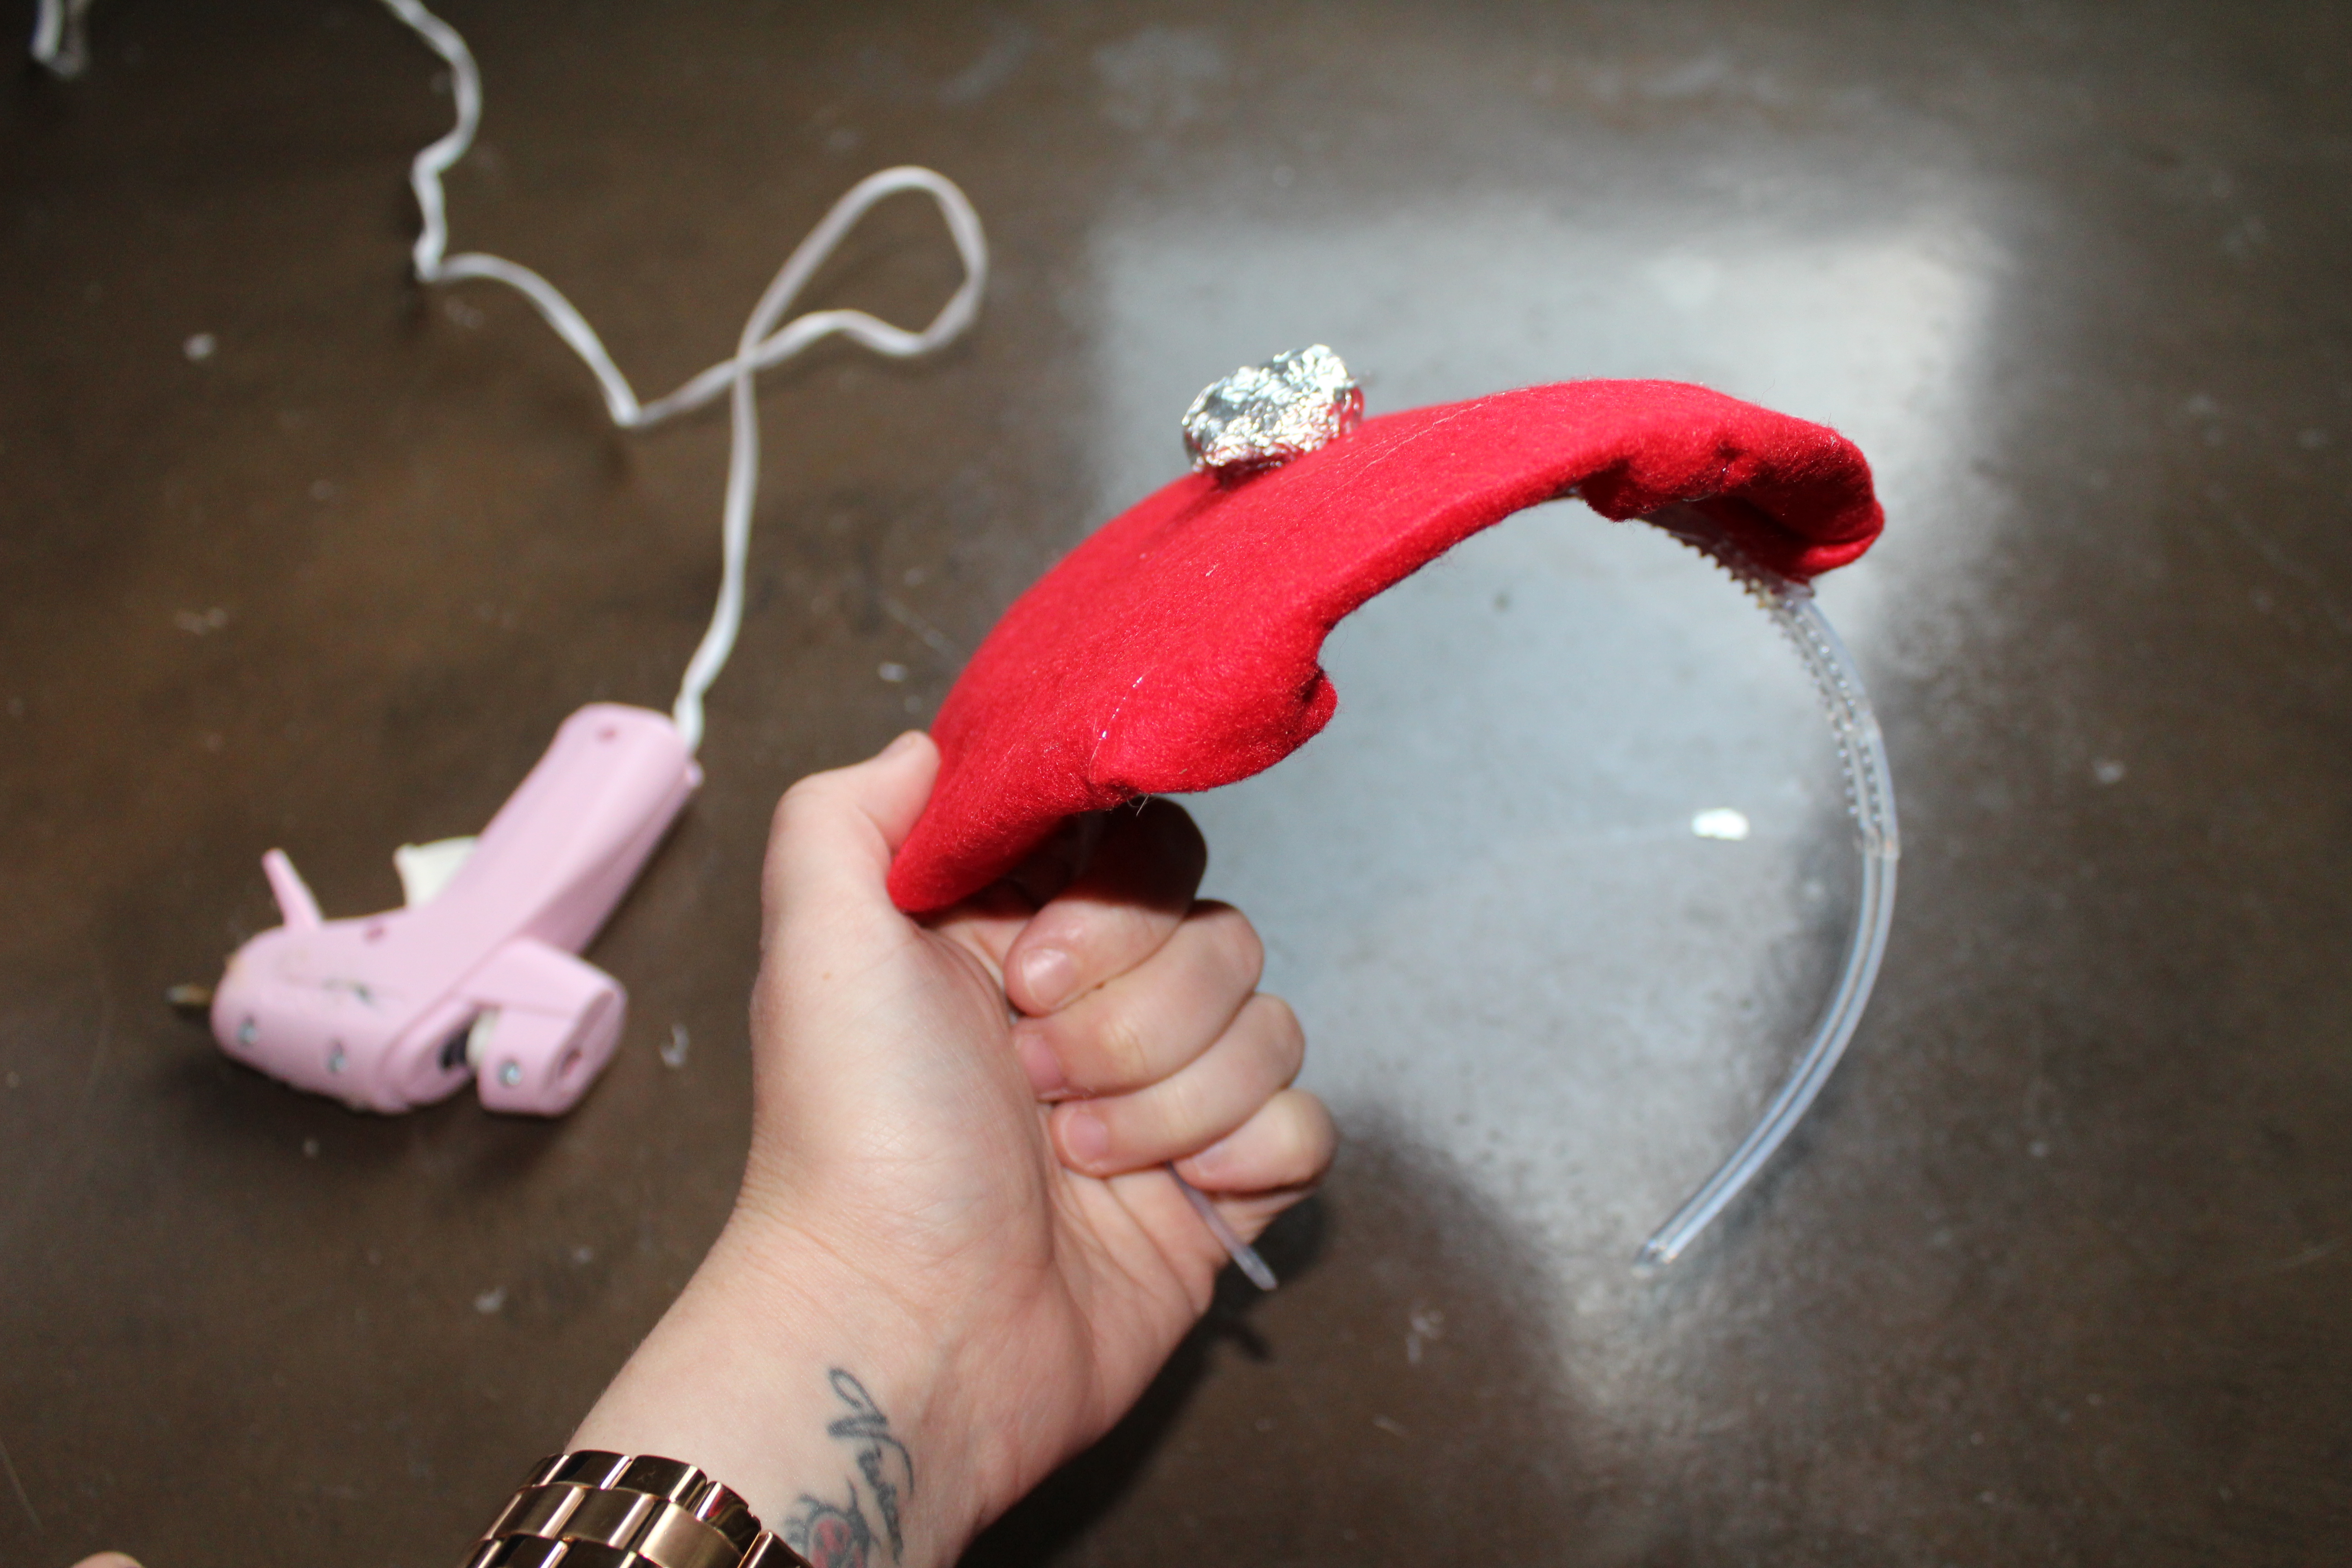
A Plastic Headband (Dollar Tree)
A Small, White Paper Plate
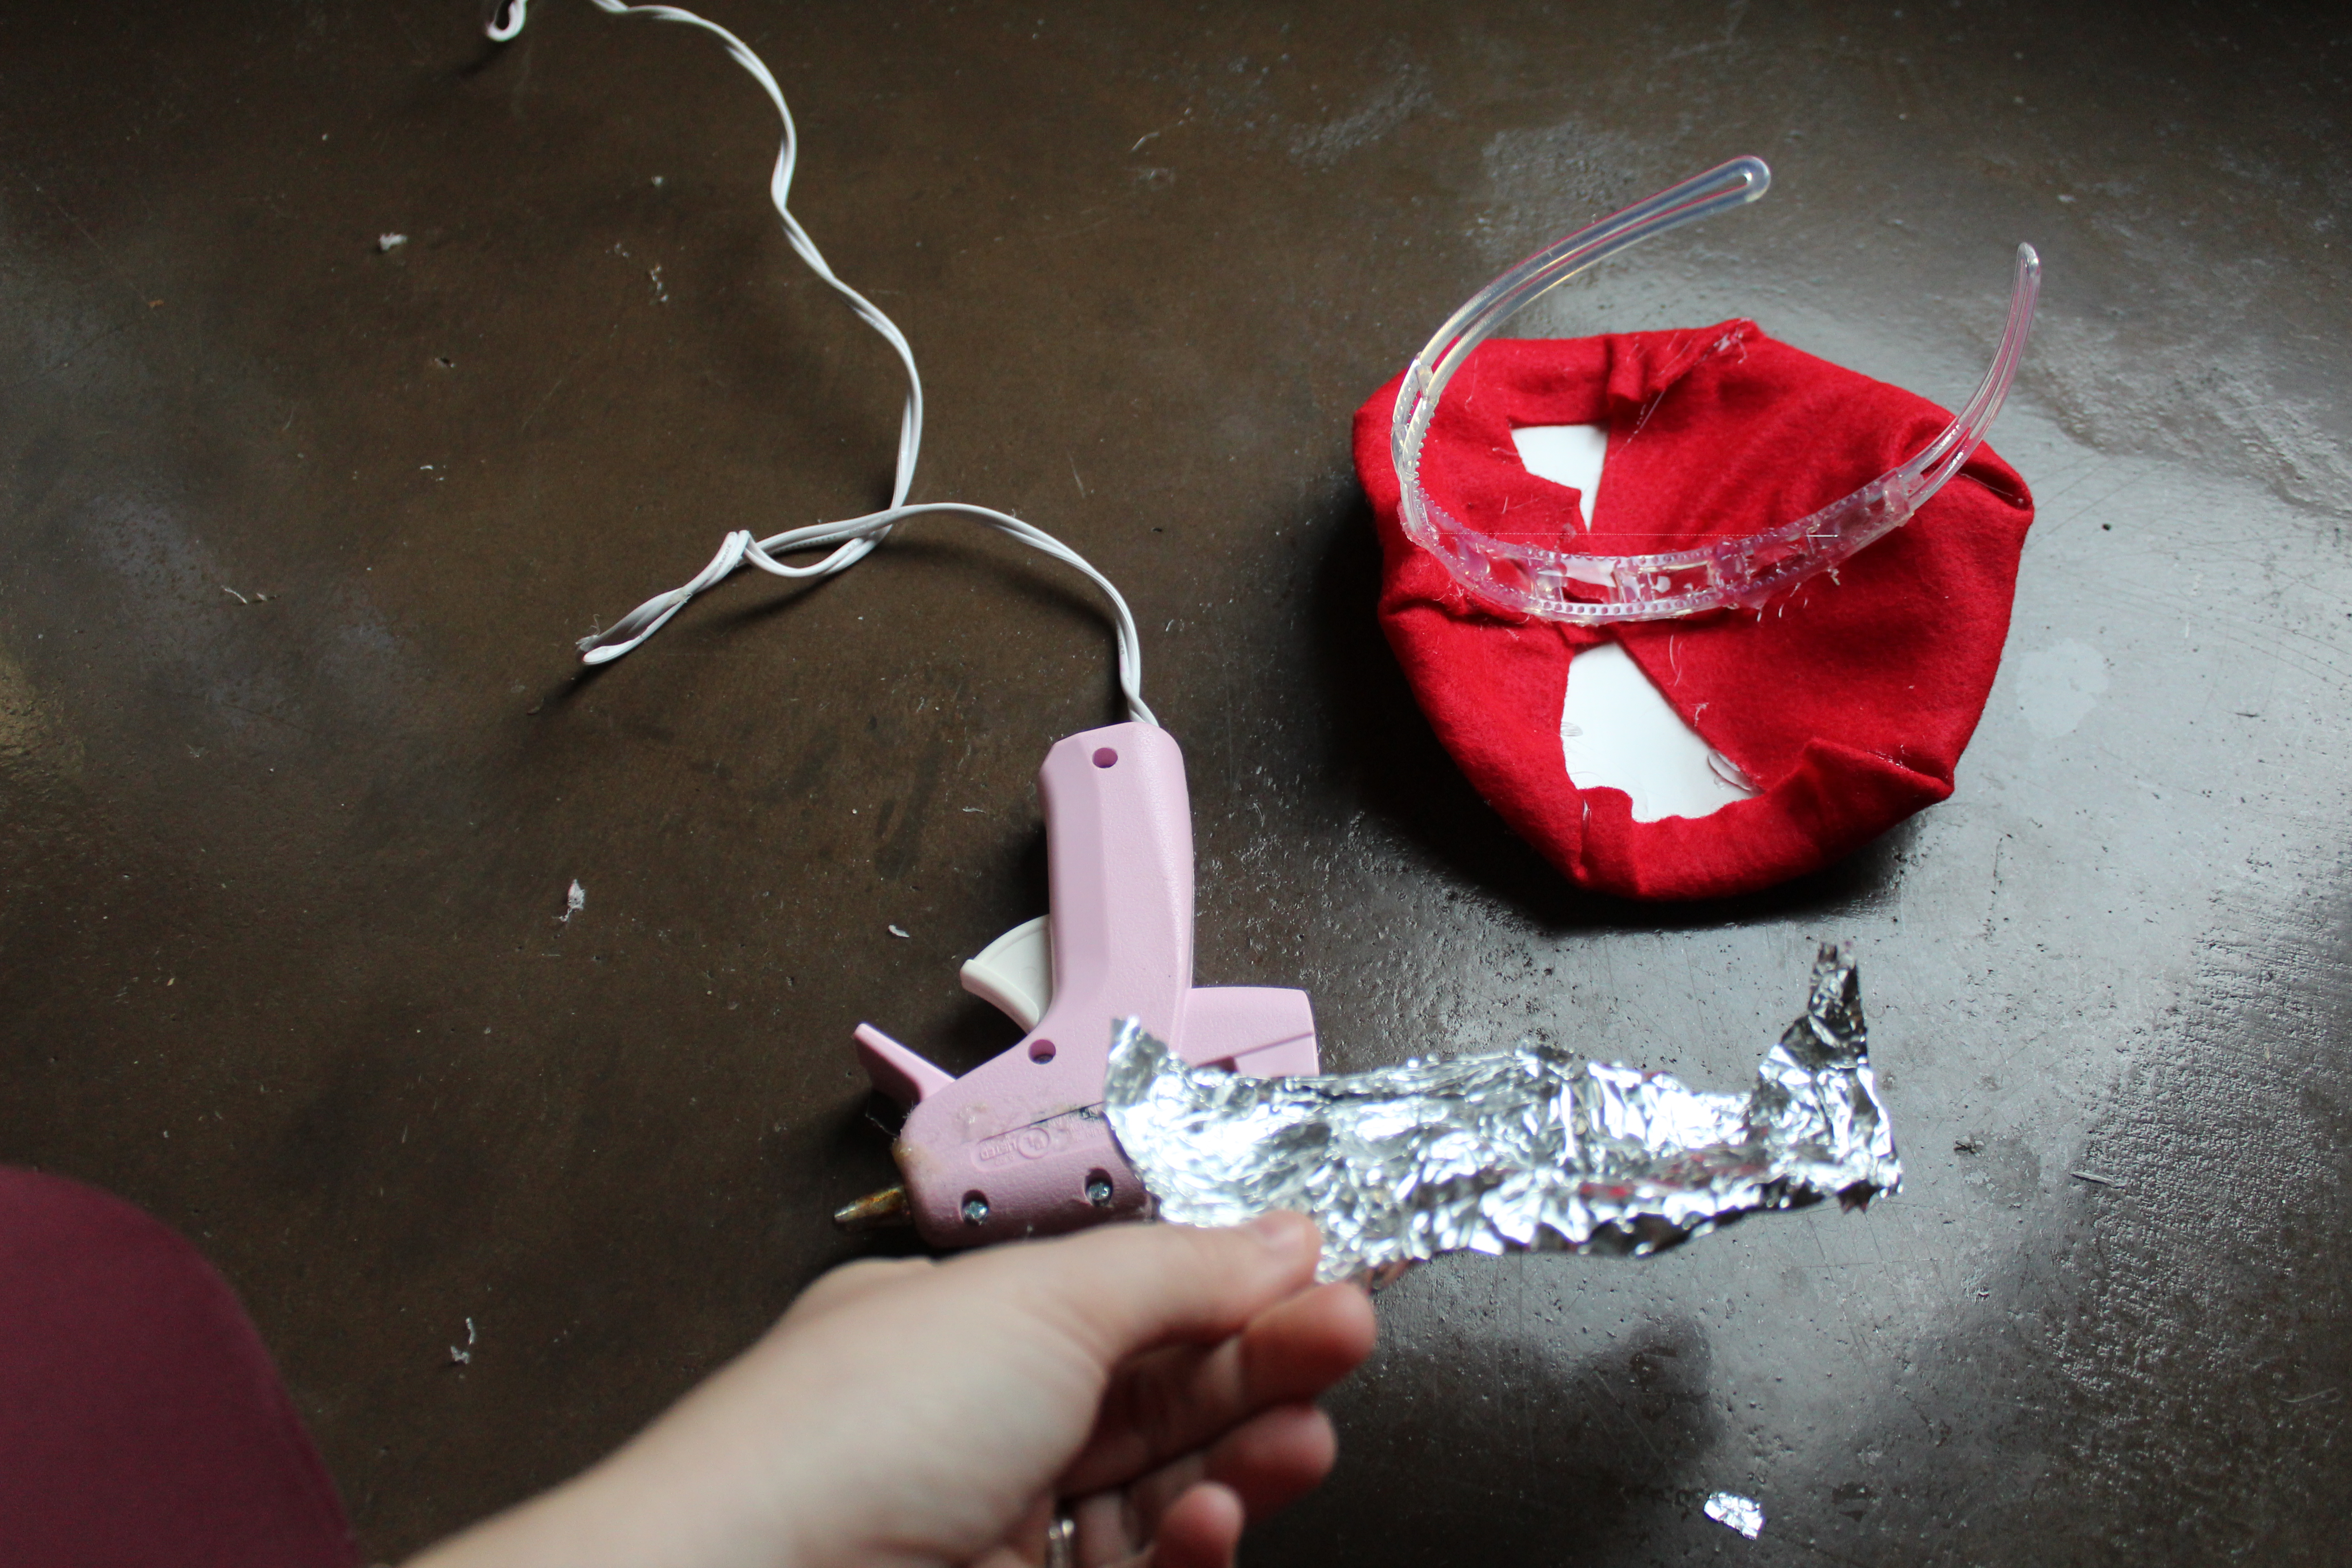
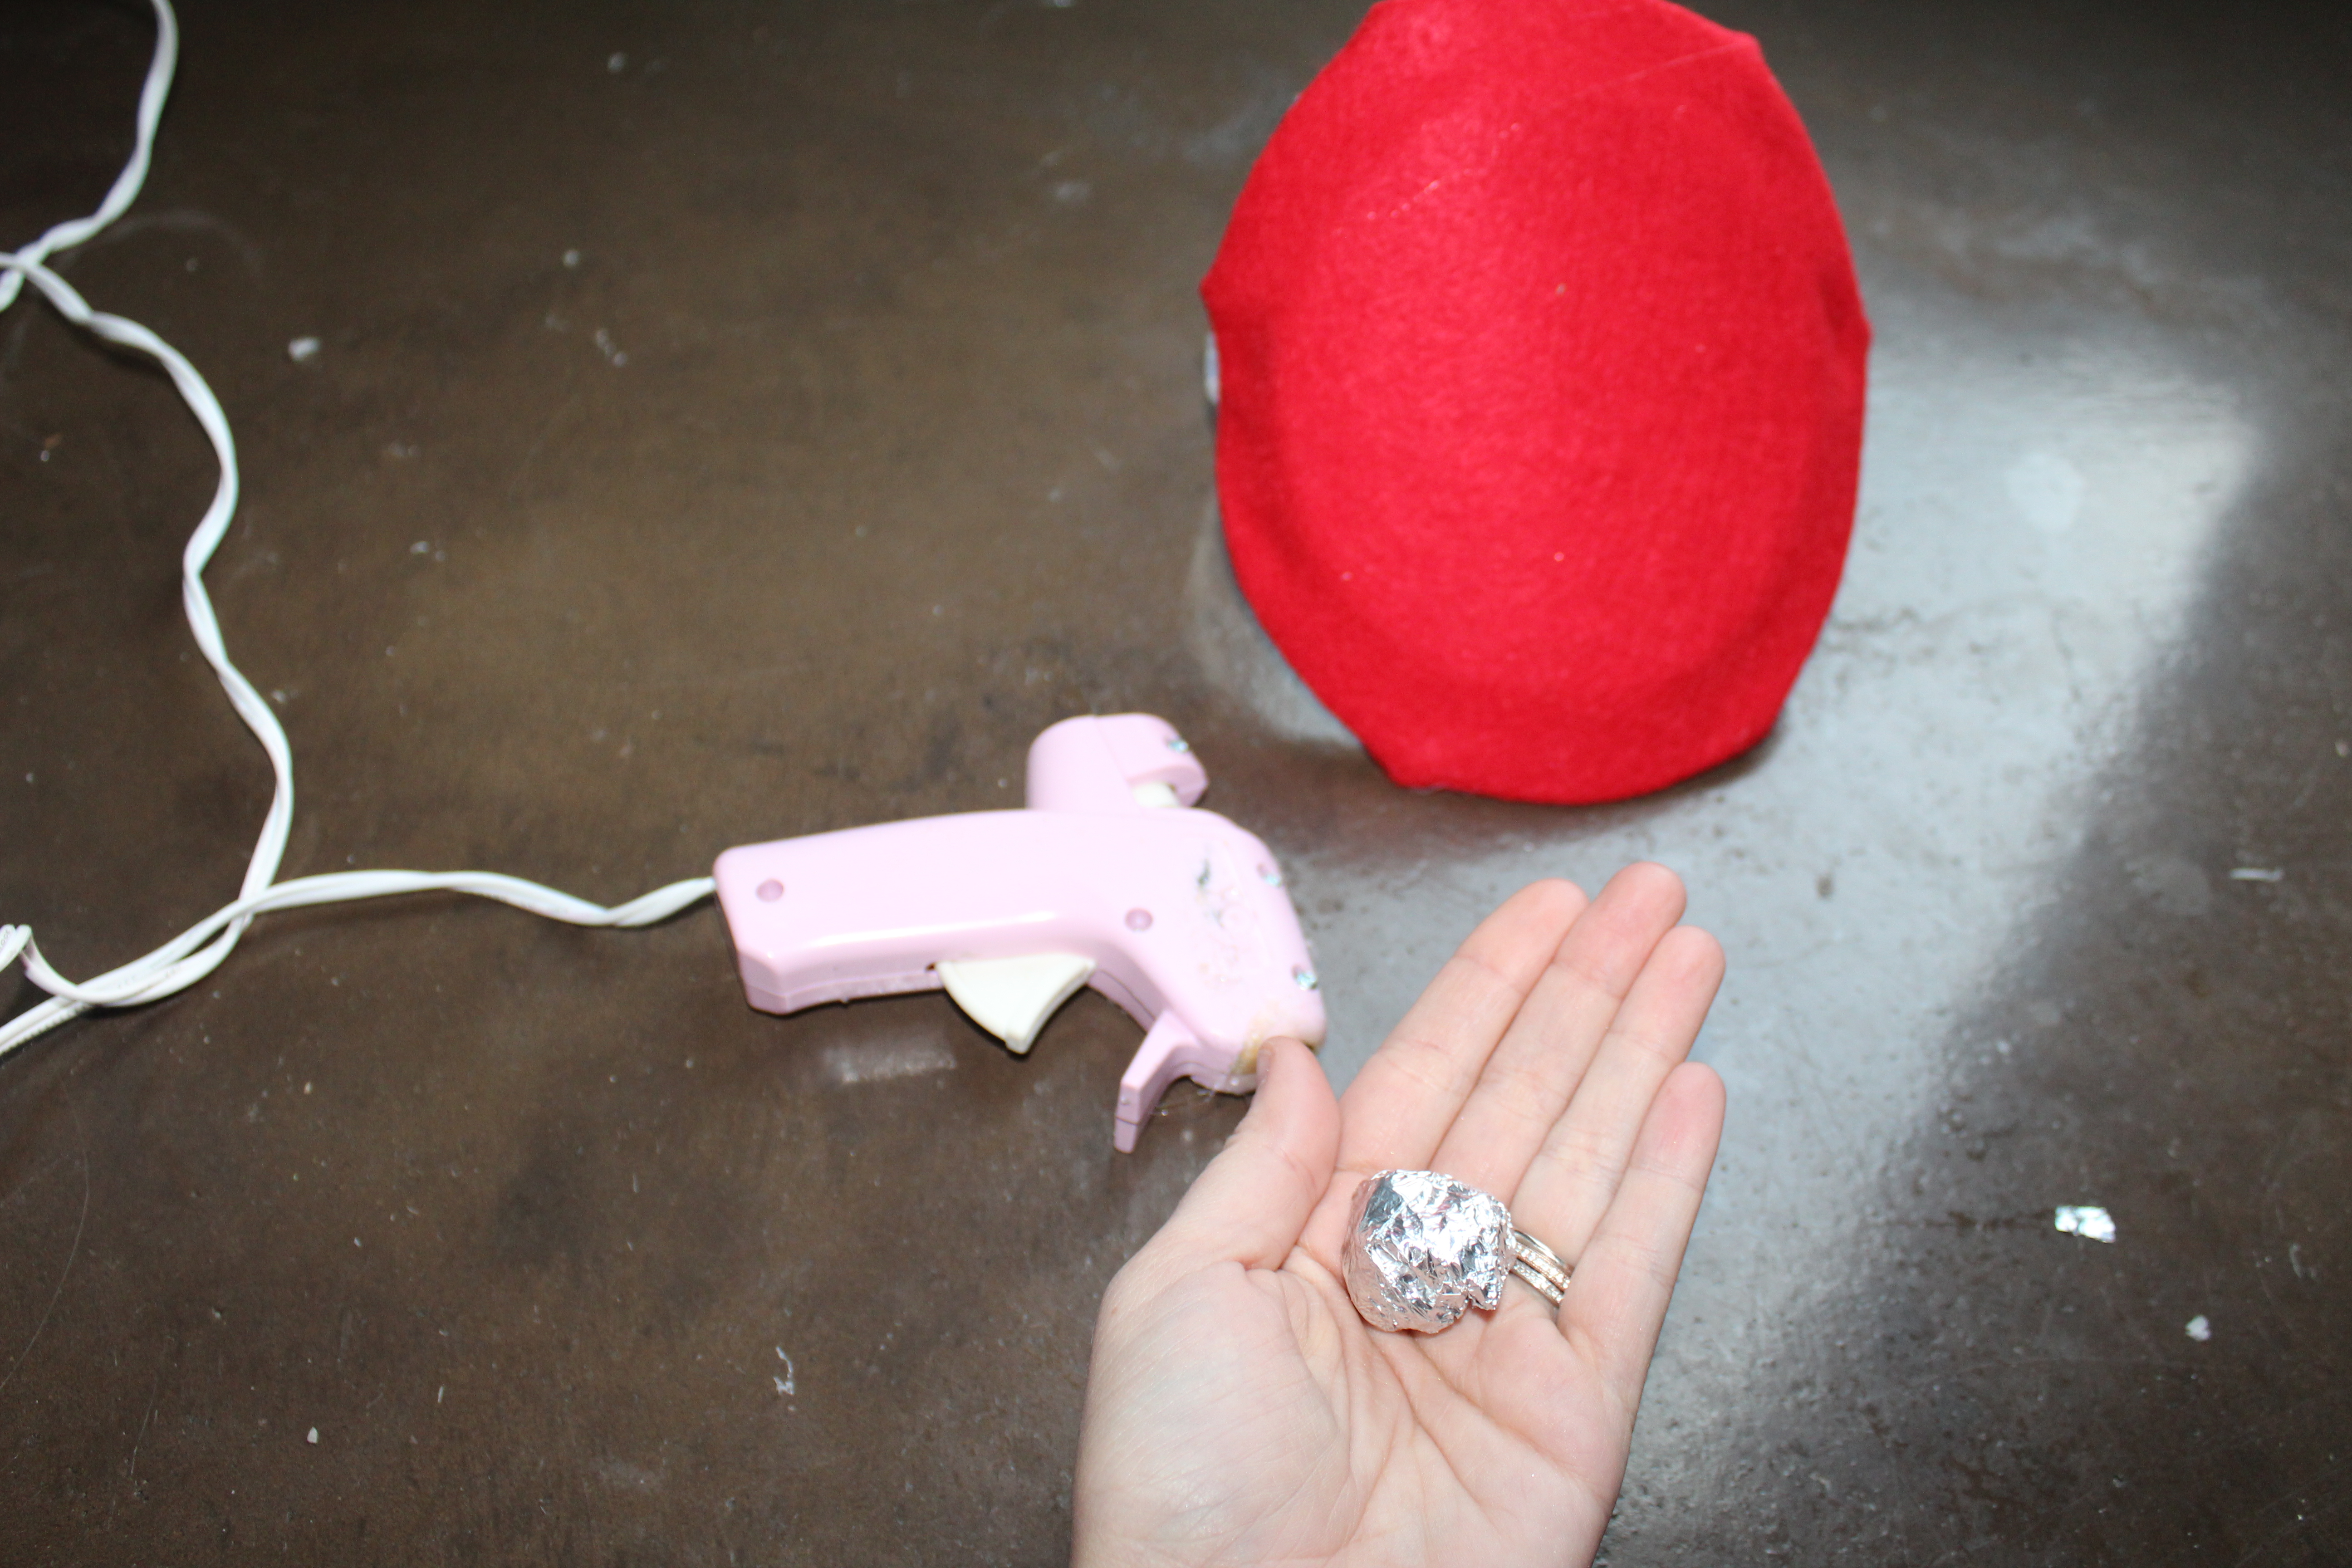
A Small Piece of Aluminum Foil
A Half a Sheet of Grey Construction Paper
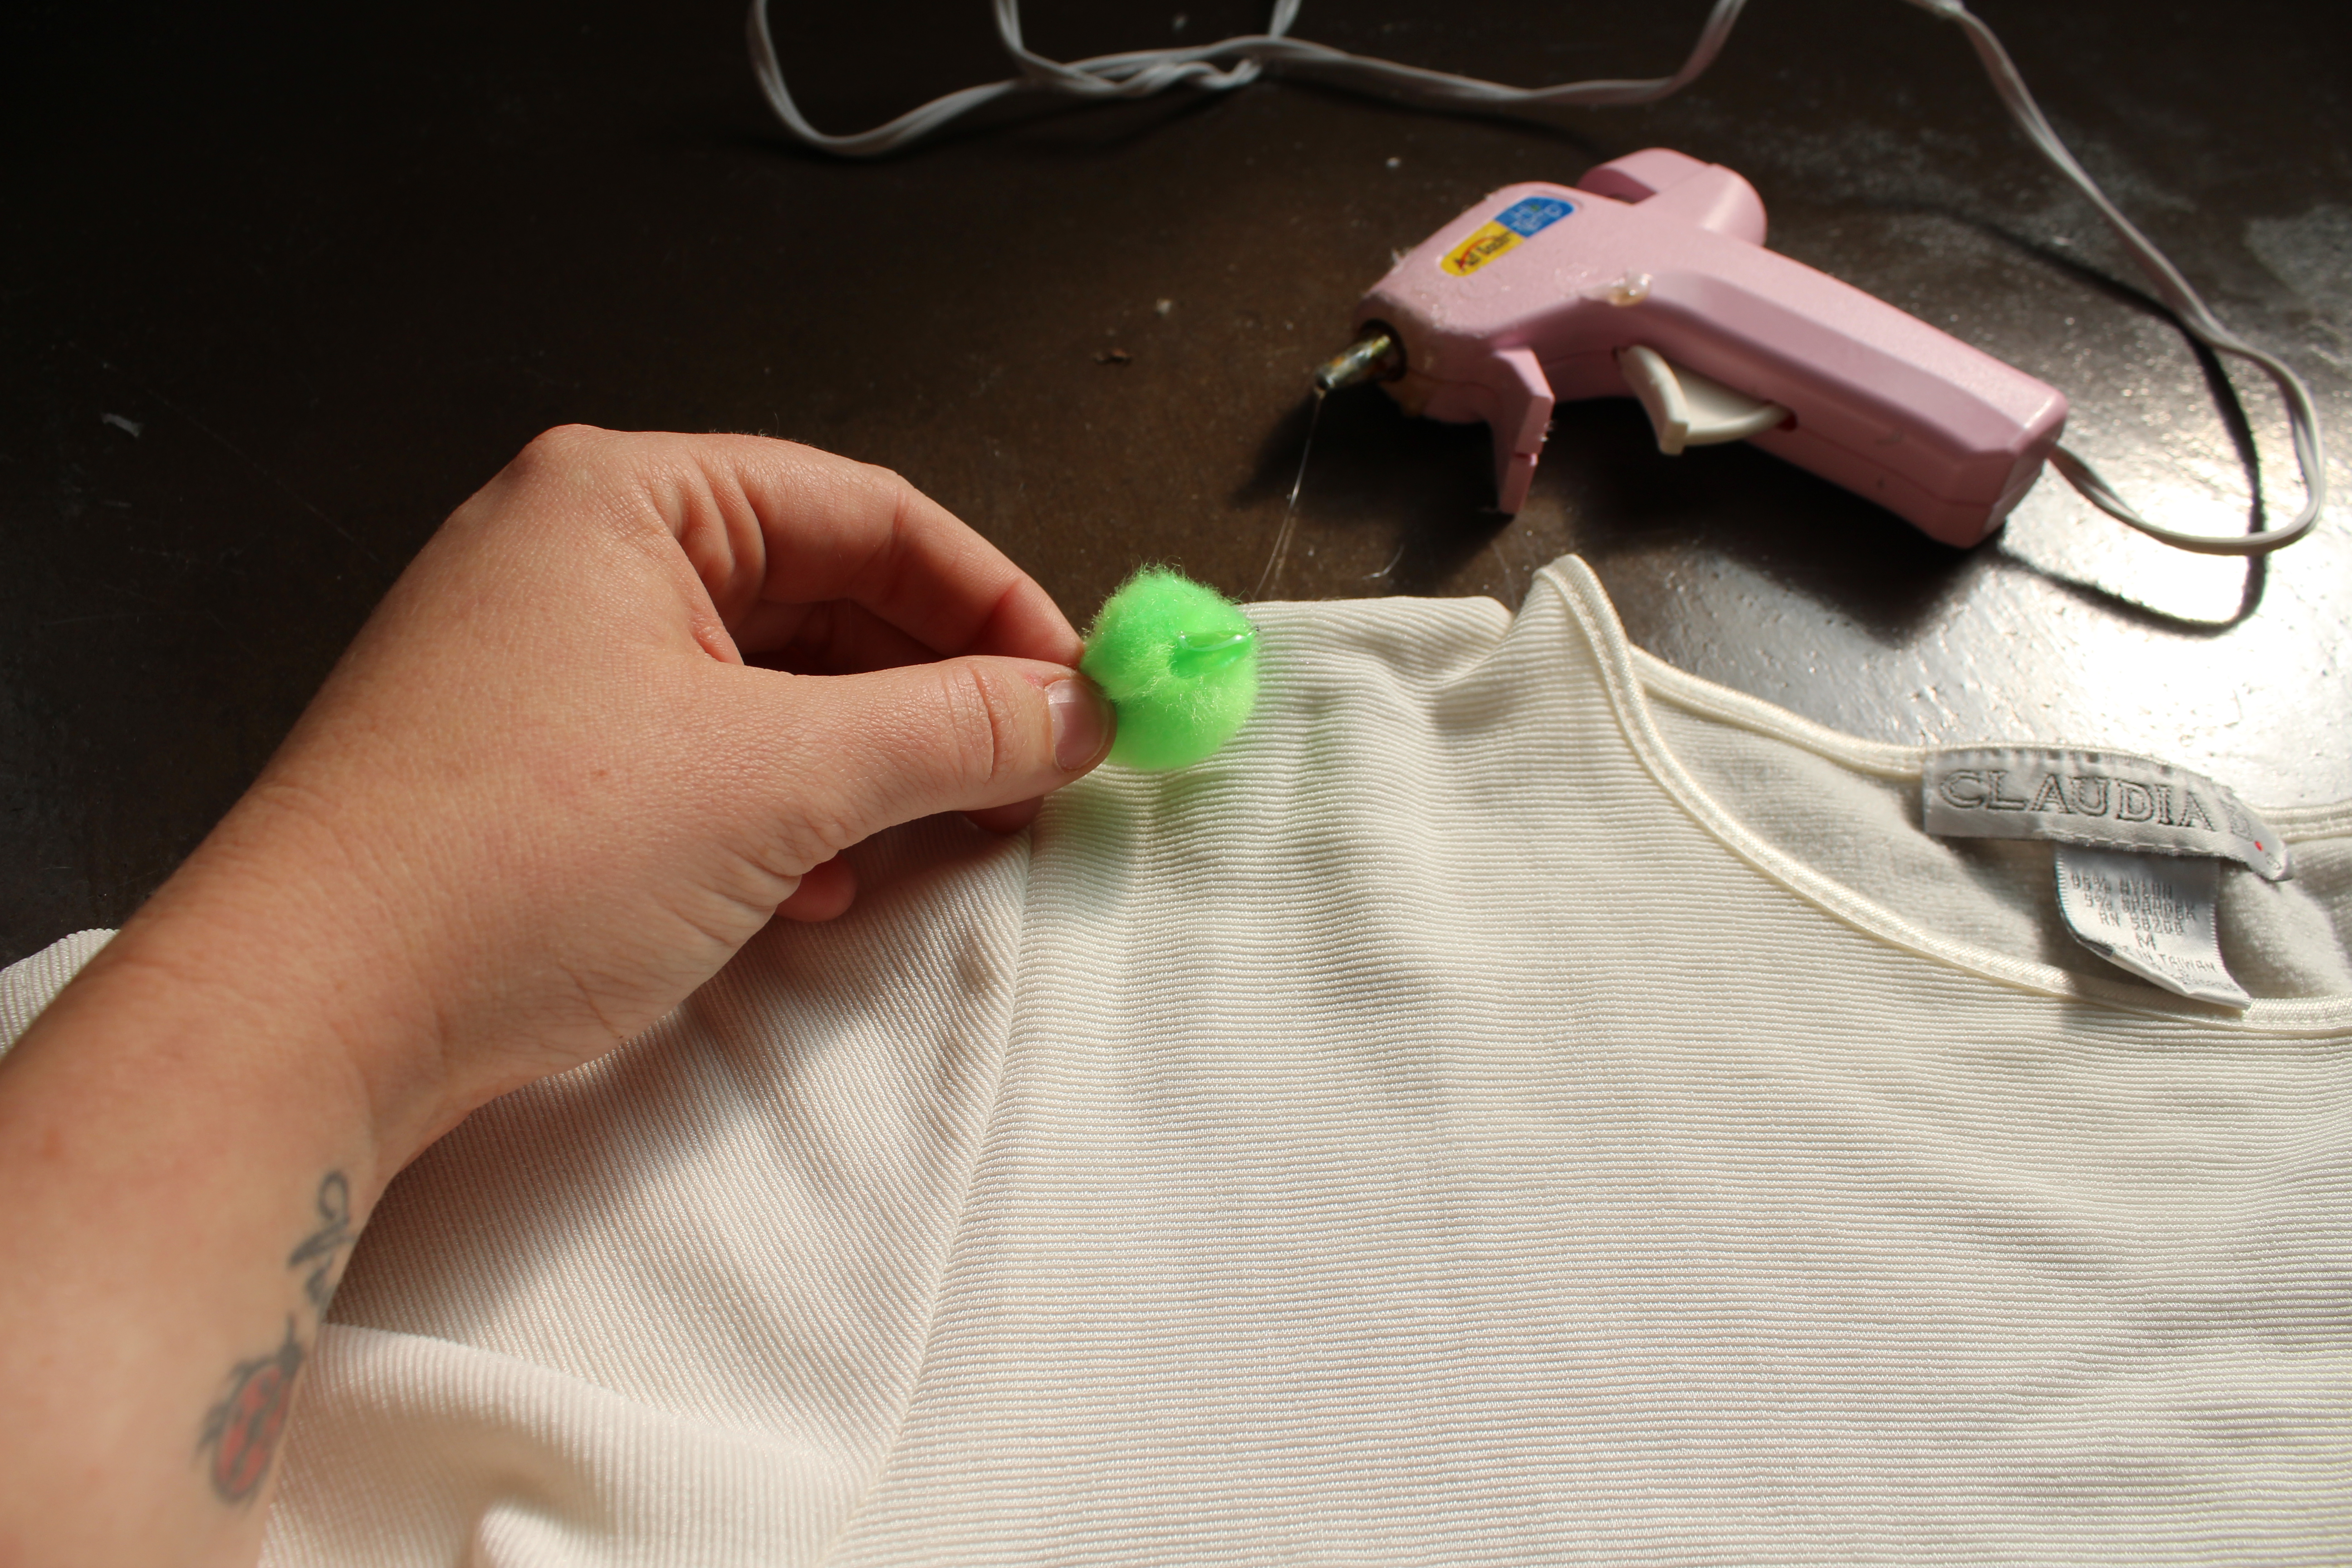
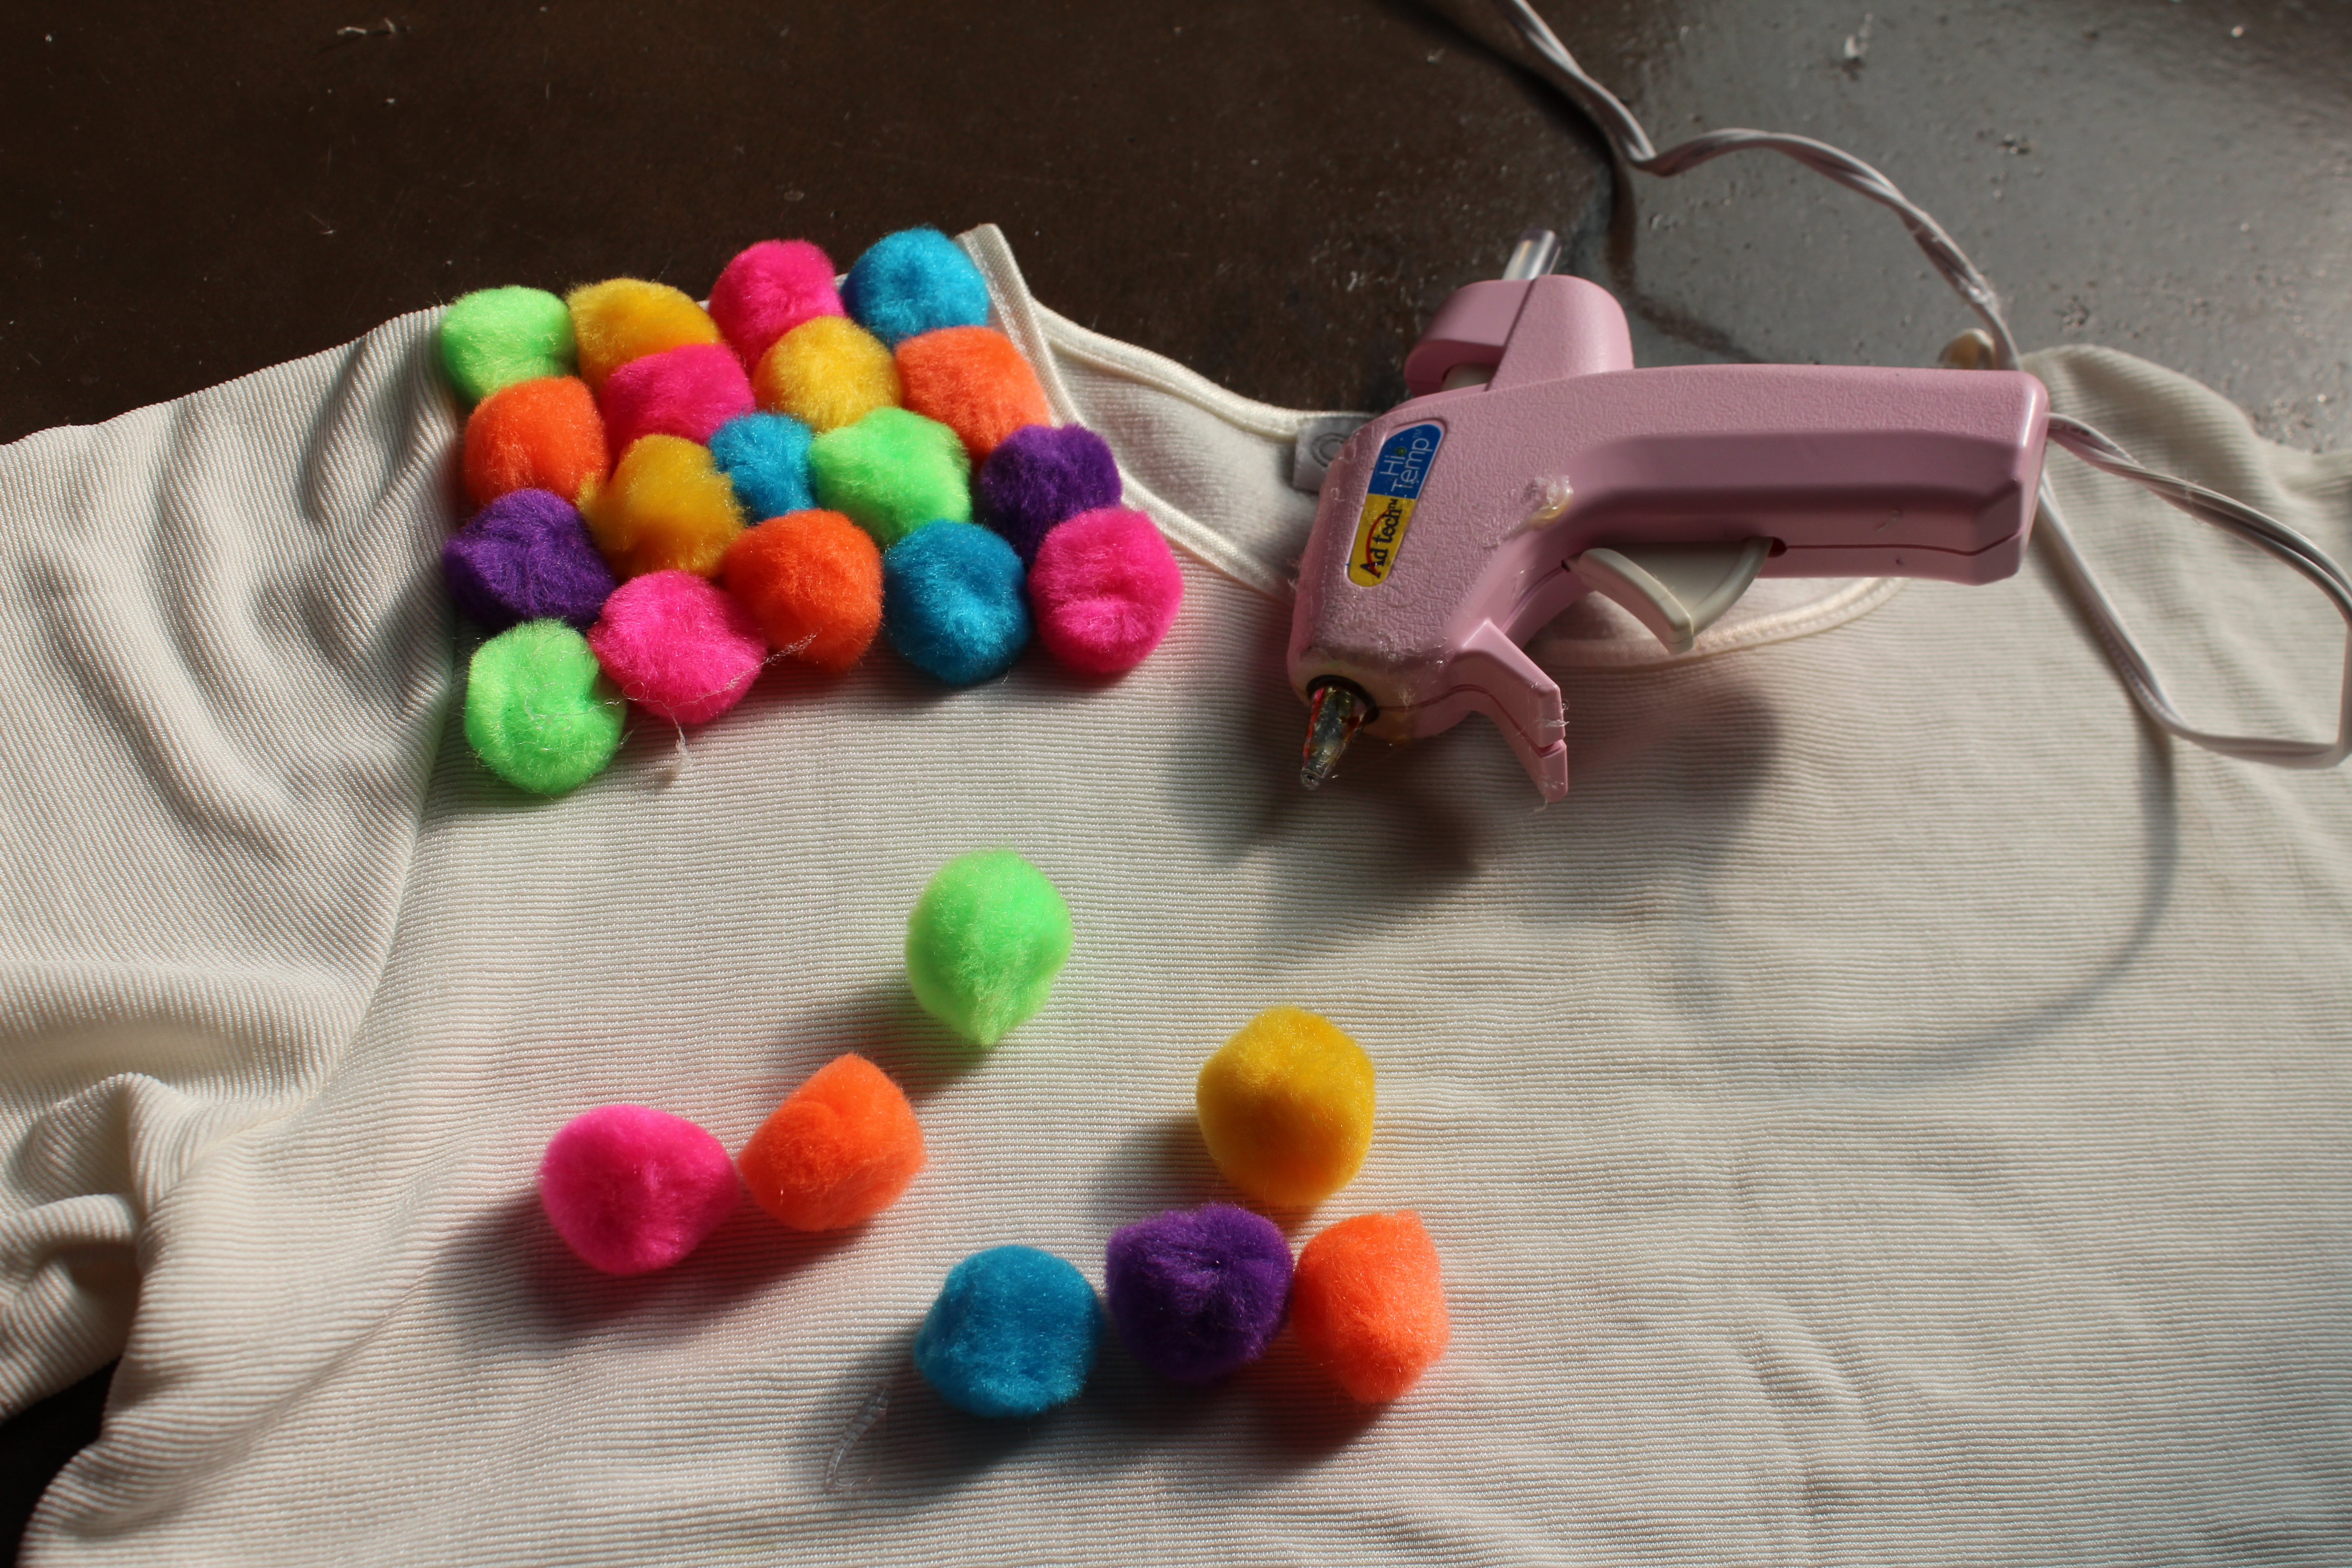
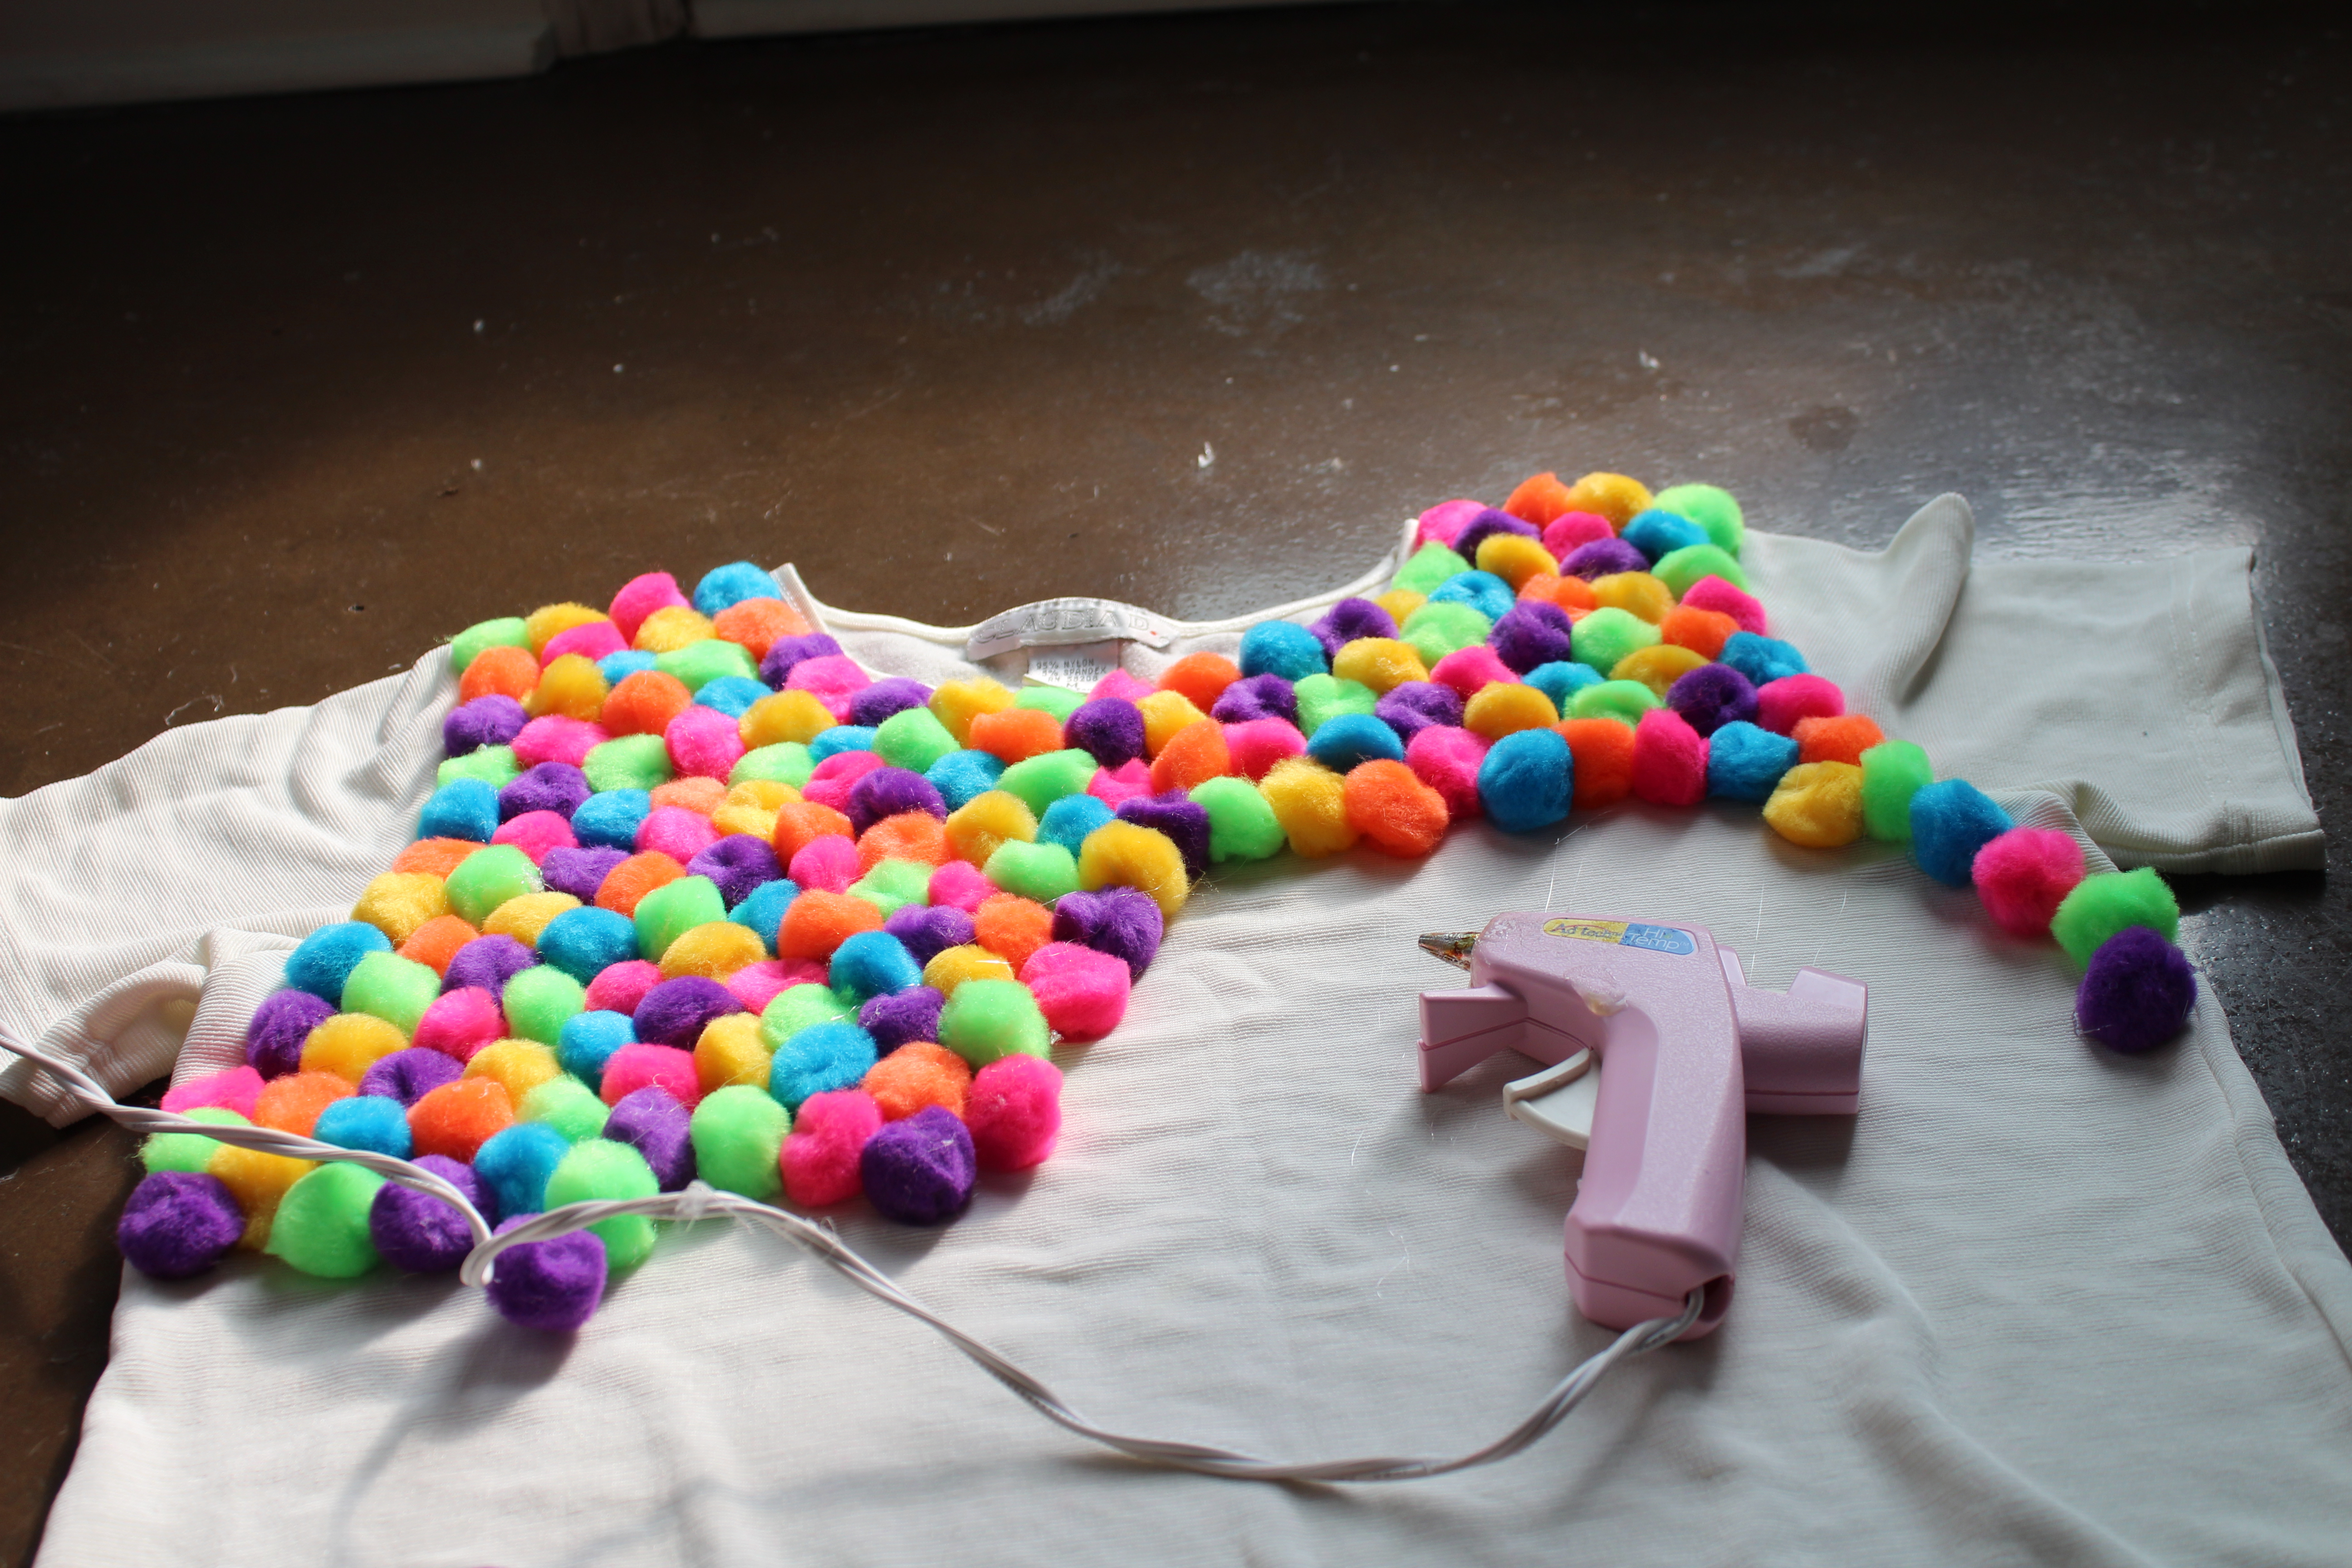
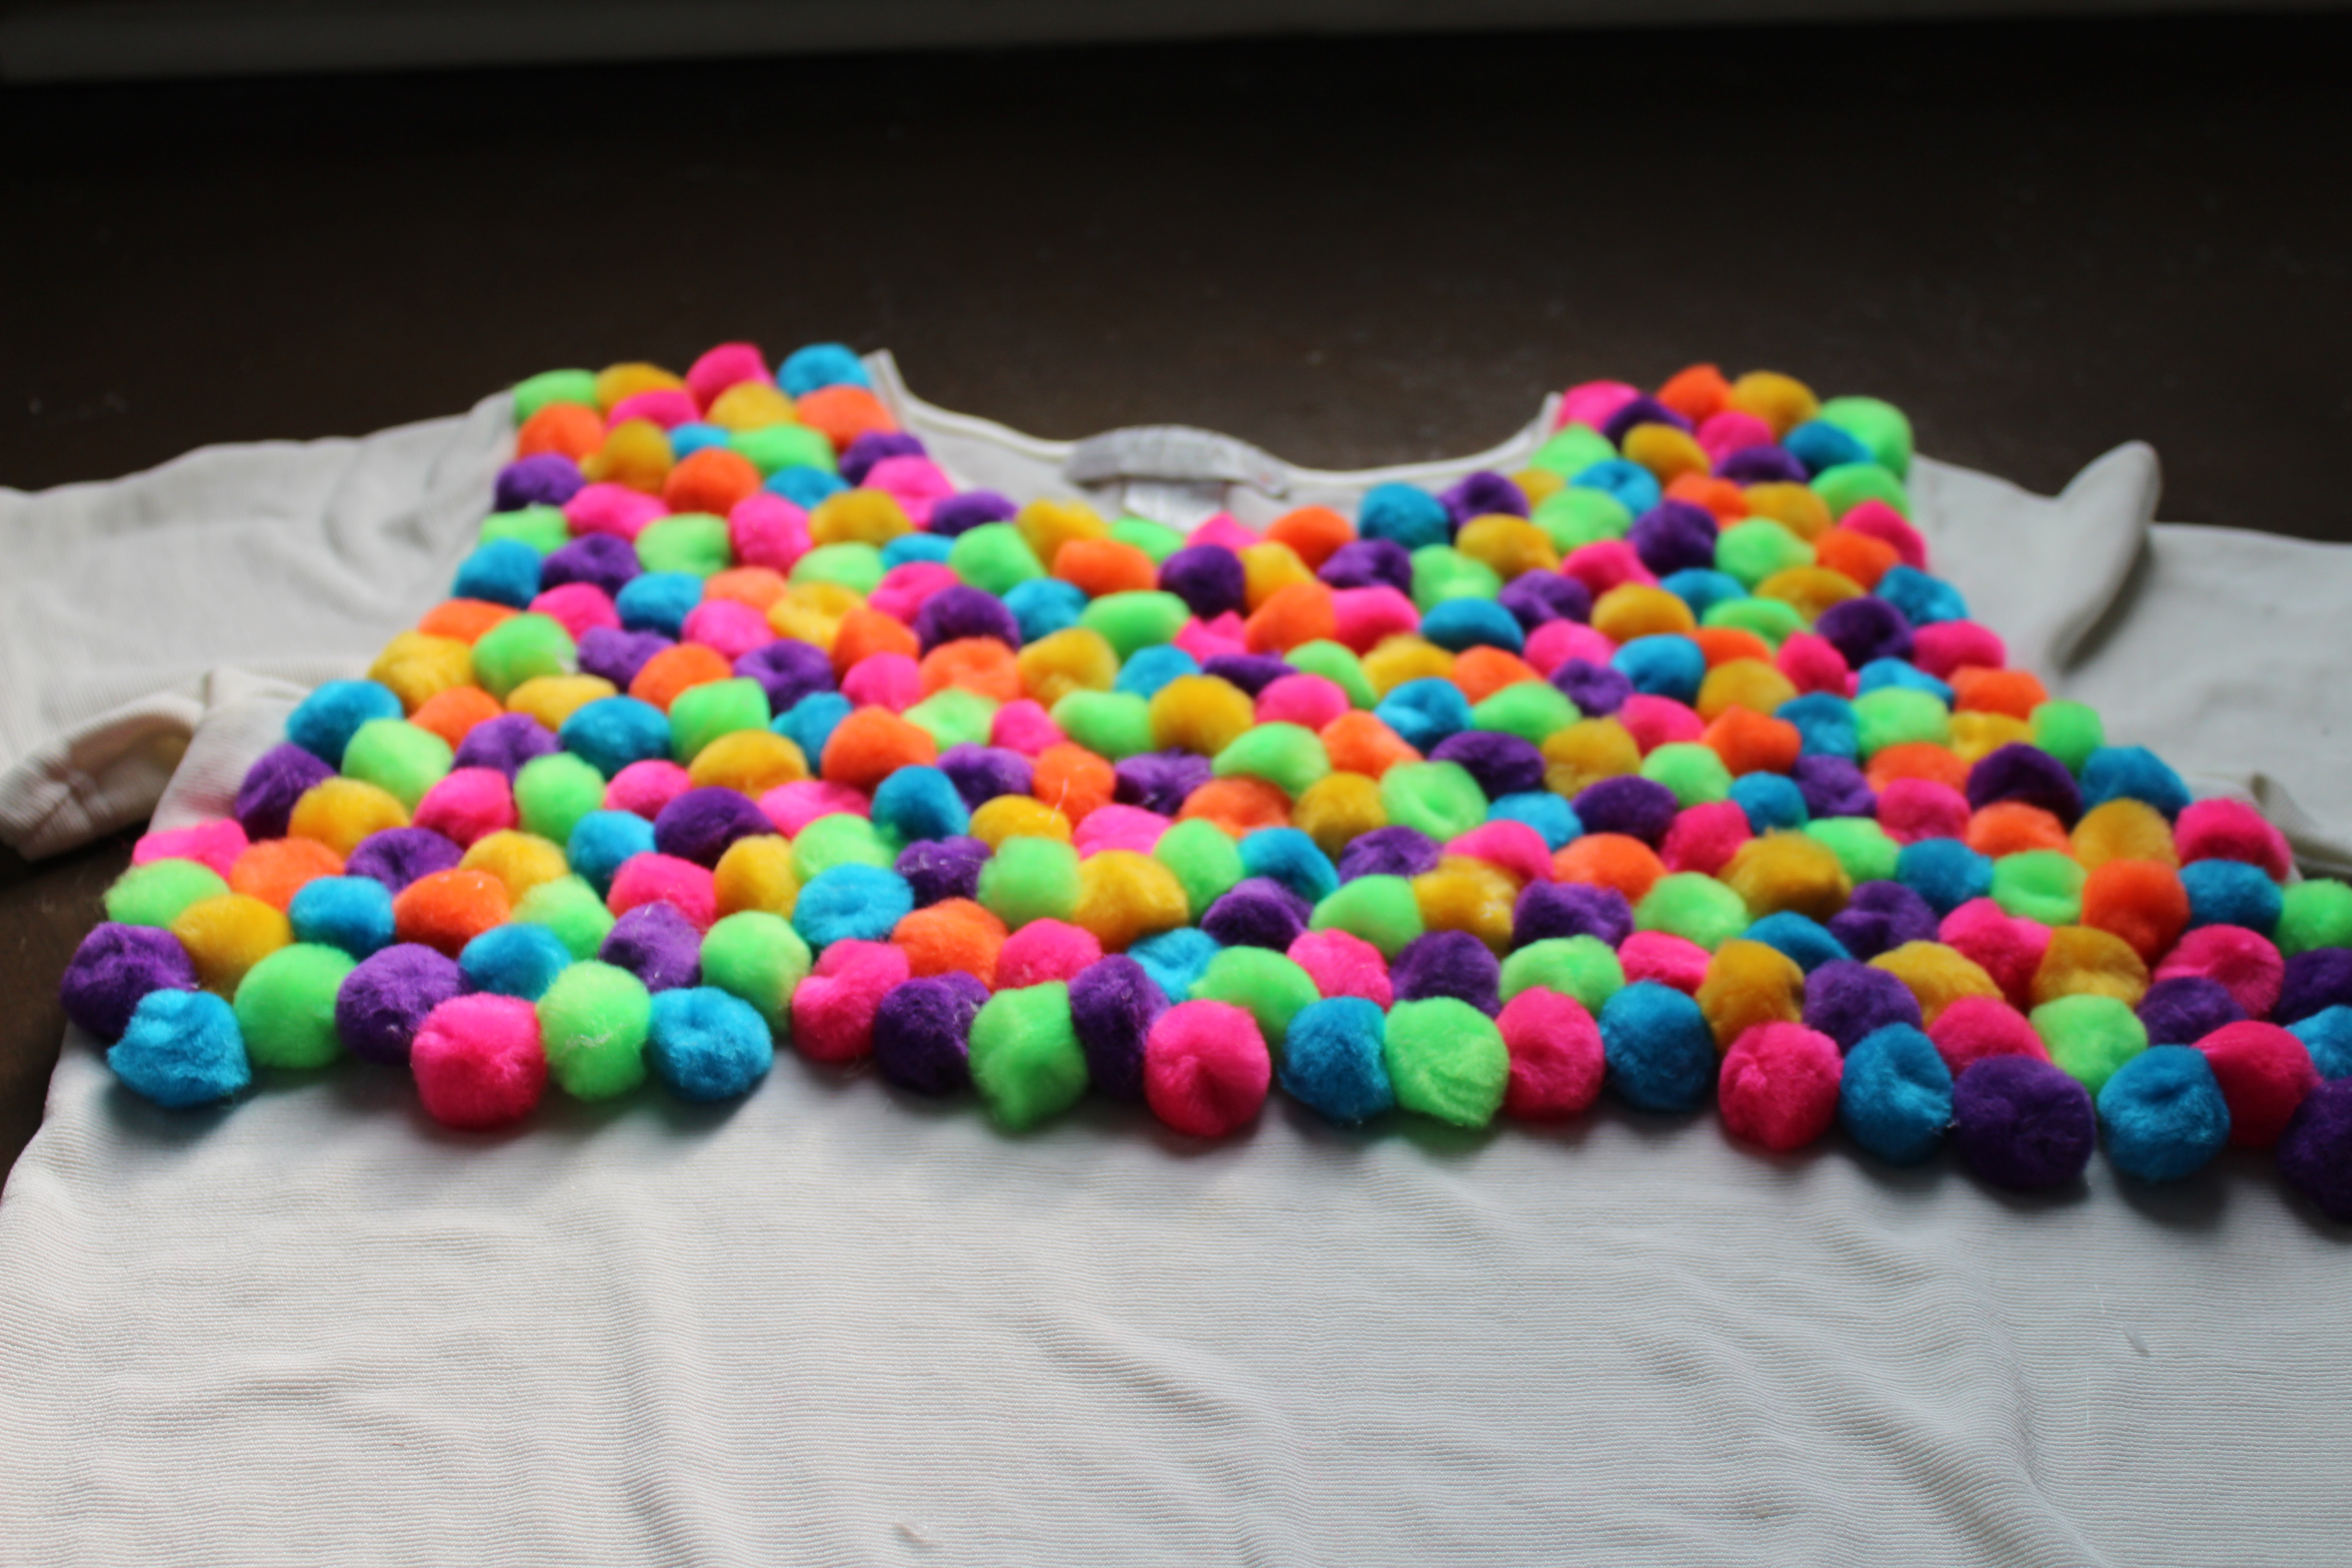
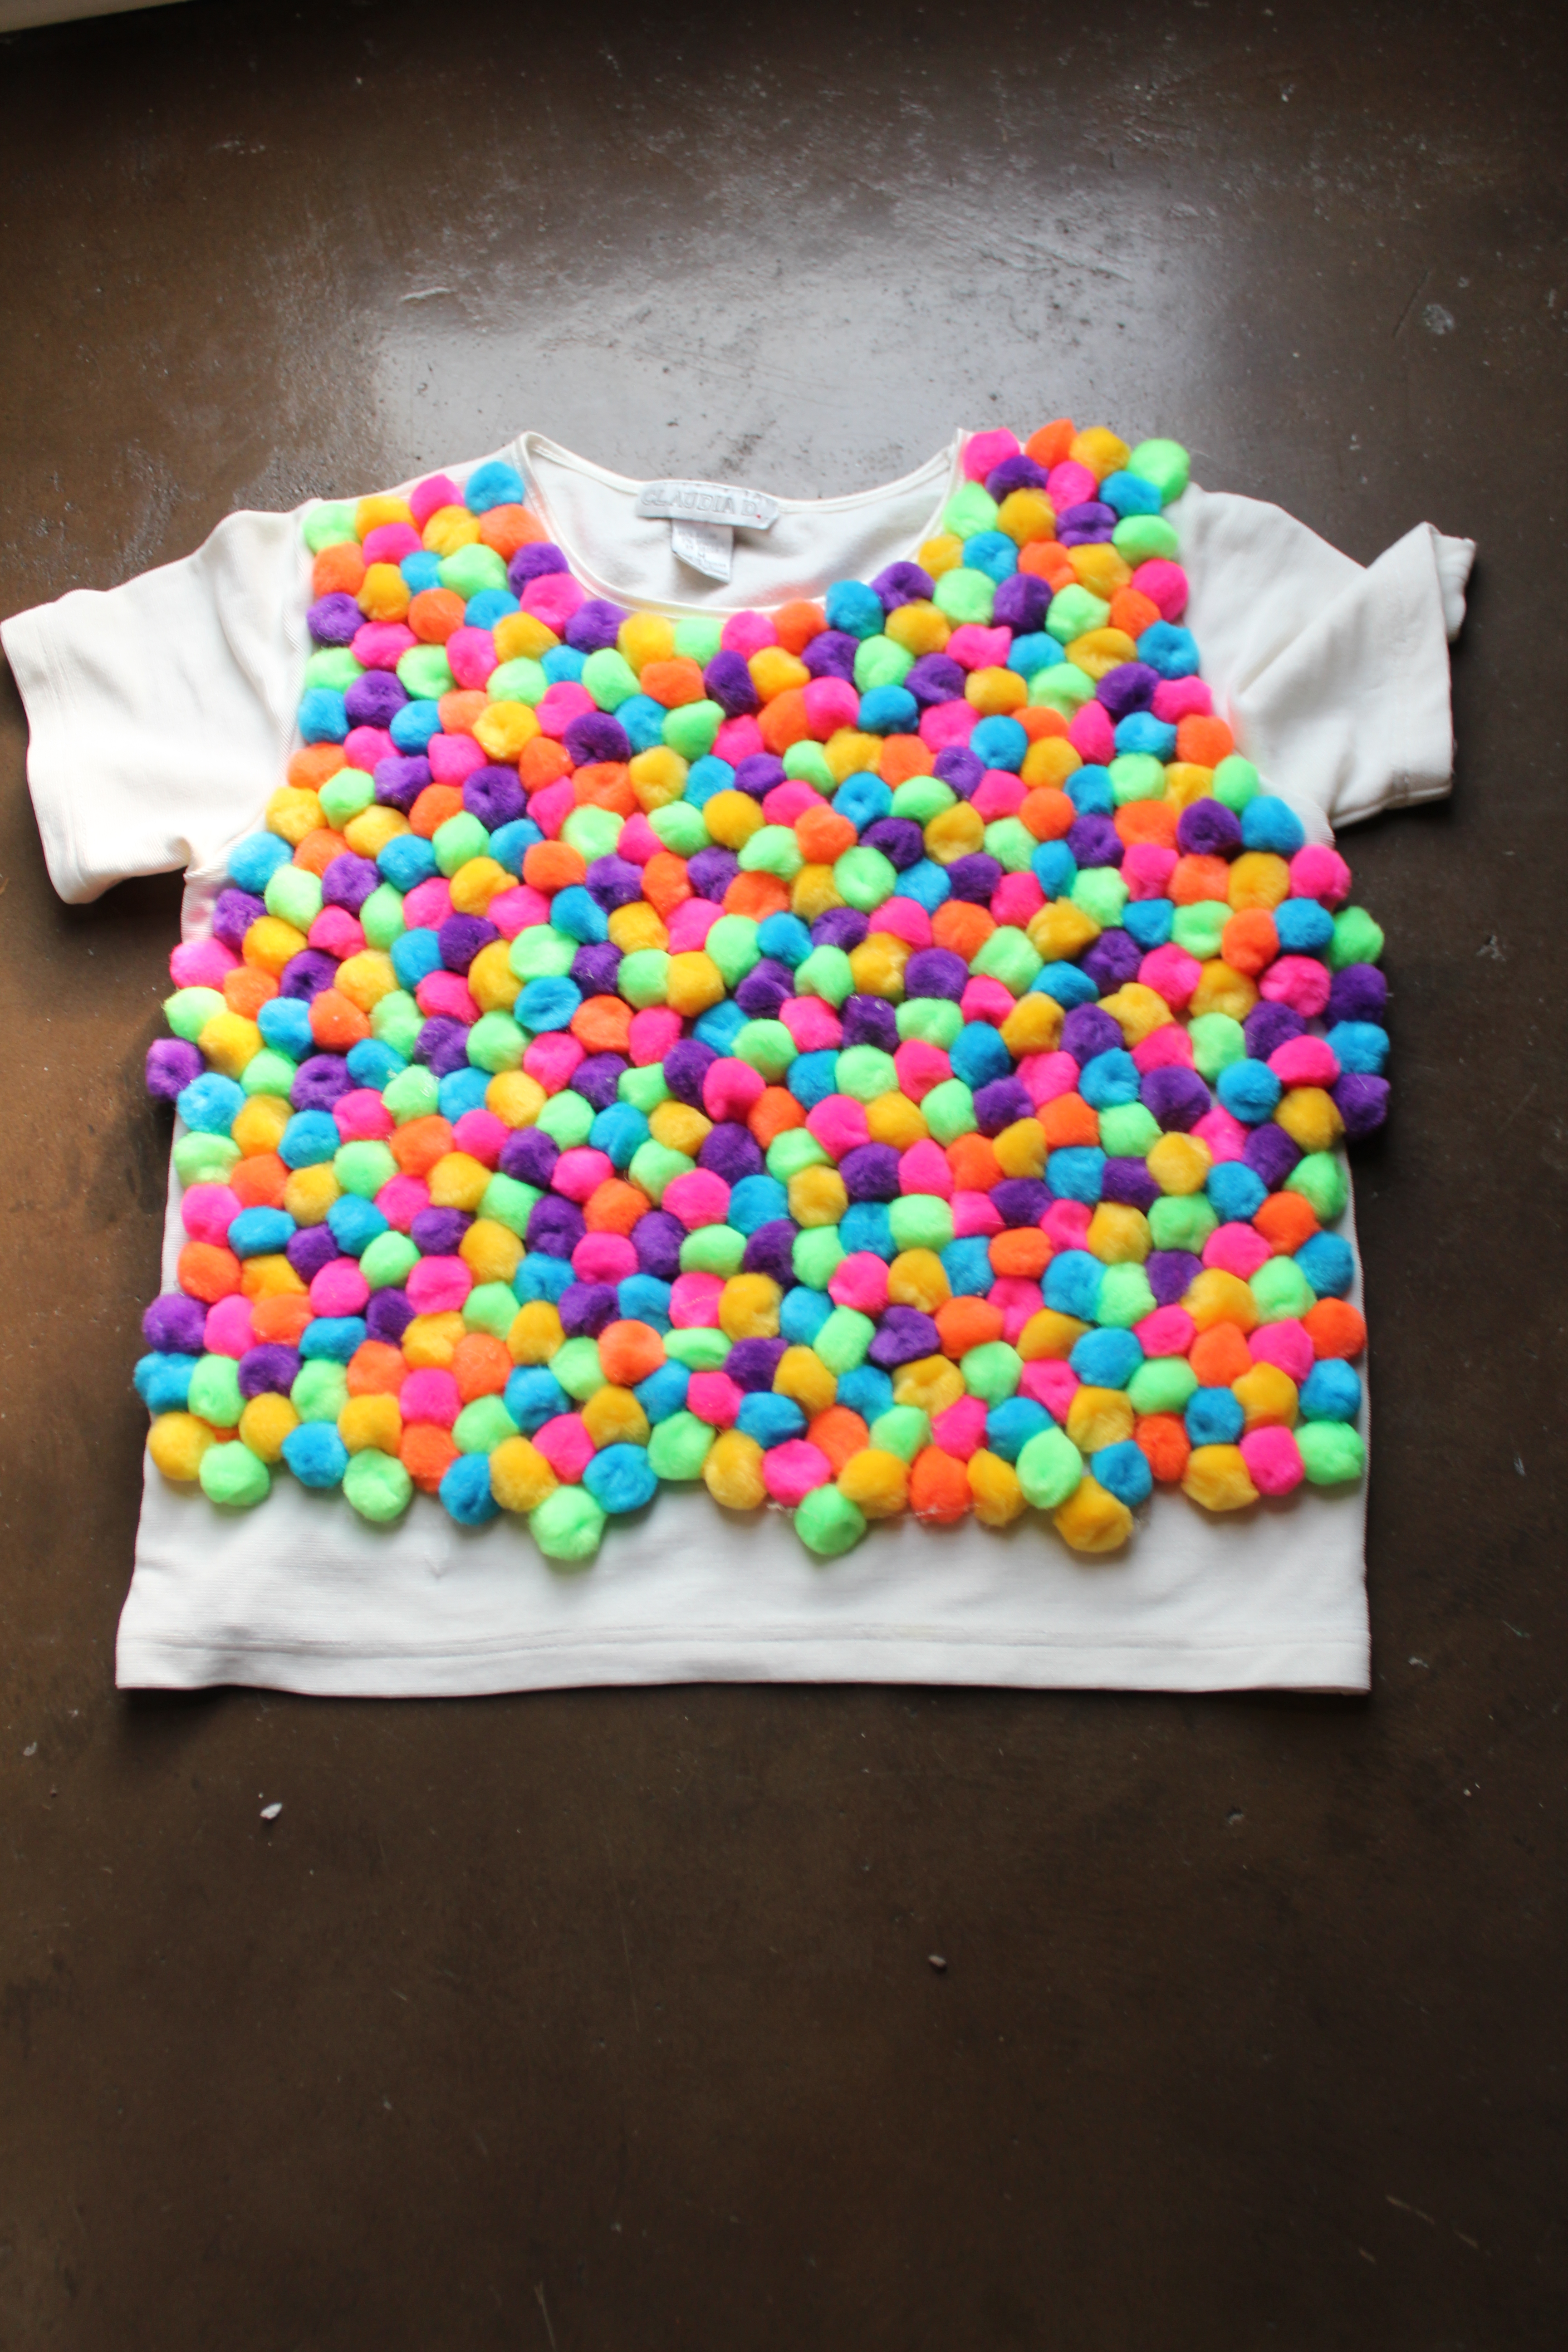
The Gumball Shirt: Begin hot gluing the pom-pom to the tee. There is no rhyme or reason to this process. The only thing that I tried not to do was glue the same color immediately next to each other. Continue gluing until the entire shirt is covered. I am not going to lie. It was a tedious process. It was not hard but it did take me some time to get every pom-pom attached. Luckily, that is the majority of the costume so, once completed, I was almost done!
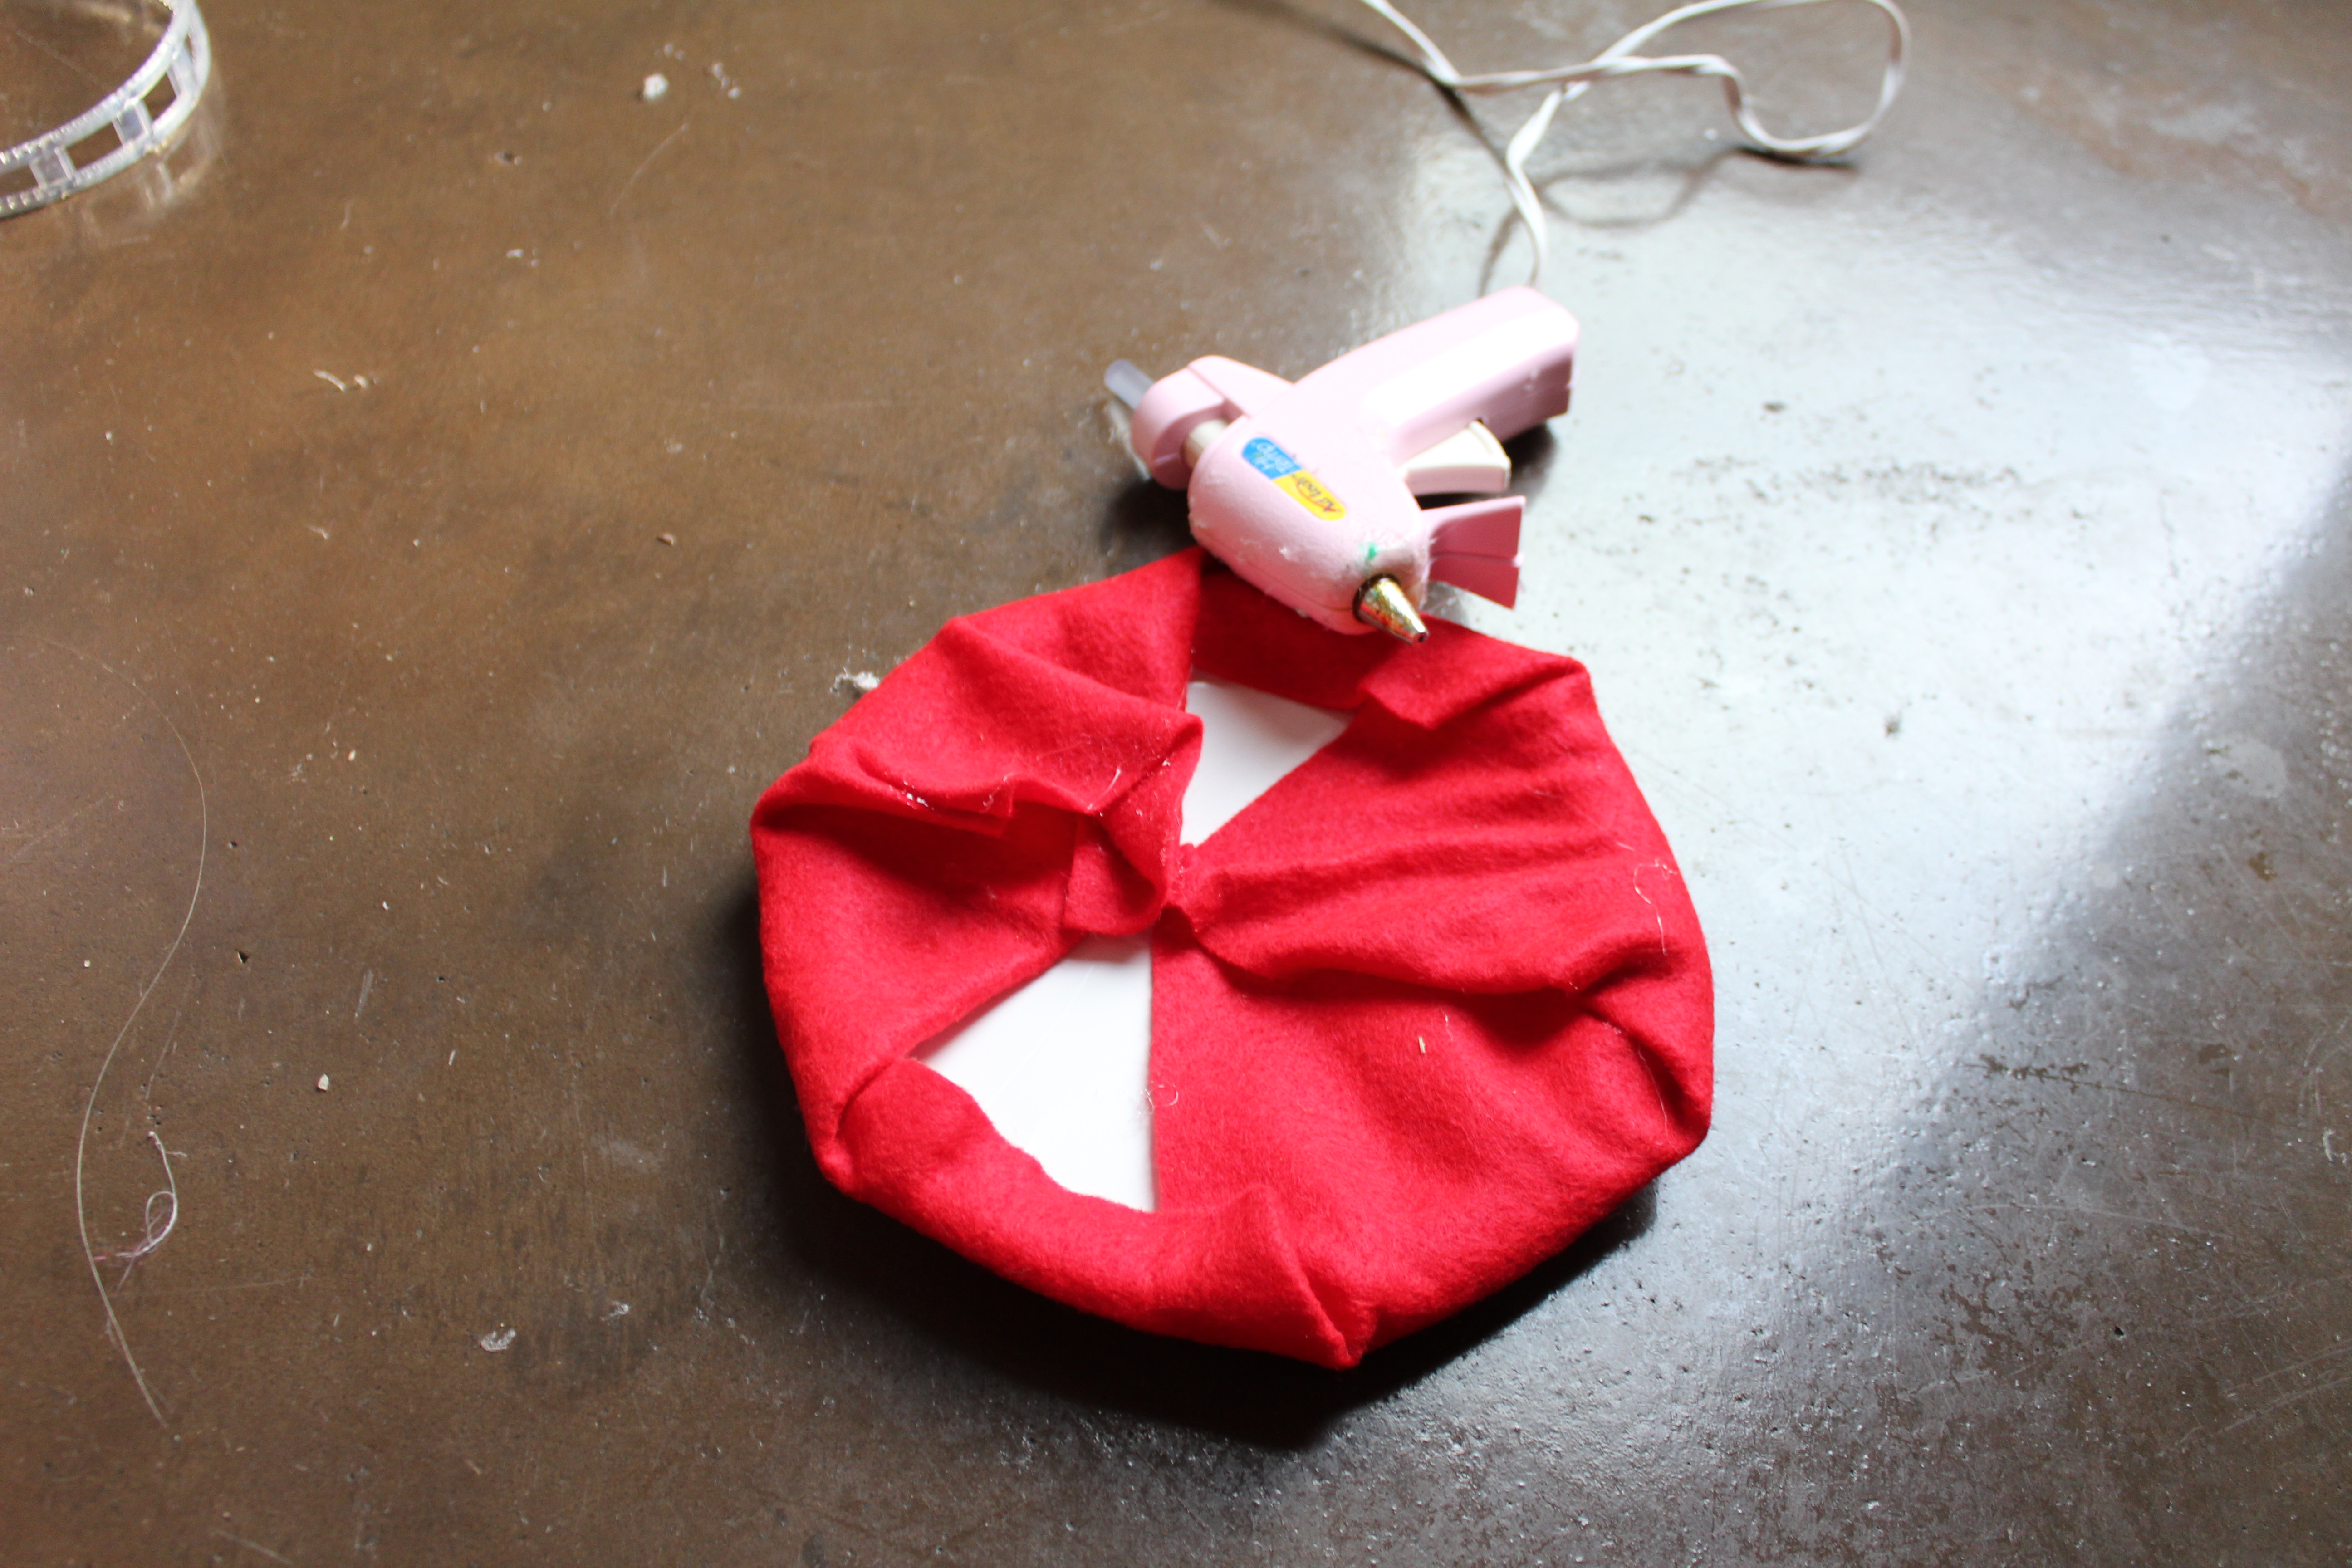
The Headband Topper: To make the top of the gumball machine, I attached a small, white paper plate to the center of the sheet of felt. I then folded the edges of the felt around the felt, securing it in place with the hot glue. I continued to do this until the felt was securely glued all around the plate. Make sure there are not pointy edges. You want this piece to be round like the top of a gumball machine. After that is dry, you will hot glue the plate to the headband. I gently folded the plate so that it would curve around the plate. I used a lot of glue to secure it to the headband and I held it in place until I was sure that it had hardened. After the headband is dry, ball up the small piece of aluminum foil and glue it to the top of the plate. This will complete the top of your gumball machine.

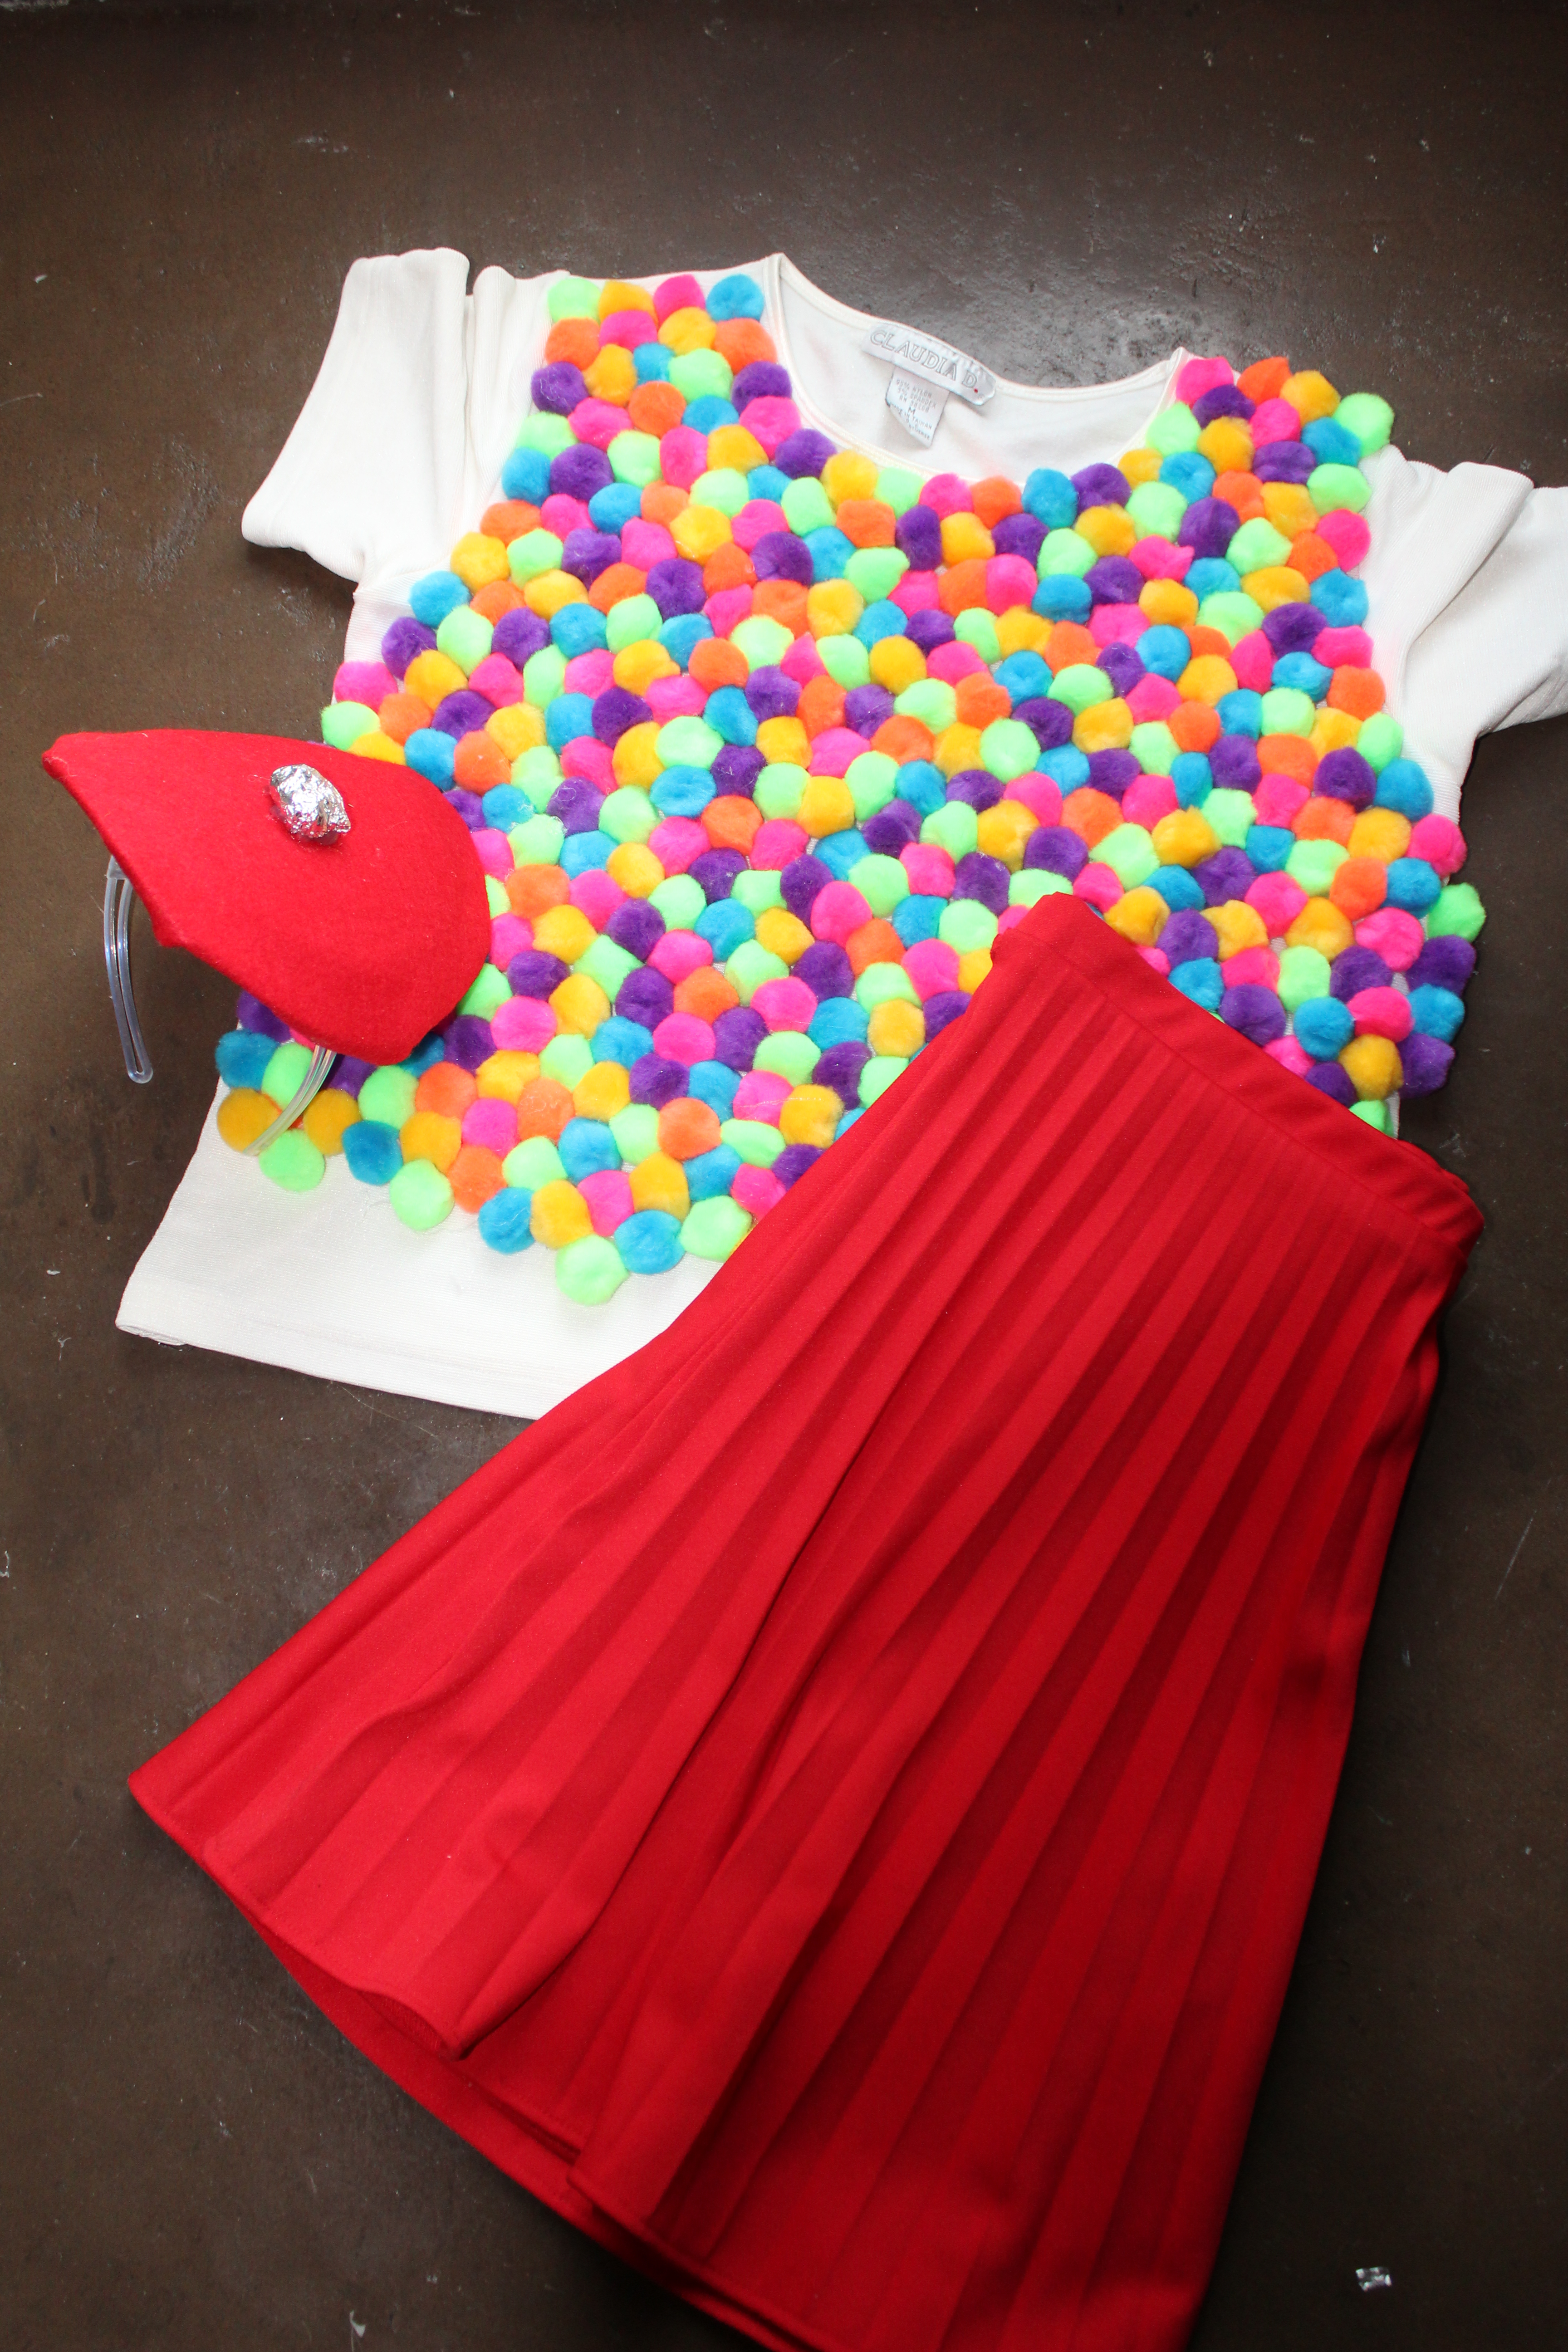
To make the 25 cents tag, I simply cut a sheet of gray construction paper in half. I folded the cut piece in half and wrote the price on one half. I then inserted the other side into the skirt and pinned it in place.
And that’s it! I loved how cute this looked turned it and I know that my students will love it if I ever wear it to school! Also, this skirt is a great addition to my wardrobe and I am already thinking of all the ways that I can use it in my outfits!
I hope this costume will “blow” you away!


1 thought on “Blog-O-Ween: DIY Gumball Machine Costume”
Comments are closed.