For my last enstallment of my Blog-O-Ween series, I knew that I wanted to do something big. Since I was little girl, I have been a Disney nut. Now that I am older, that love has only increased. When I started planning out everything for my Blog-O-Ween series, I knew that I really wanted to do something that was Disney inspired. I would love it, my daughter would love it, and I could potentially even use it on our big family trip to Disney World in May.
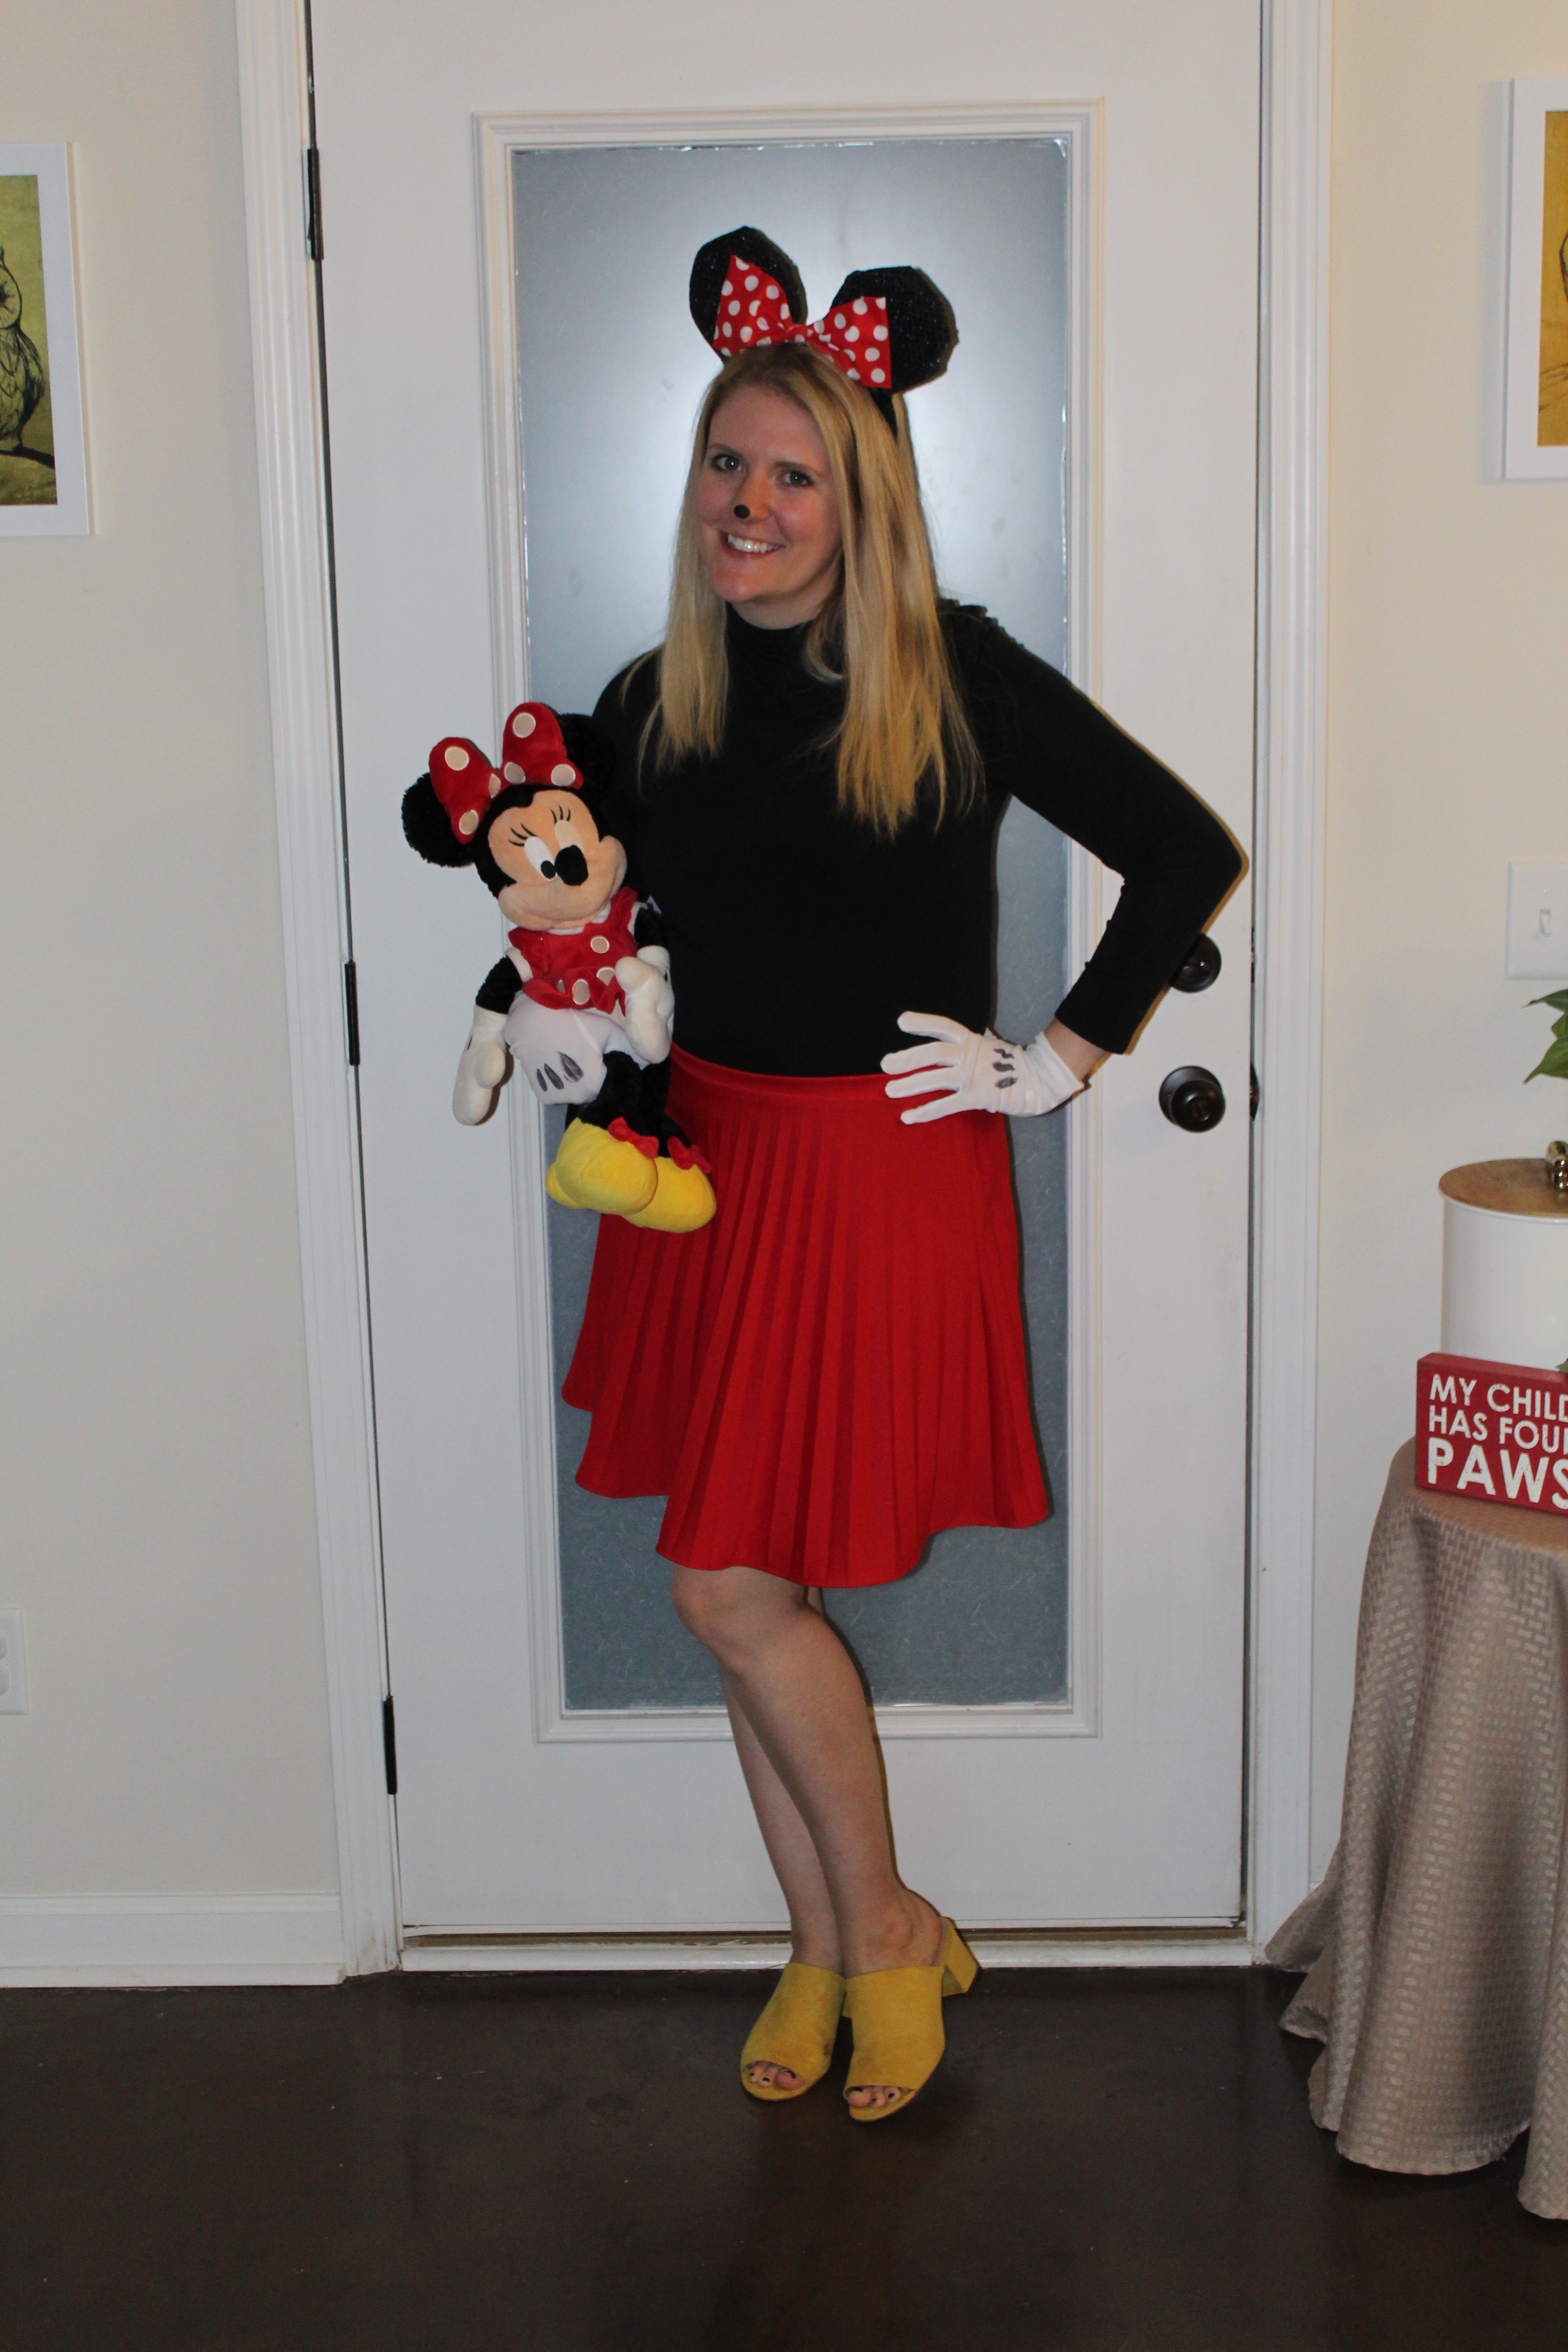
When I found that adorable red skirt that I used in my DIY Gumball Machine Costume, at my local Goodwill, I knew that it had so much potential. It is for this reason that I made the decision to use it again in a DIY Minnie Mouse costume. Red is Minnie’s color and, with a visit to my local craft store, I knew that I could make this costume a reality.
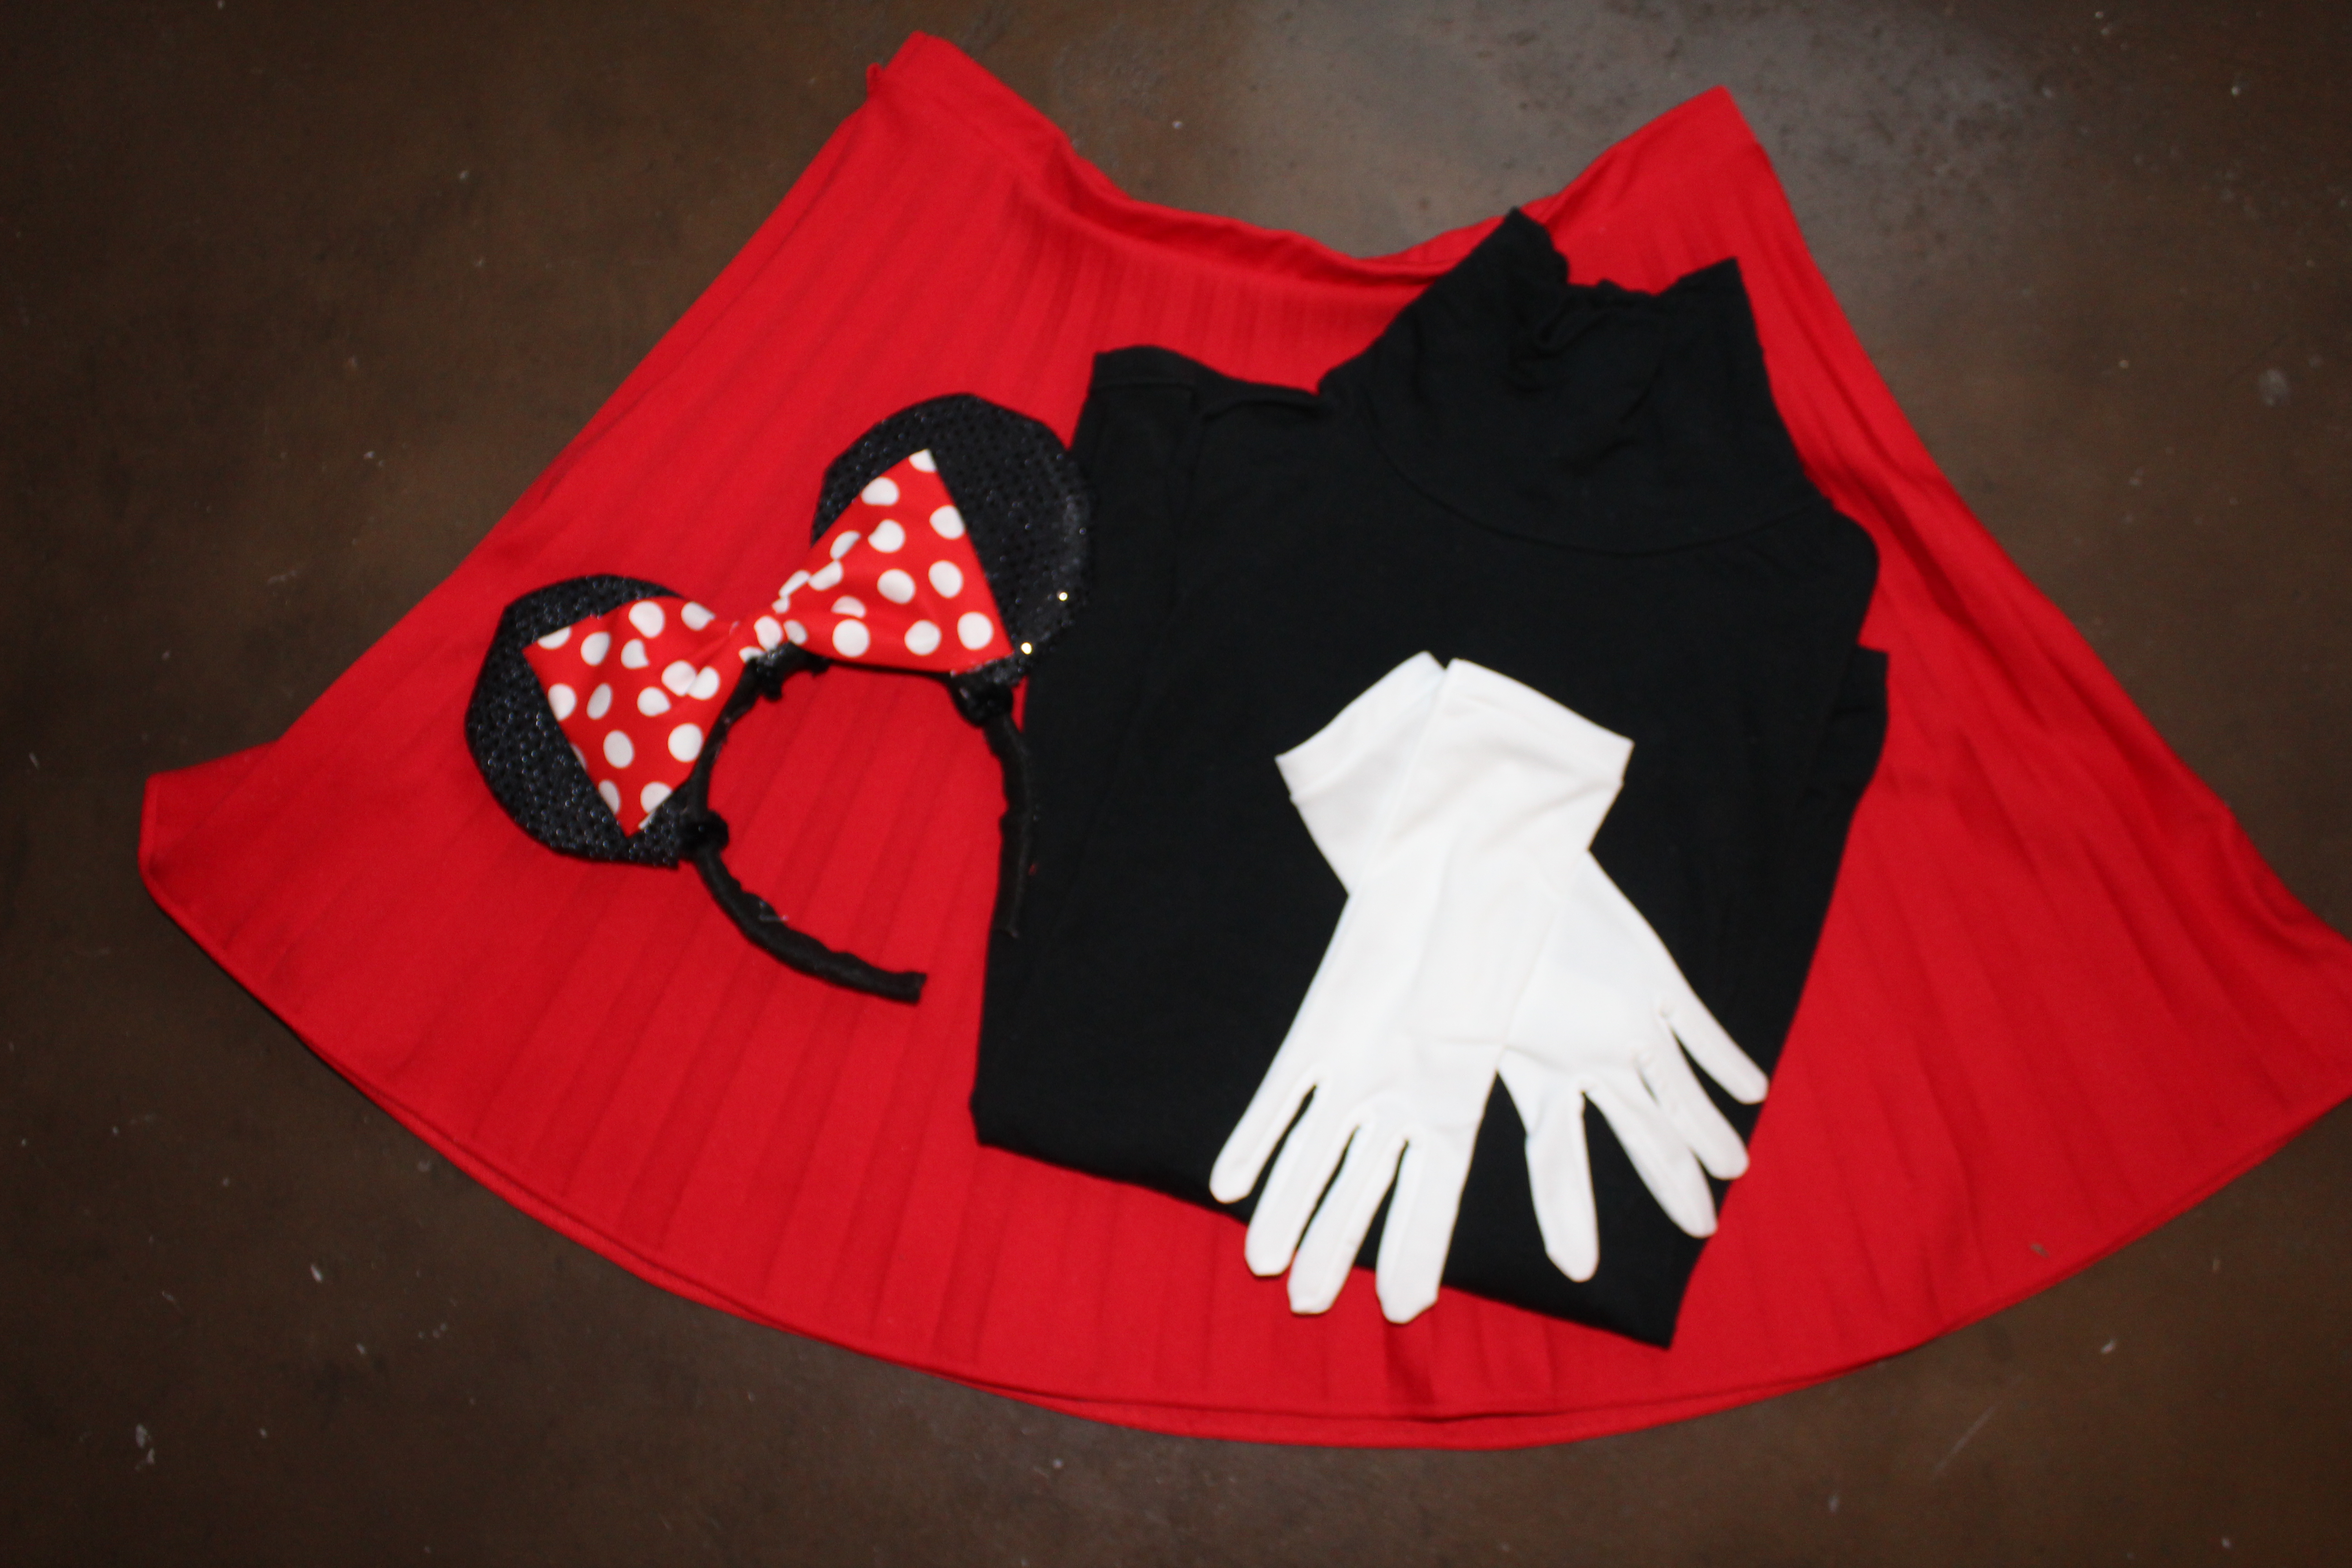
Here is what you need to create this look:
A Black Top (Goodwill)
A Red Skirt (Goodwill)
White, Wrist Length Gloves (Costume Shop)
A Large Piece of Black Felt (Michaels)
A Piece of White Felt (Michaels)
1/4 of a Yard of Felt Batting (Hobby Lobby)
1/4 of a Yard of Sequin Fabric (Hobby Lobby)
1/4 of a Yard of Red and White Polka Dot Material (Hobby Lobby)
Black Pipe Cleaners (Michaels)
A Plastic Headband (Dollar Tree)

Before you begin, I will let you know that I wanted my ears to be full and fluffy. For this reason, there will be a lot of steps to my ears. Luckily, the ears are the only thing that had to be made for this costume!
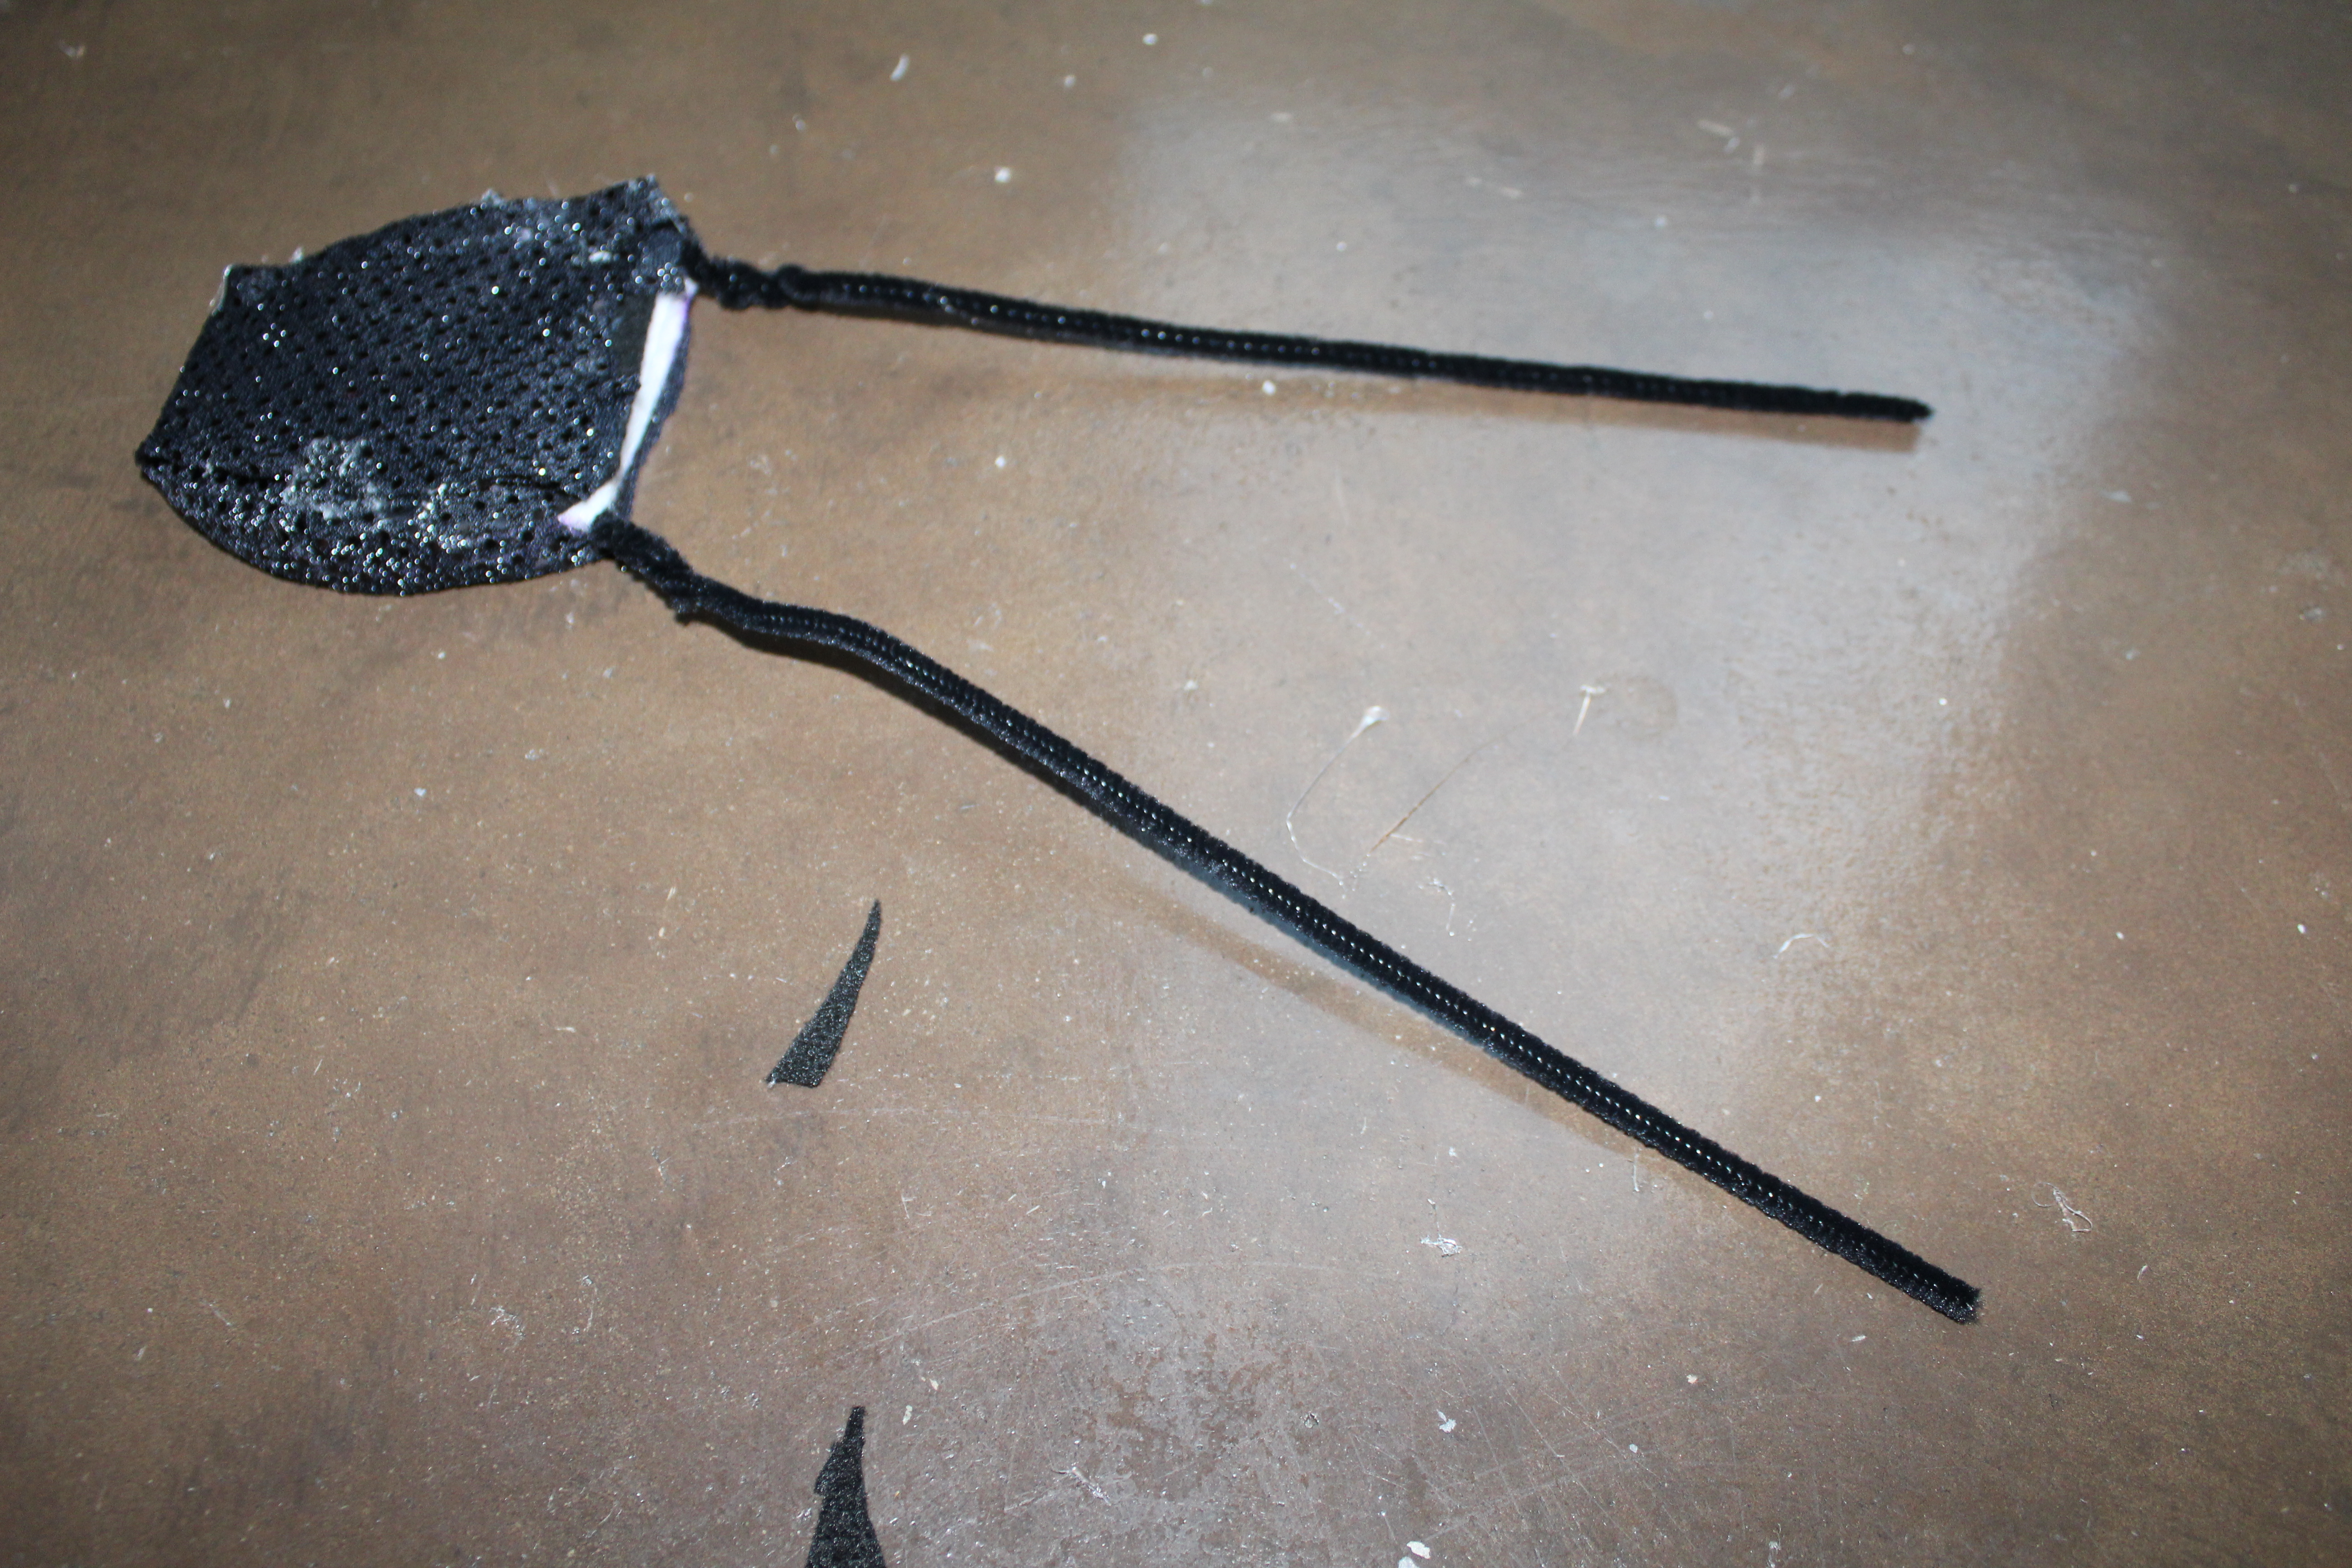
Step 1: Fold a sheet of white felt in half. Using a permanent marker, draw an outline for your ears. Once you have cut out the ears, hot glue a pipe cleaner along the edges of each ear. Make sure that you have pipe cleaner hanging out on each end. You will need this later to attach the ears to the headband.
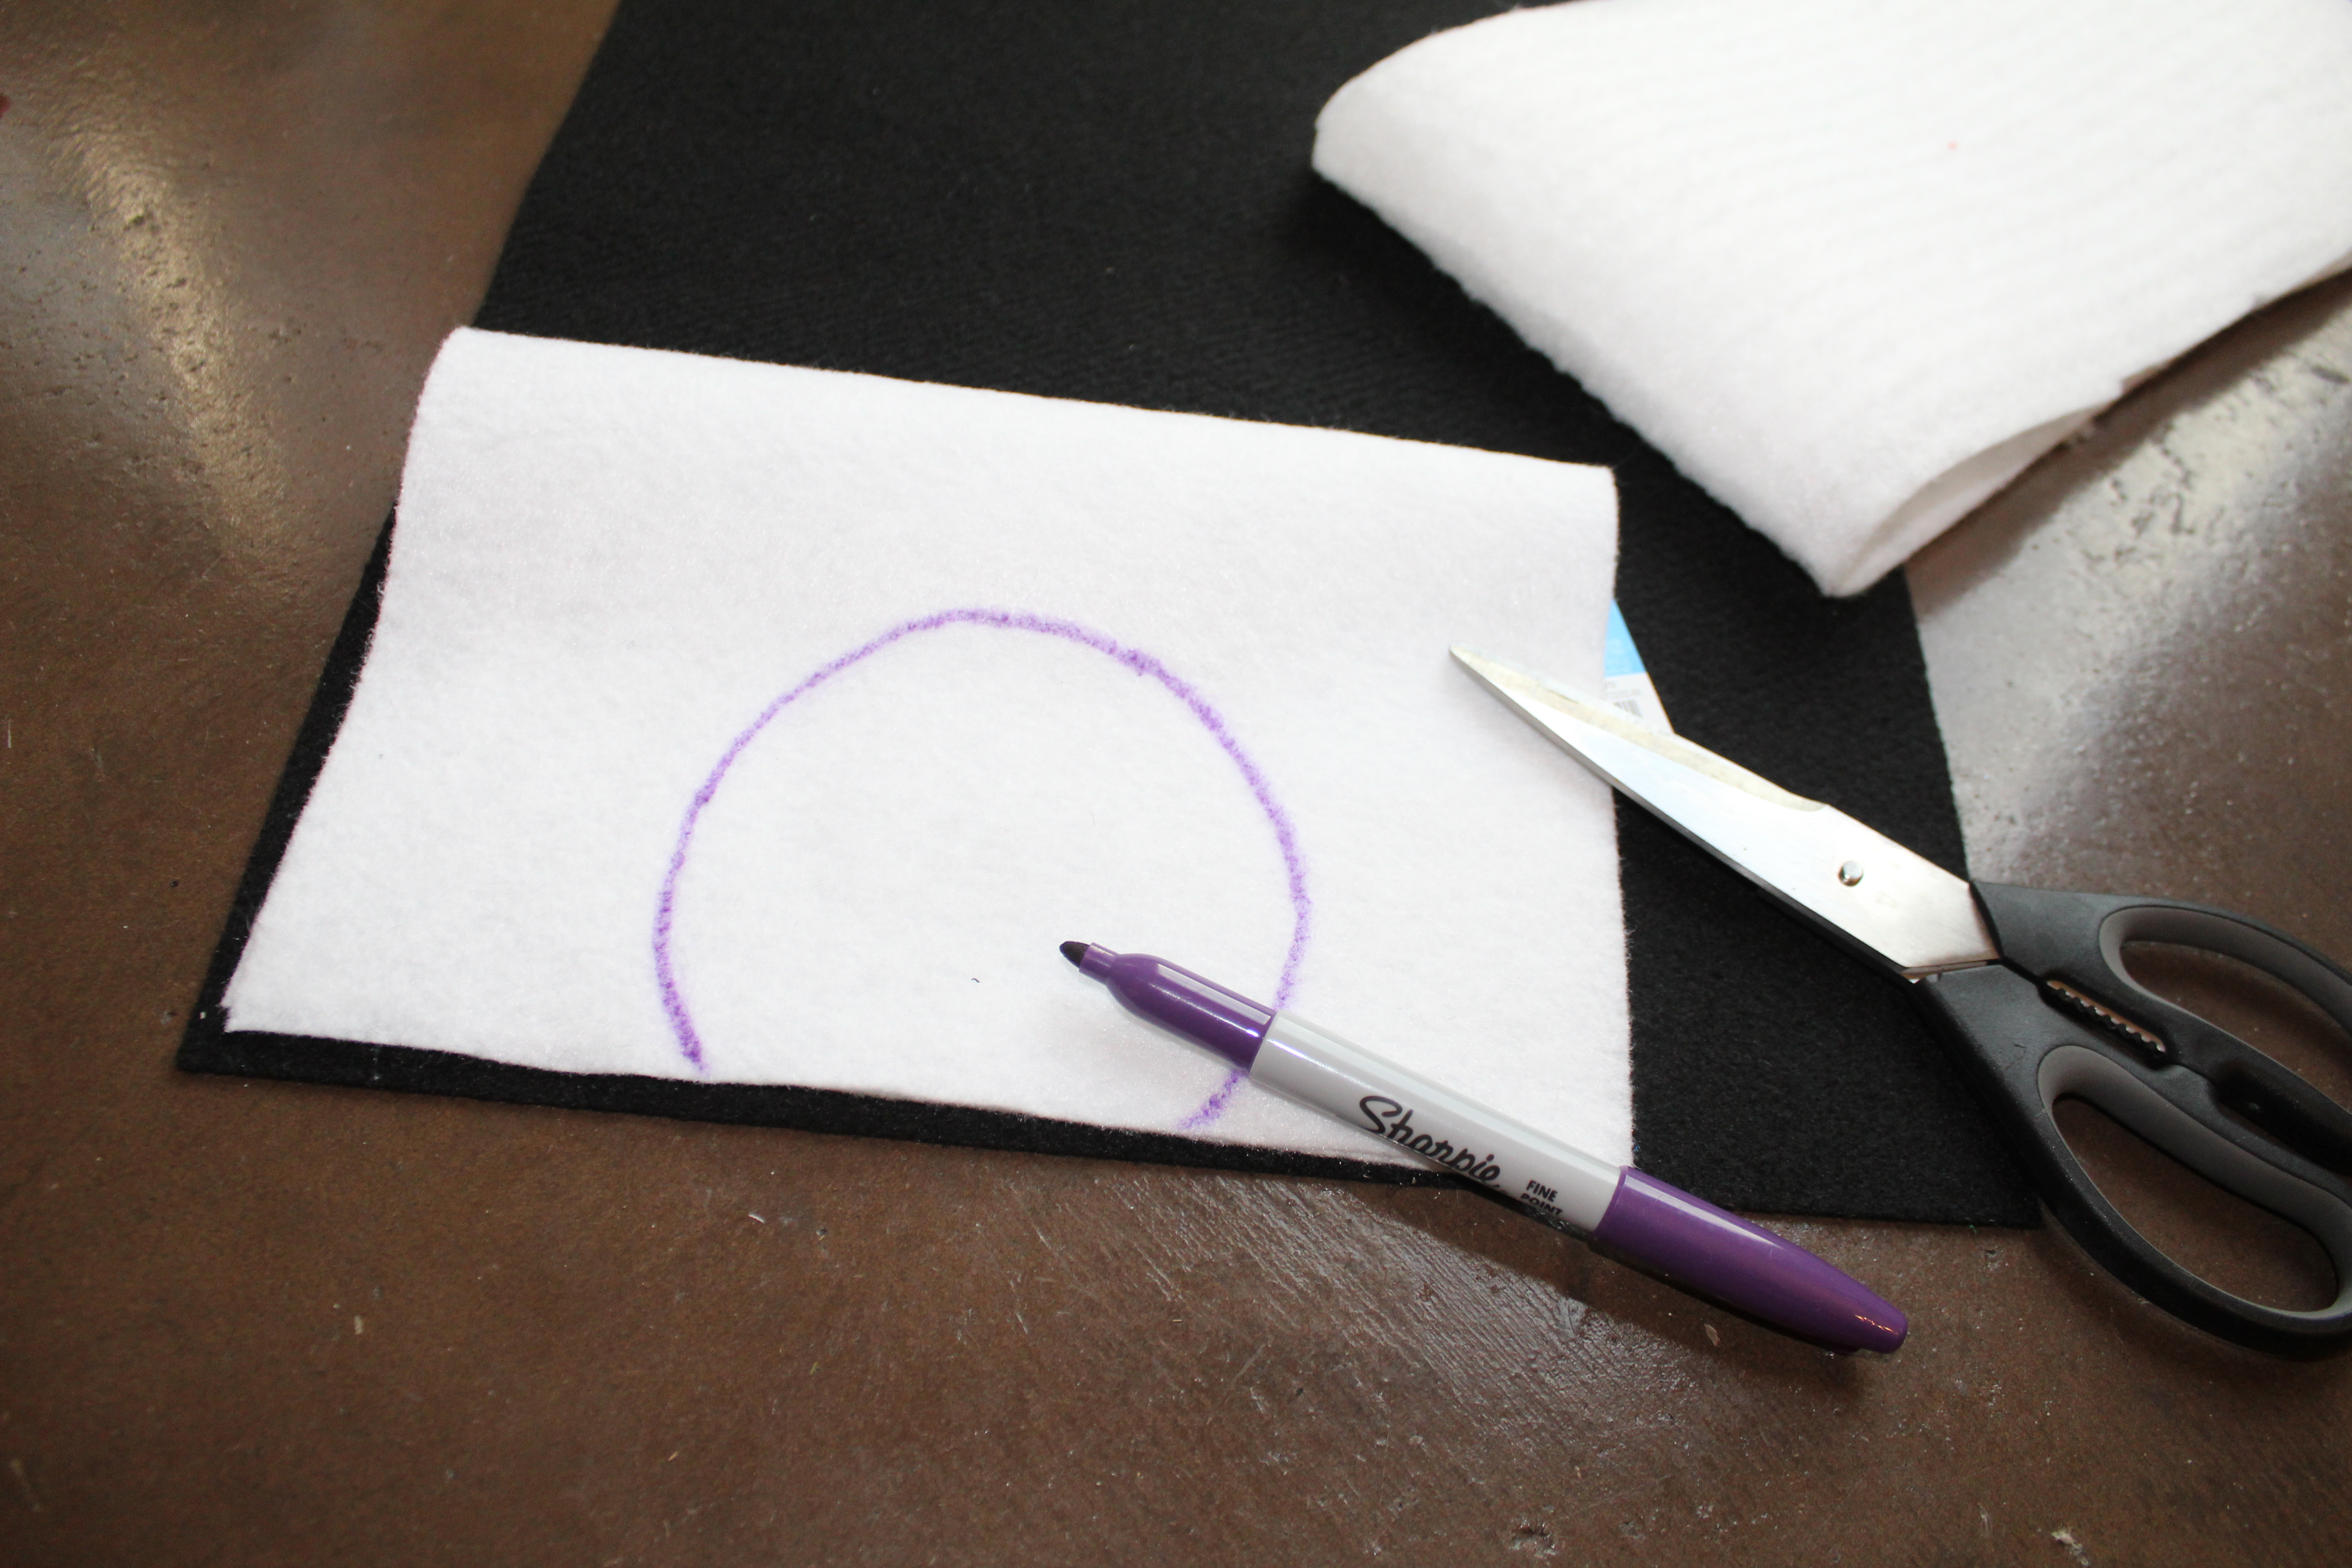
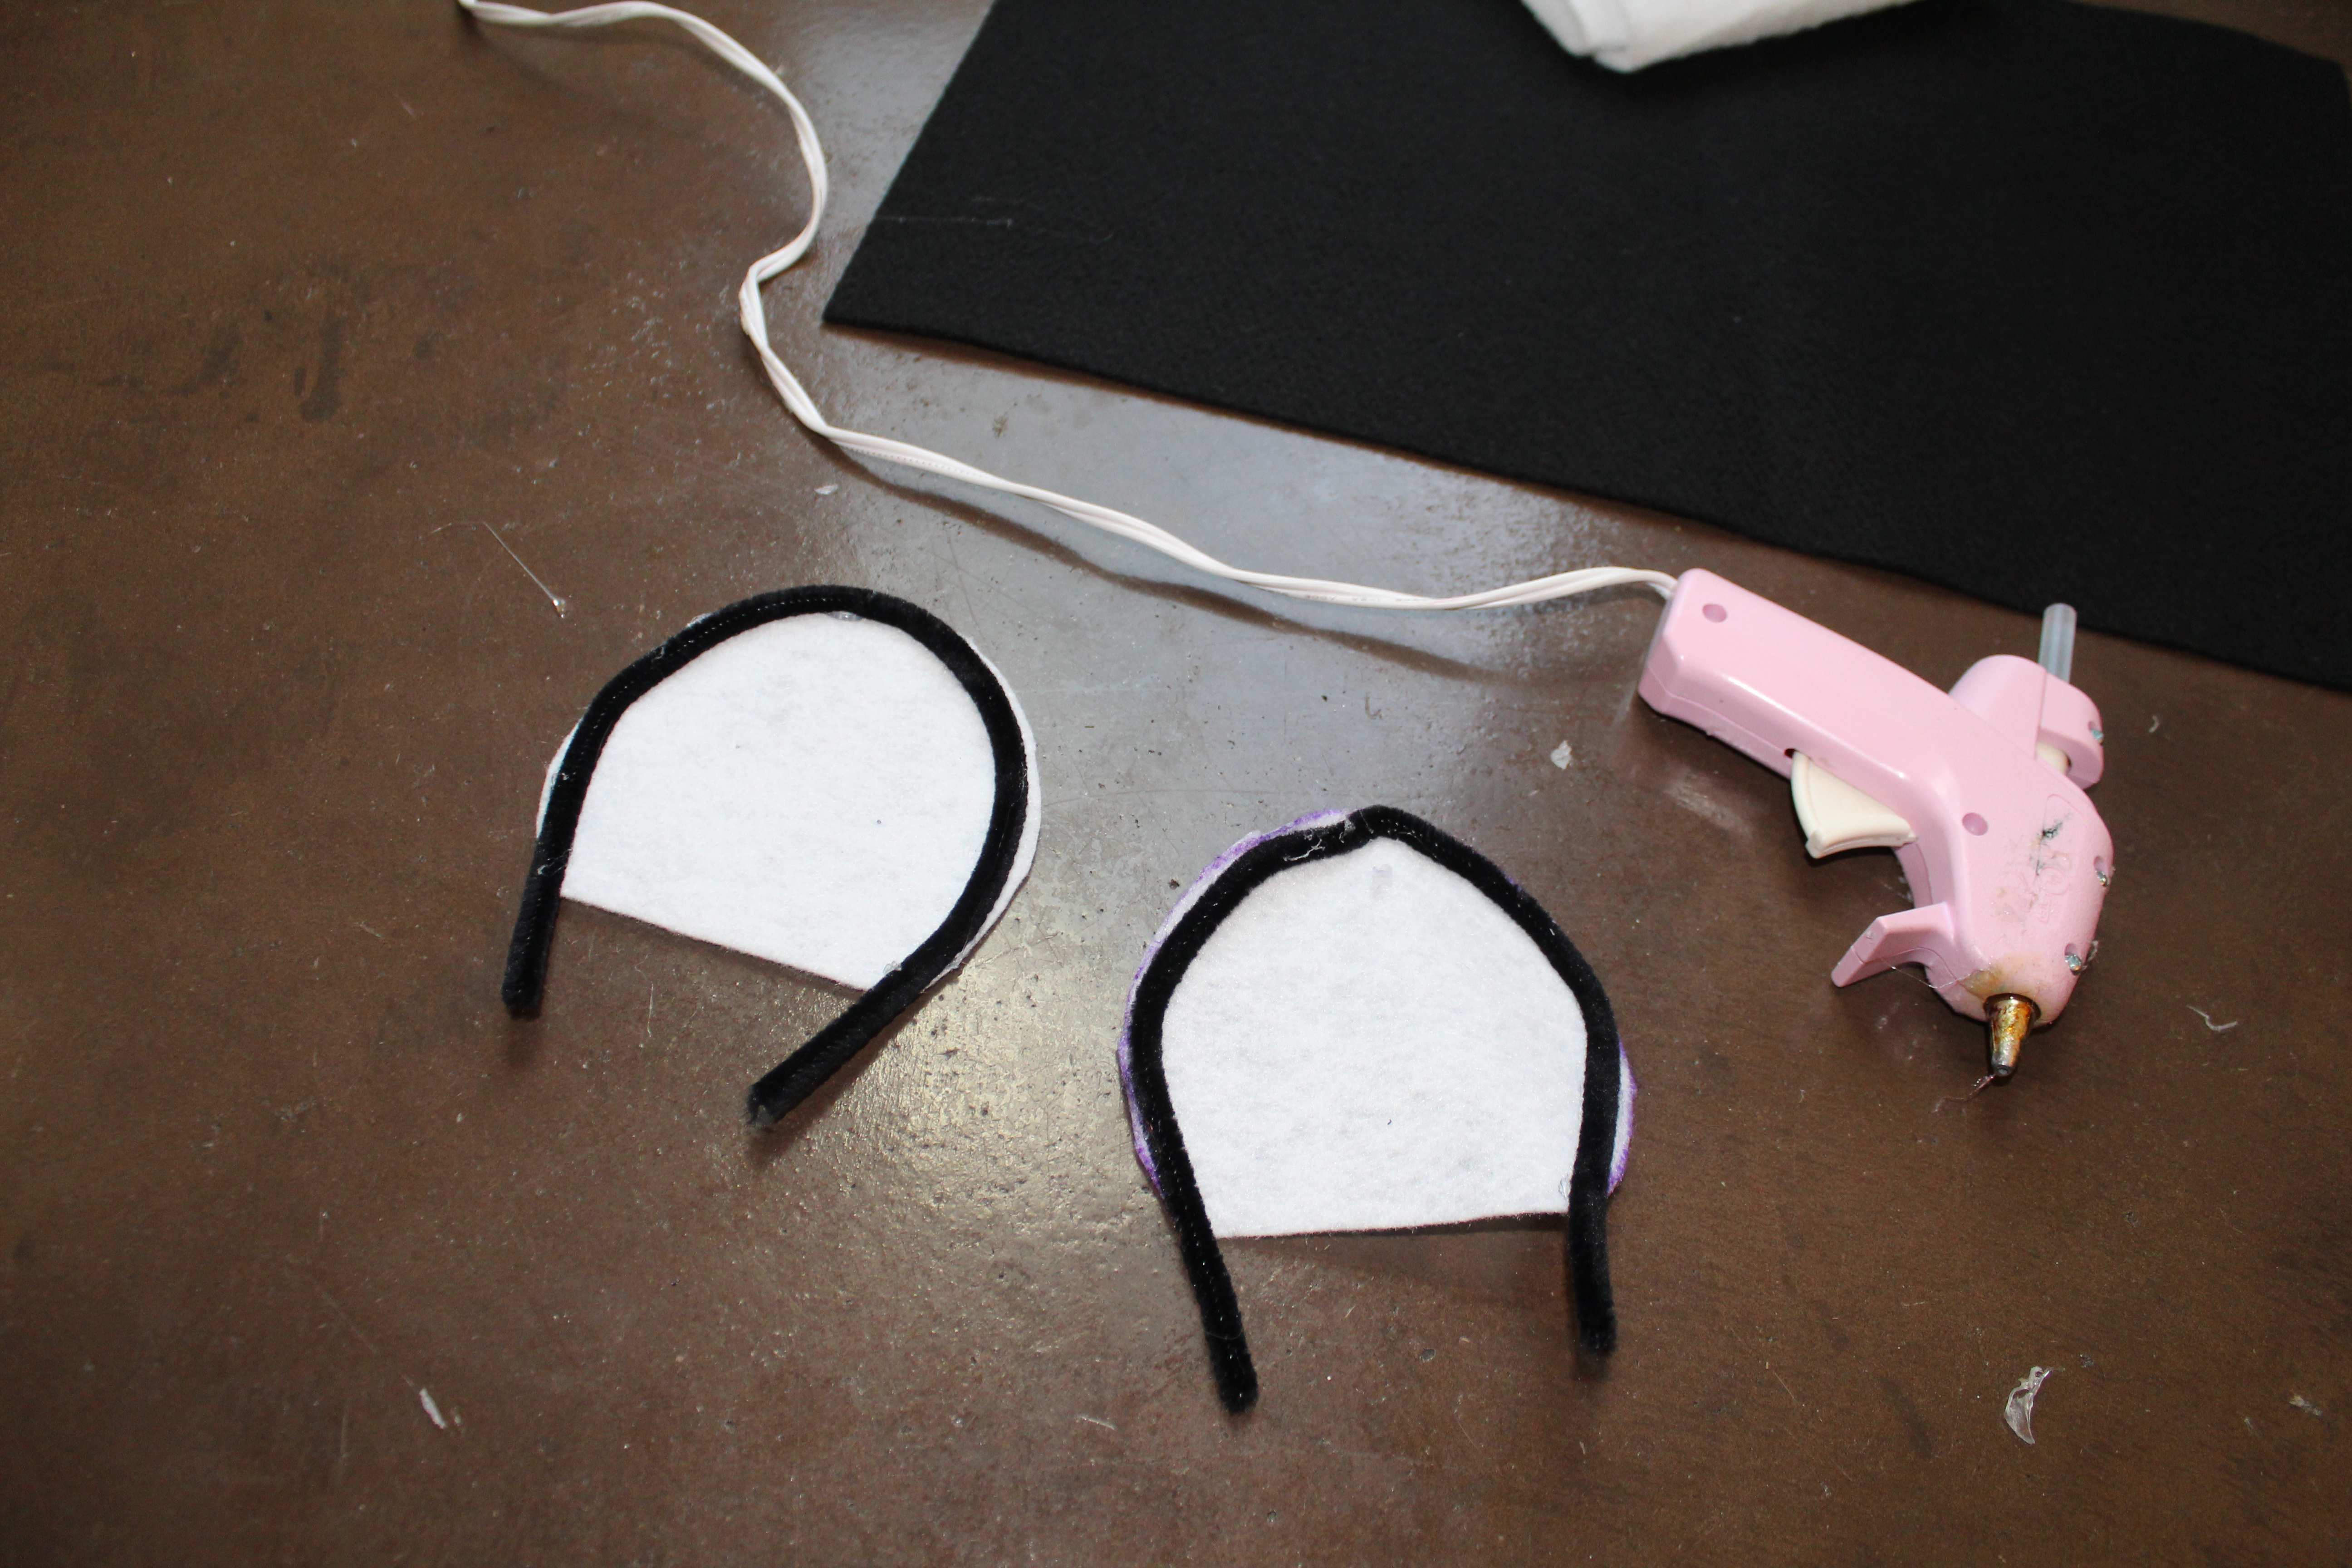
Step 2: Using your ears as a guide, trace an outline onto the felt batting. You will need enough to cover both sides of each ear, or four pieces total. The pipe cleaner should now be sandwiched between the felt batting.
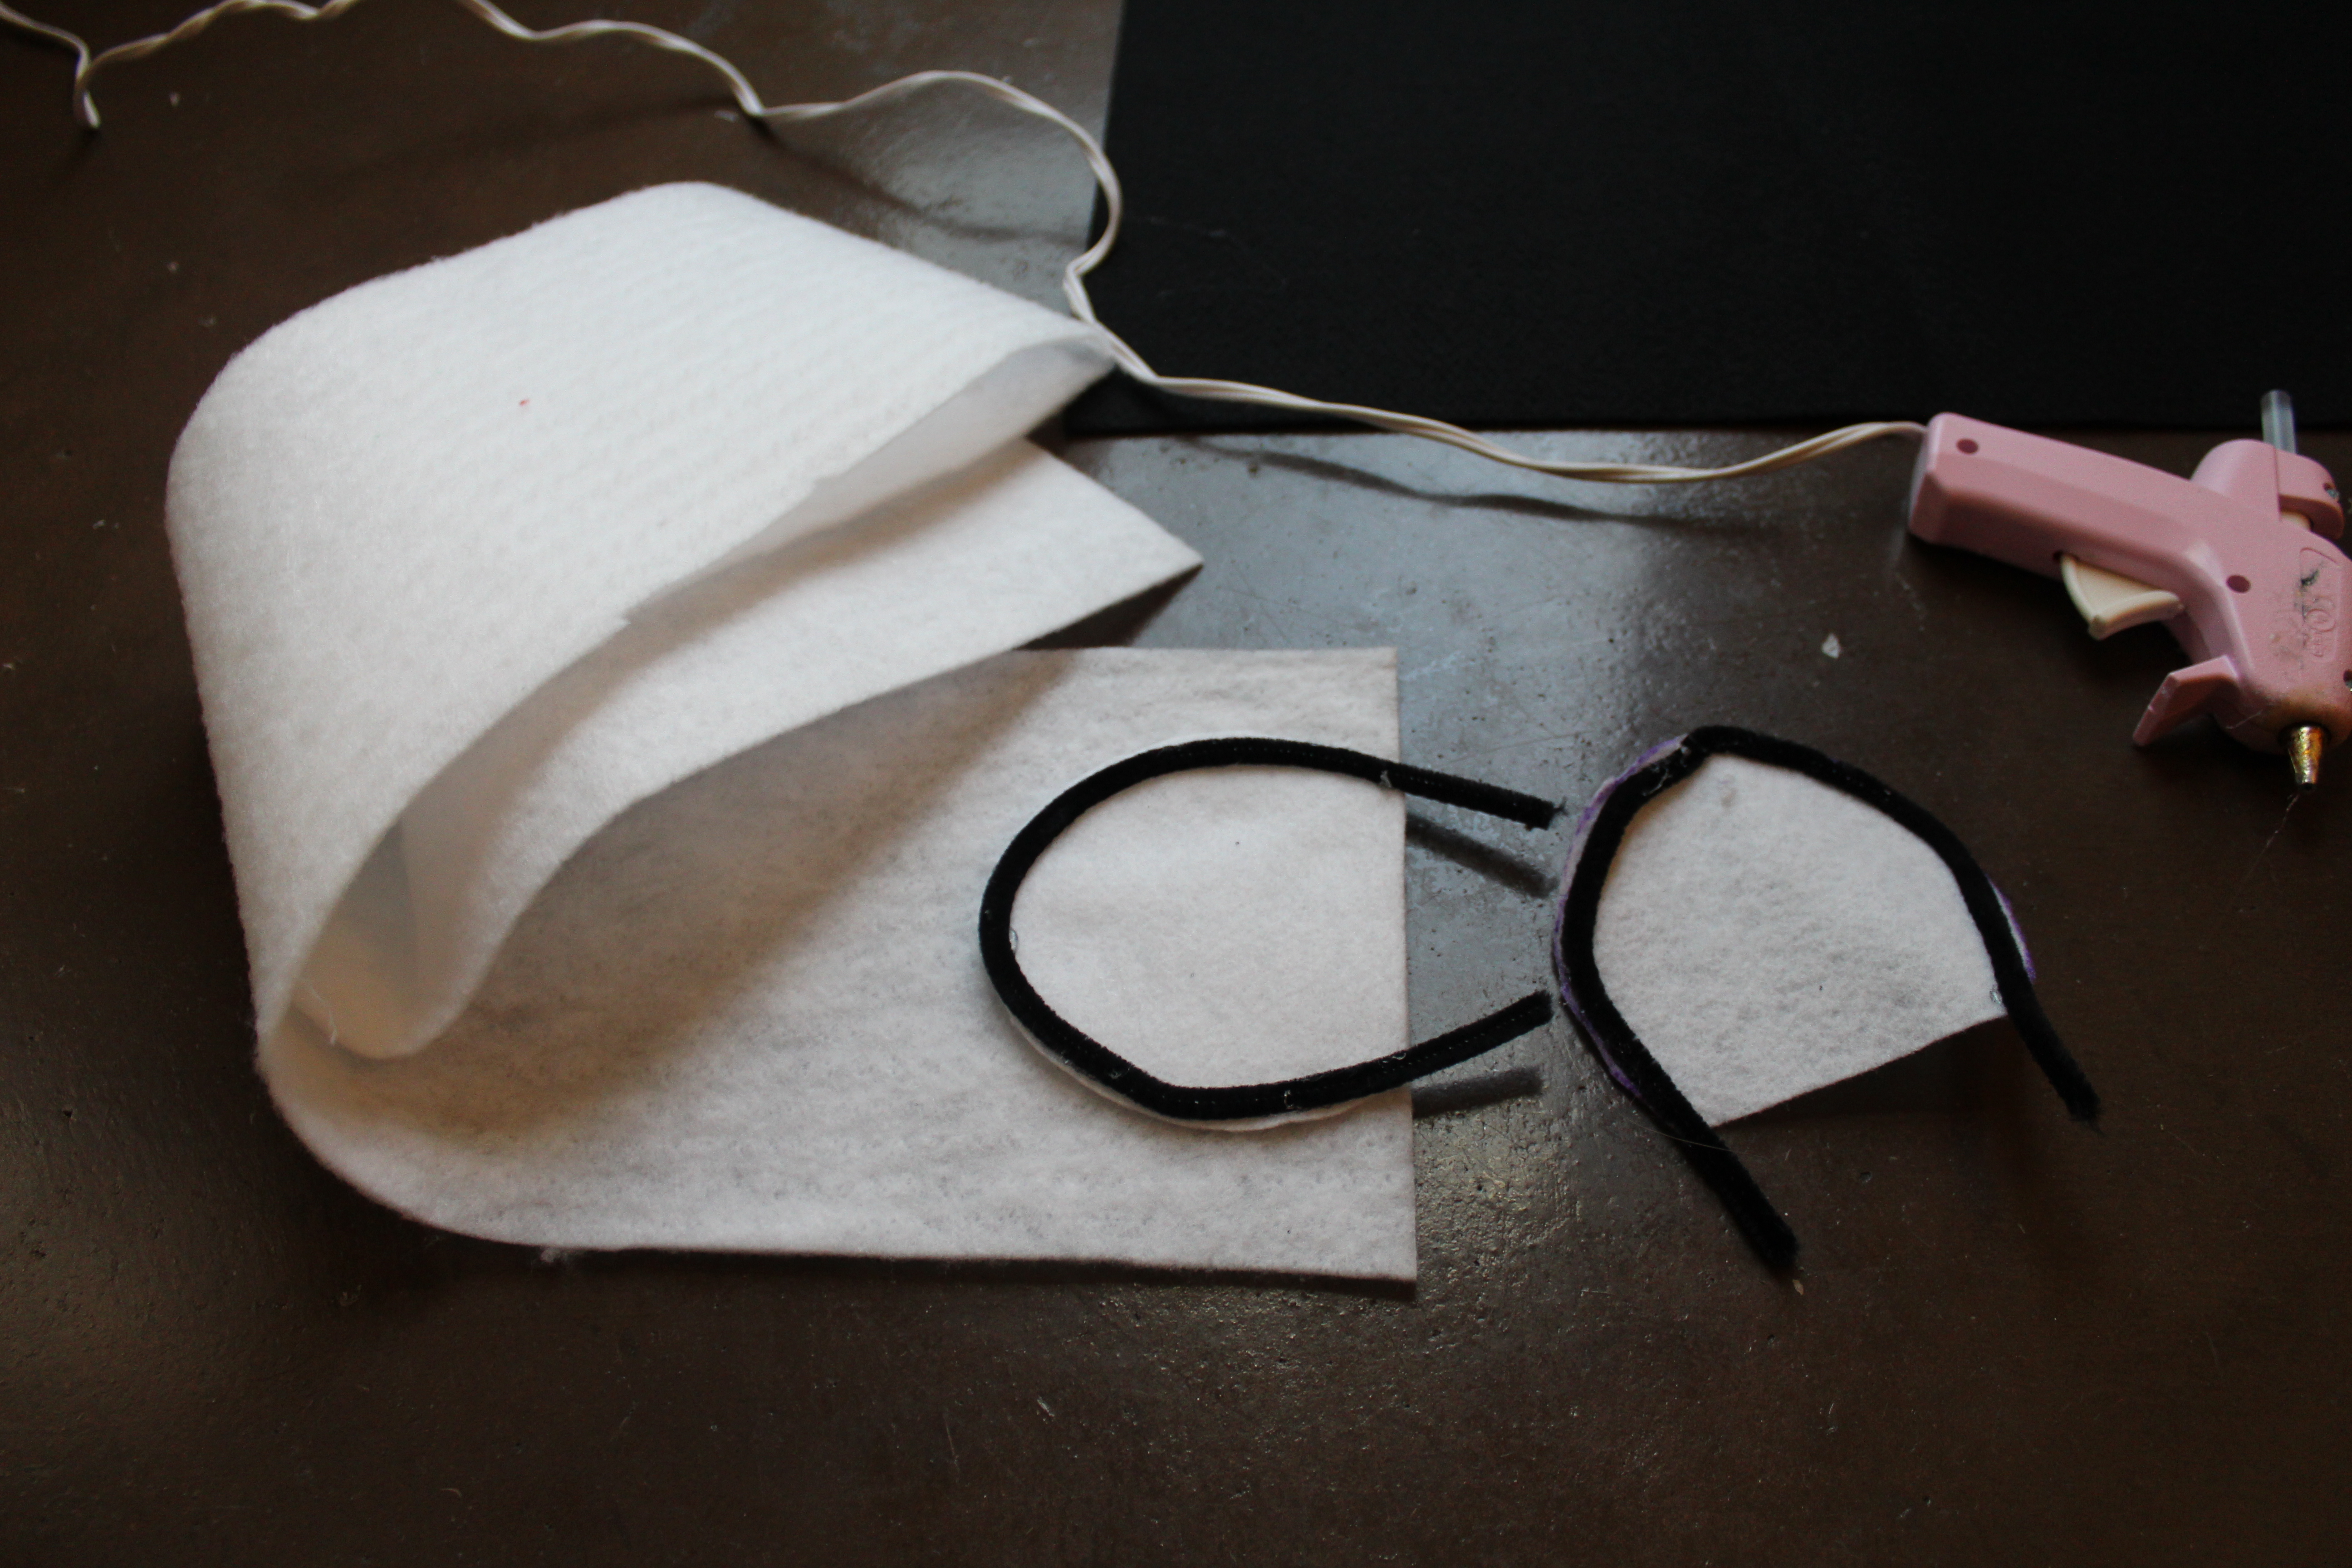

Step 3: Using your ears as a guide, again, trace an outline onto the piece of black felt. I folded my felt in such a way that when I cut, I was left with both sides of the ear connected in the middle. I was then able to fold the black felt over the top of the year and glue in place. If this is to difficult for you, you can always just cut out four separate pieces and glue one piece of black felt to each side of each ear.


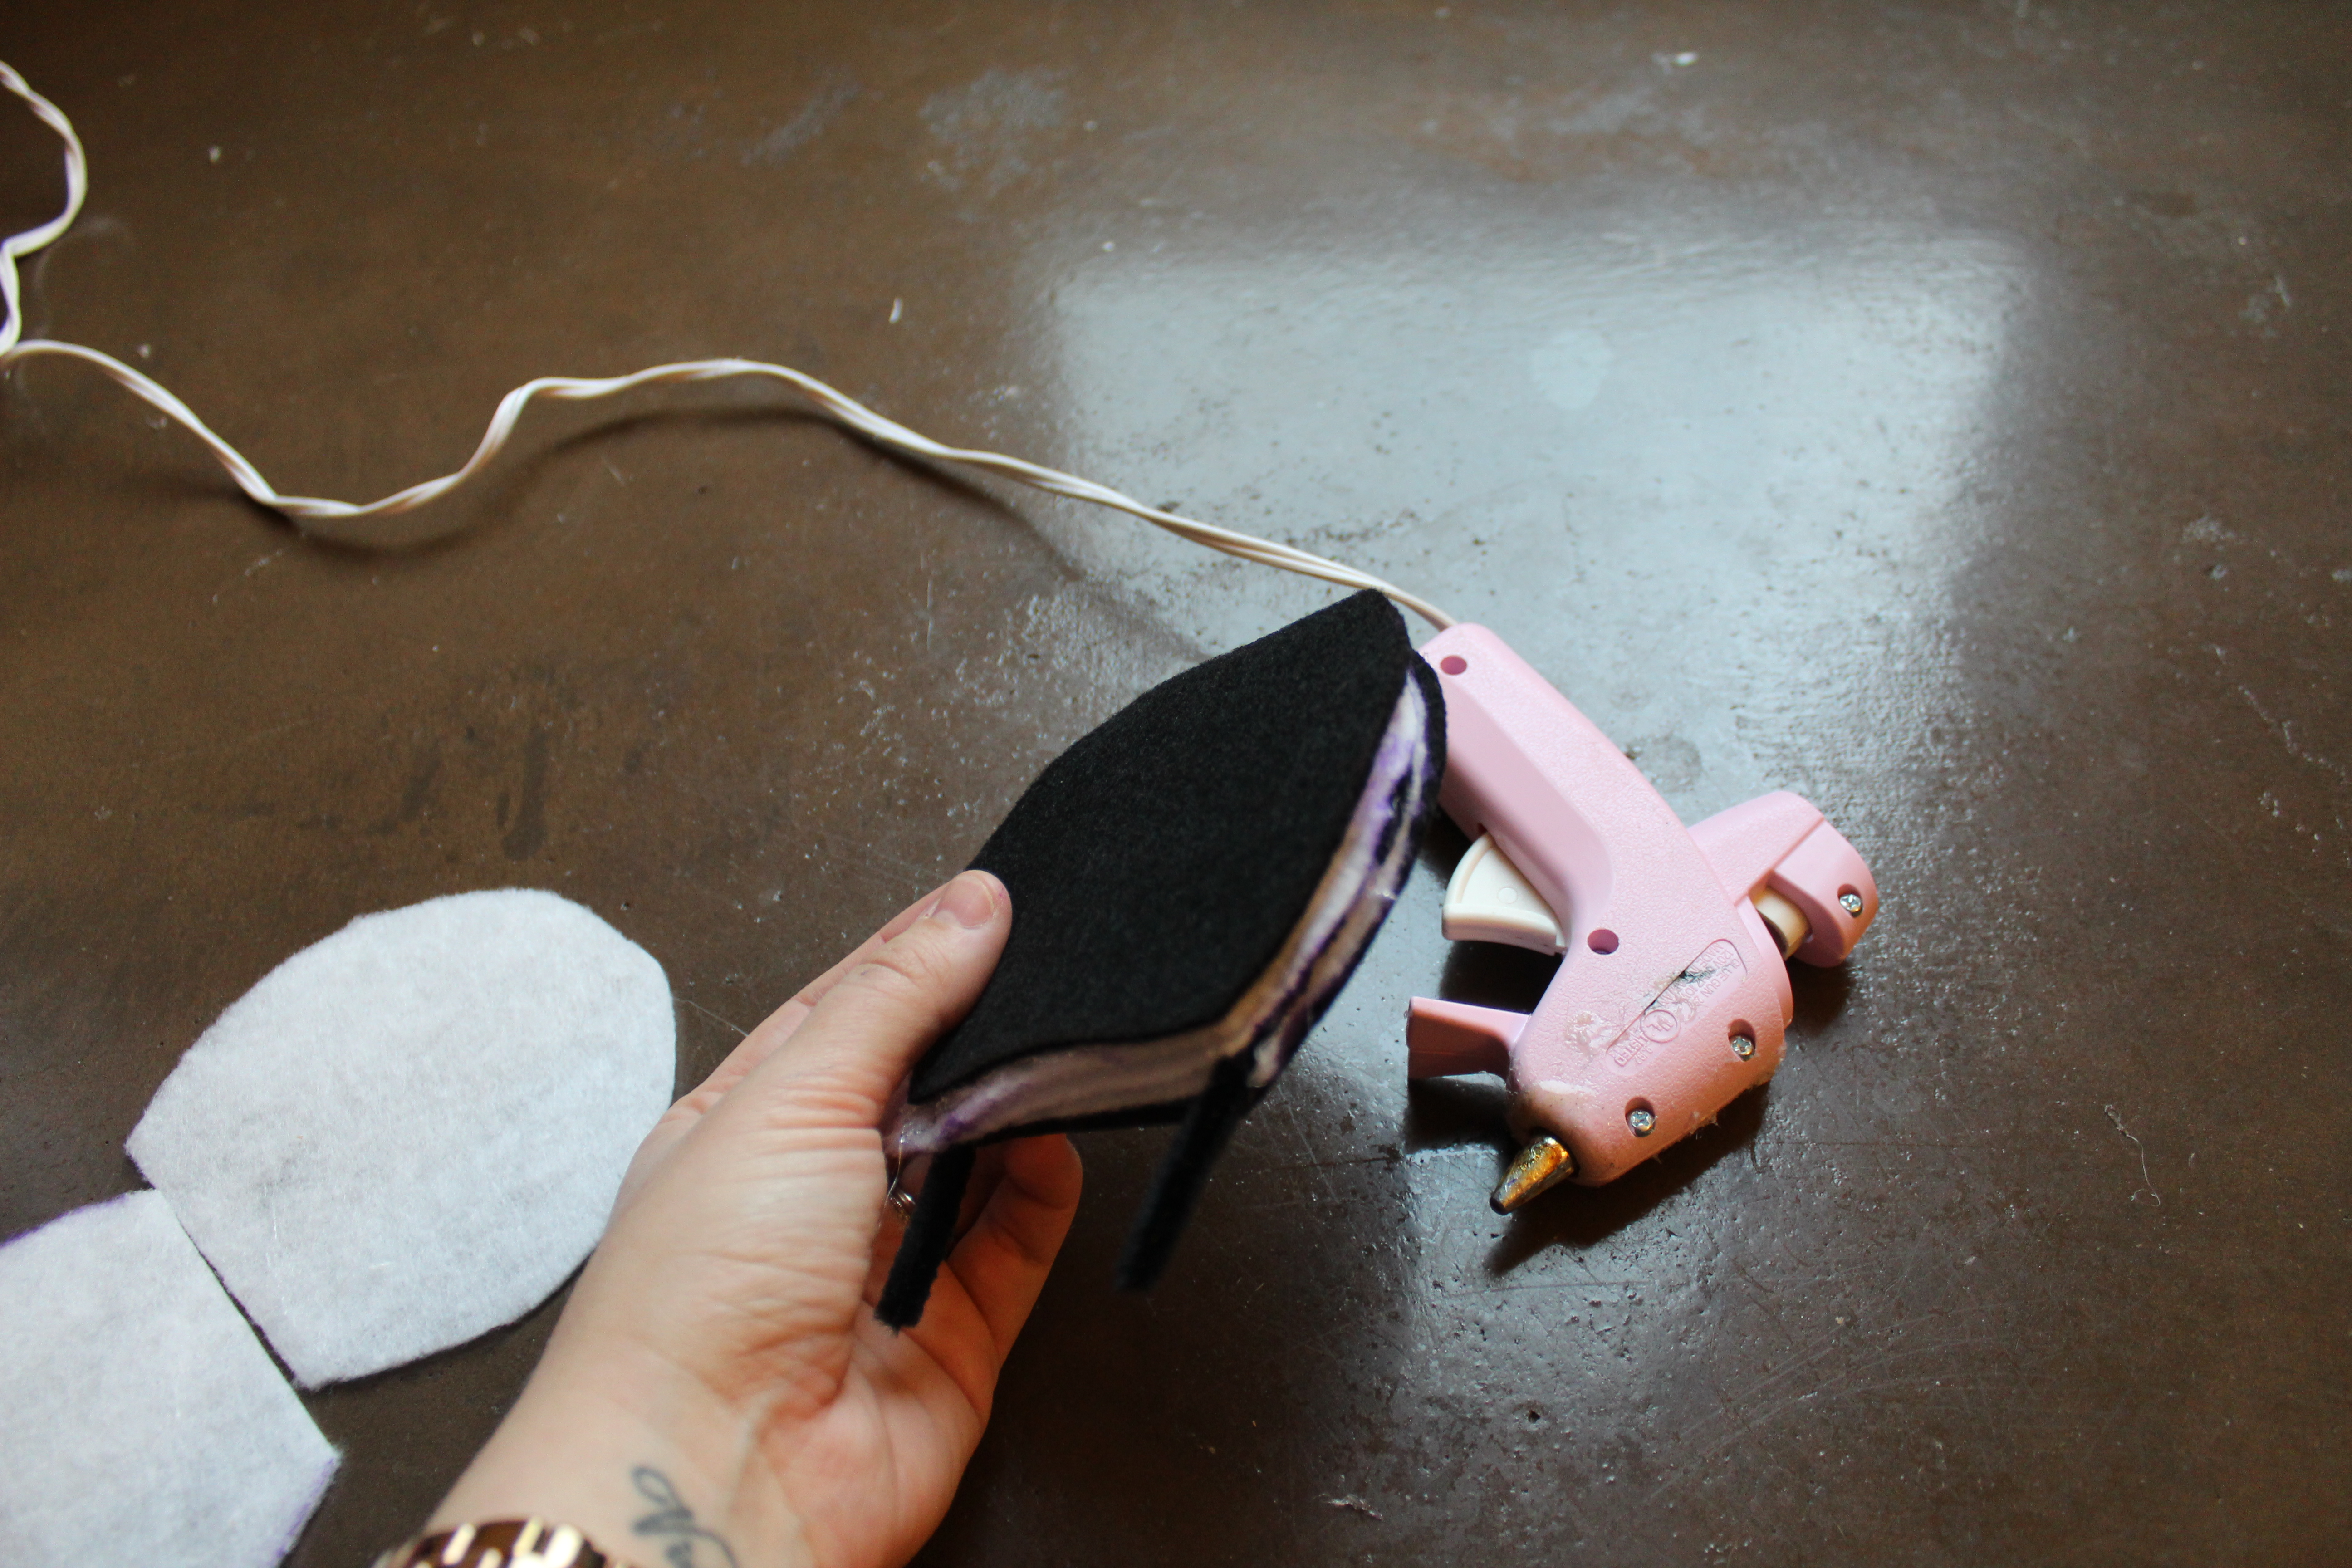
Step 4: Cut your sequin fabric so that you have a piece that is large enough to completely cover each ear. Hot glue the fabric to one side of the ear. This side will be nice and neat and will be the front of your headband. With the remainder of the fabric, carefully hot glue it to the other side of the ears, making sure that the black felt is completely covered. I tried to make it as neat as possible so it would not look sloppy from behind.

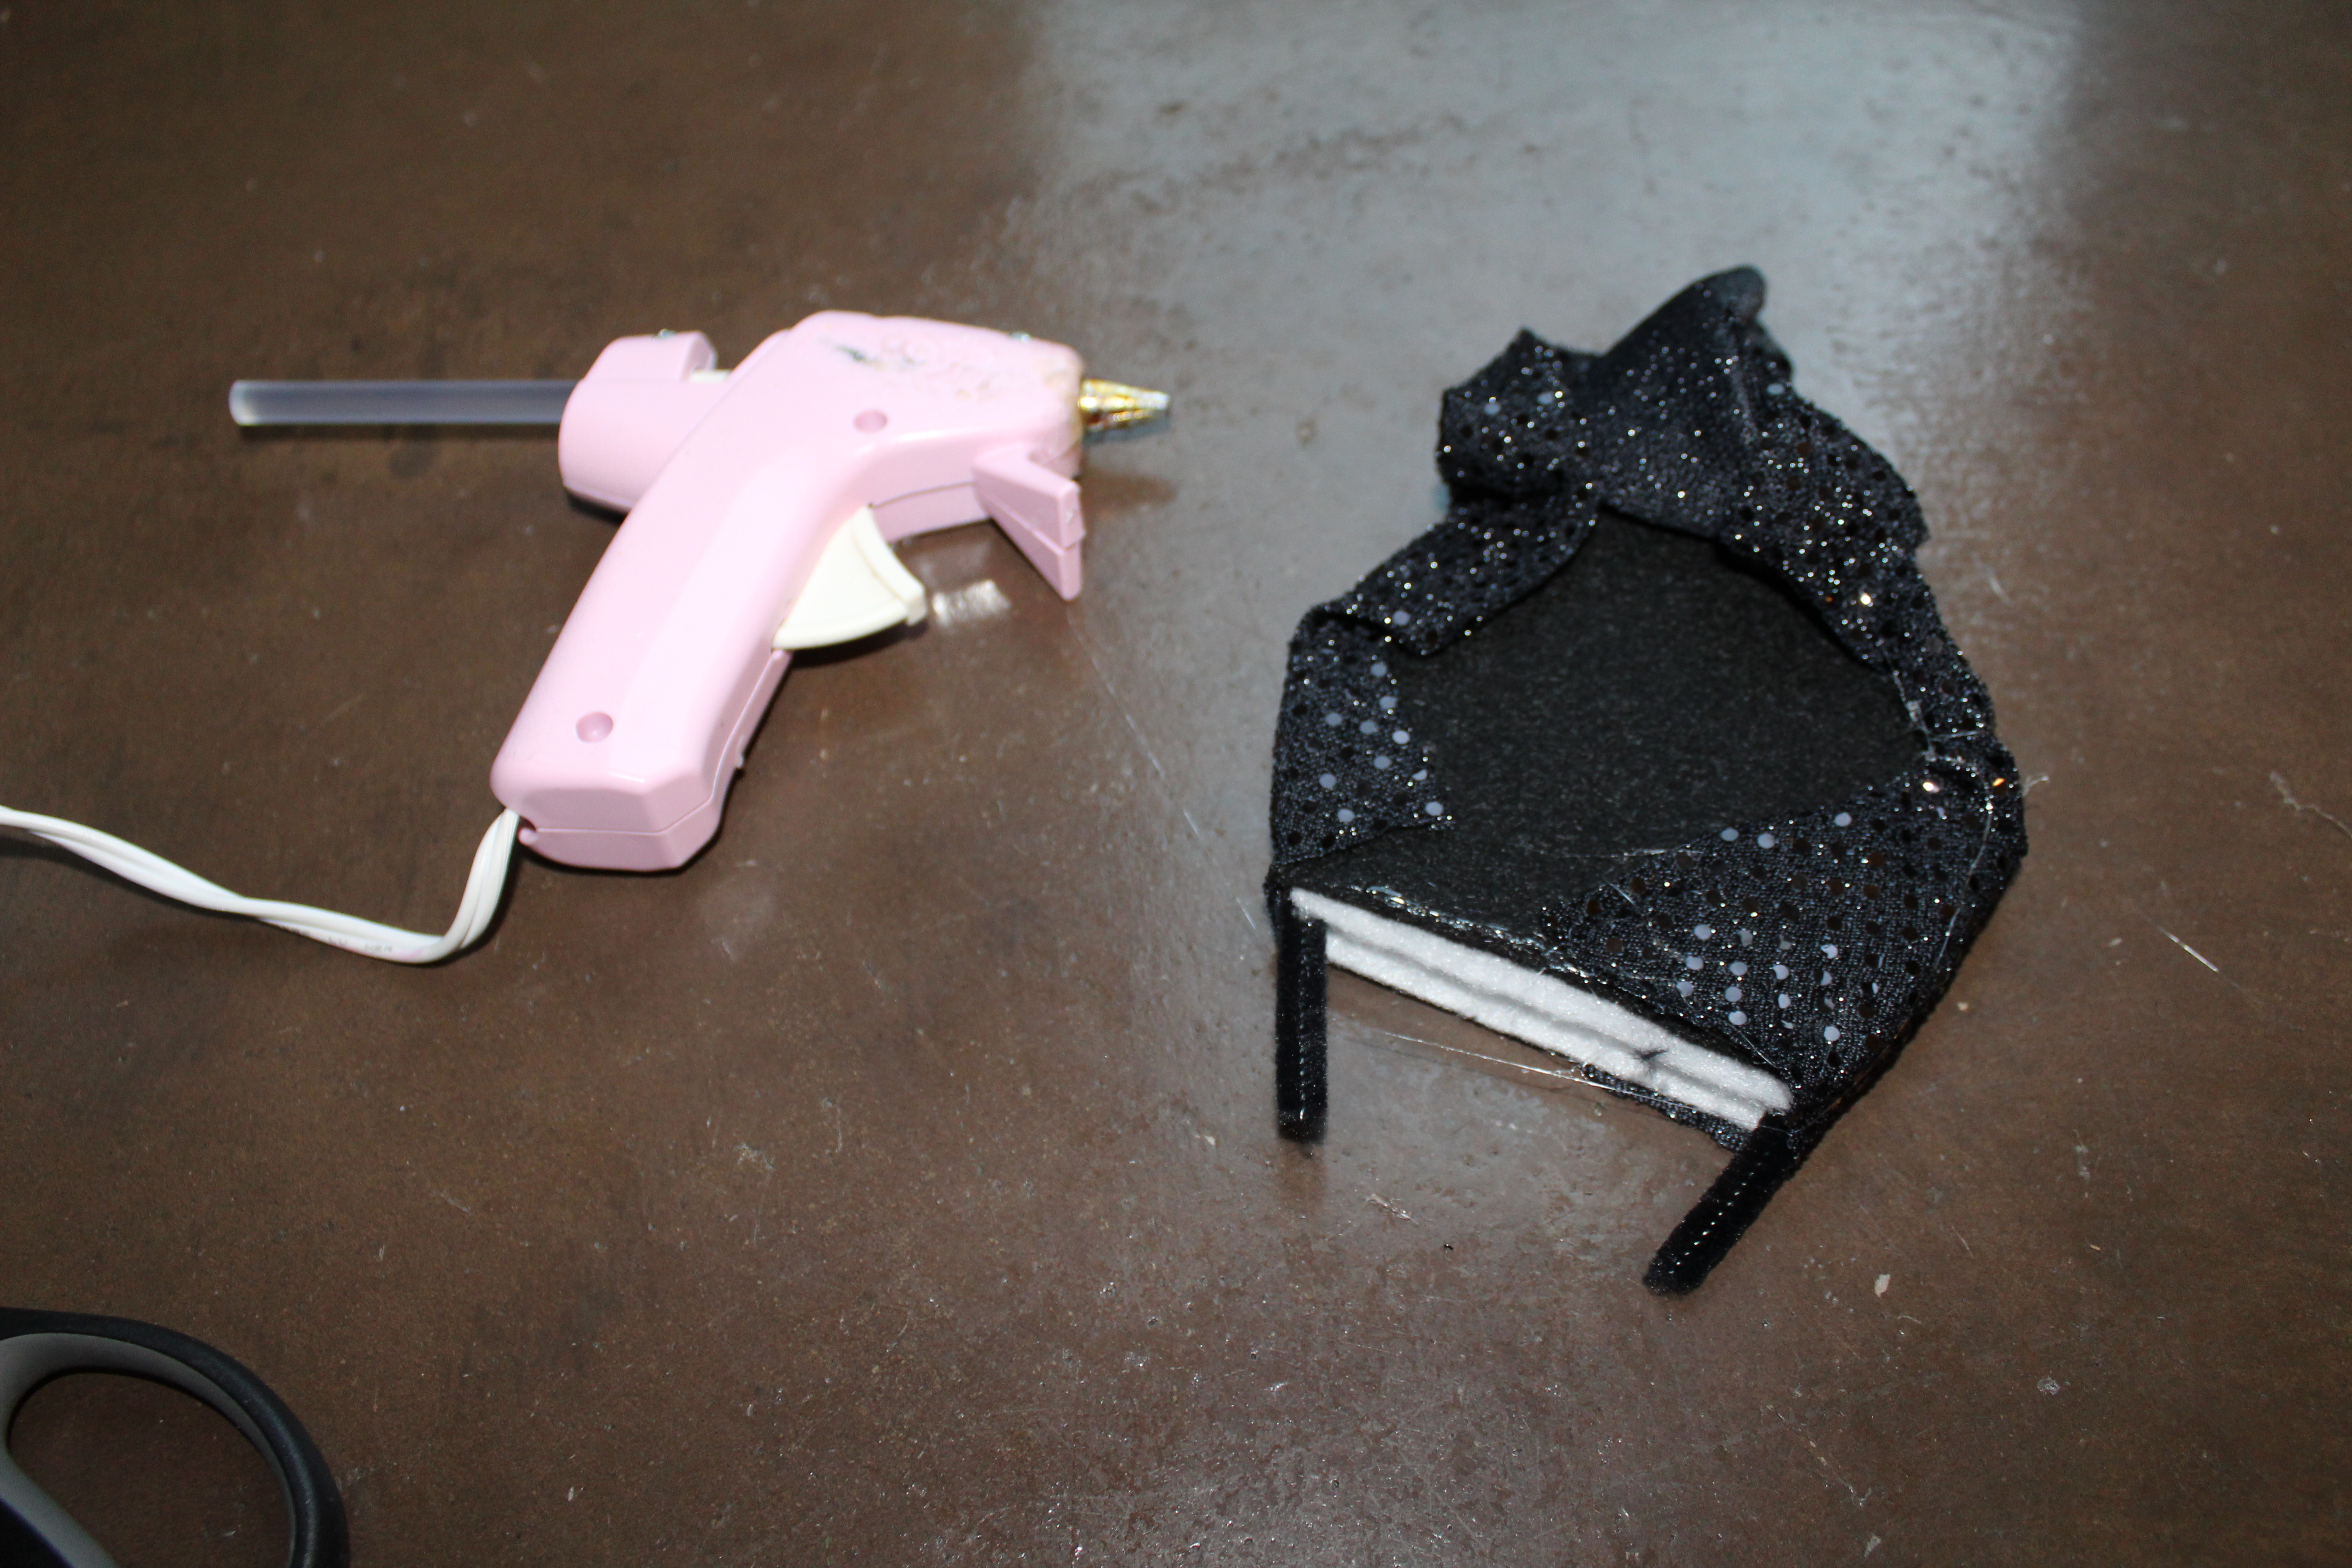
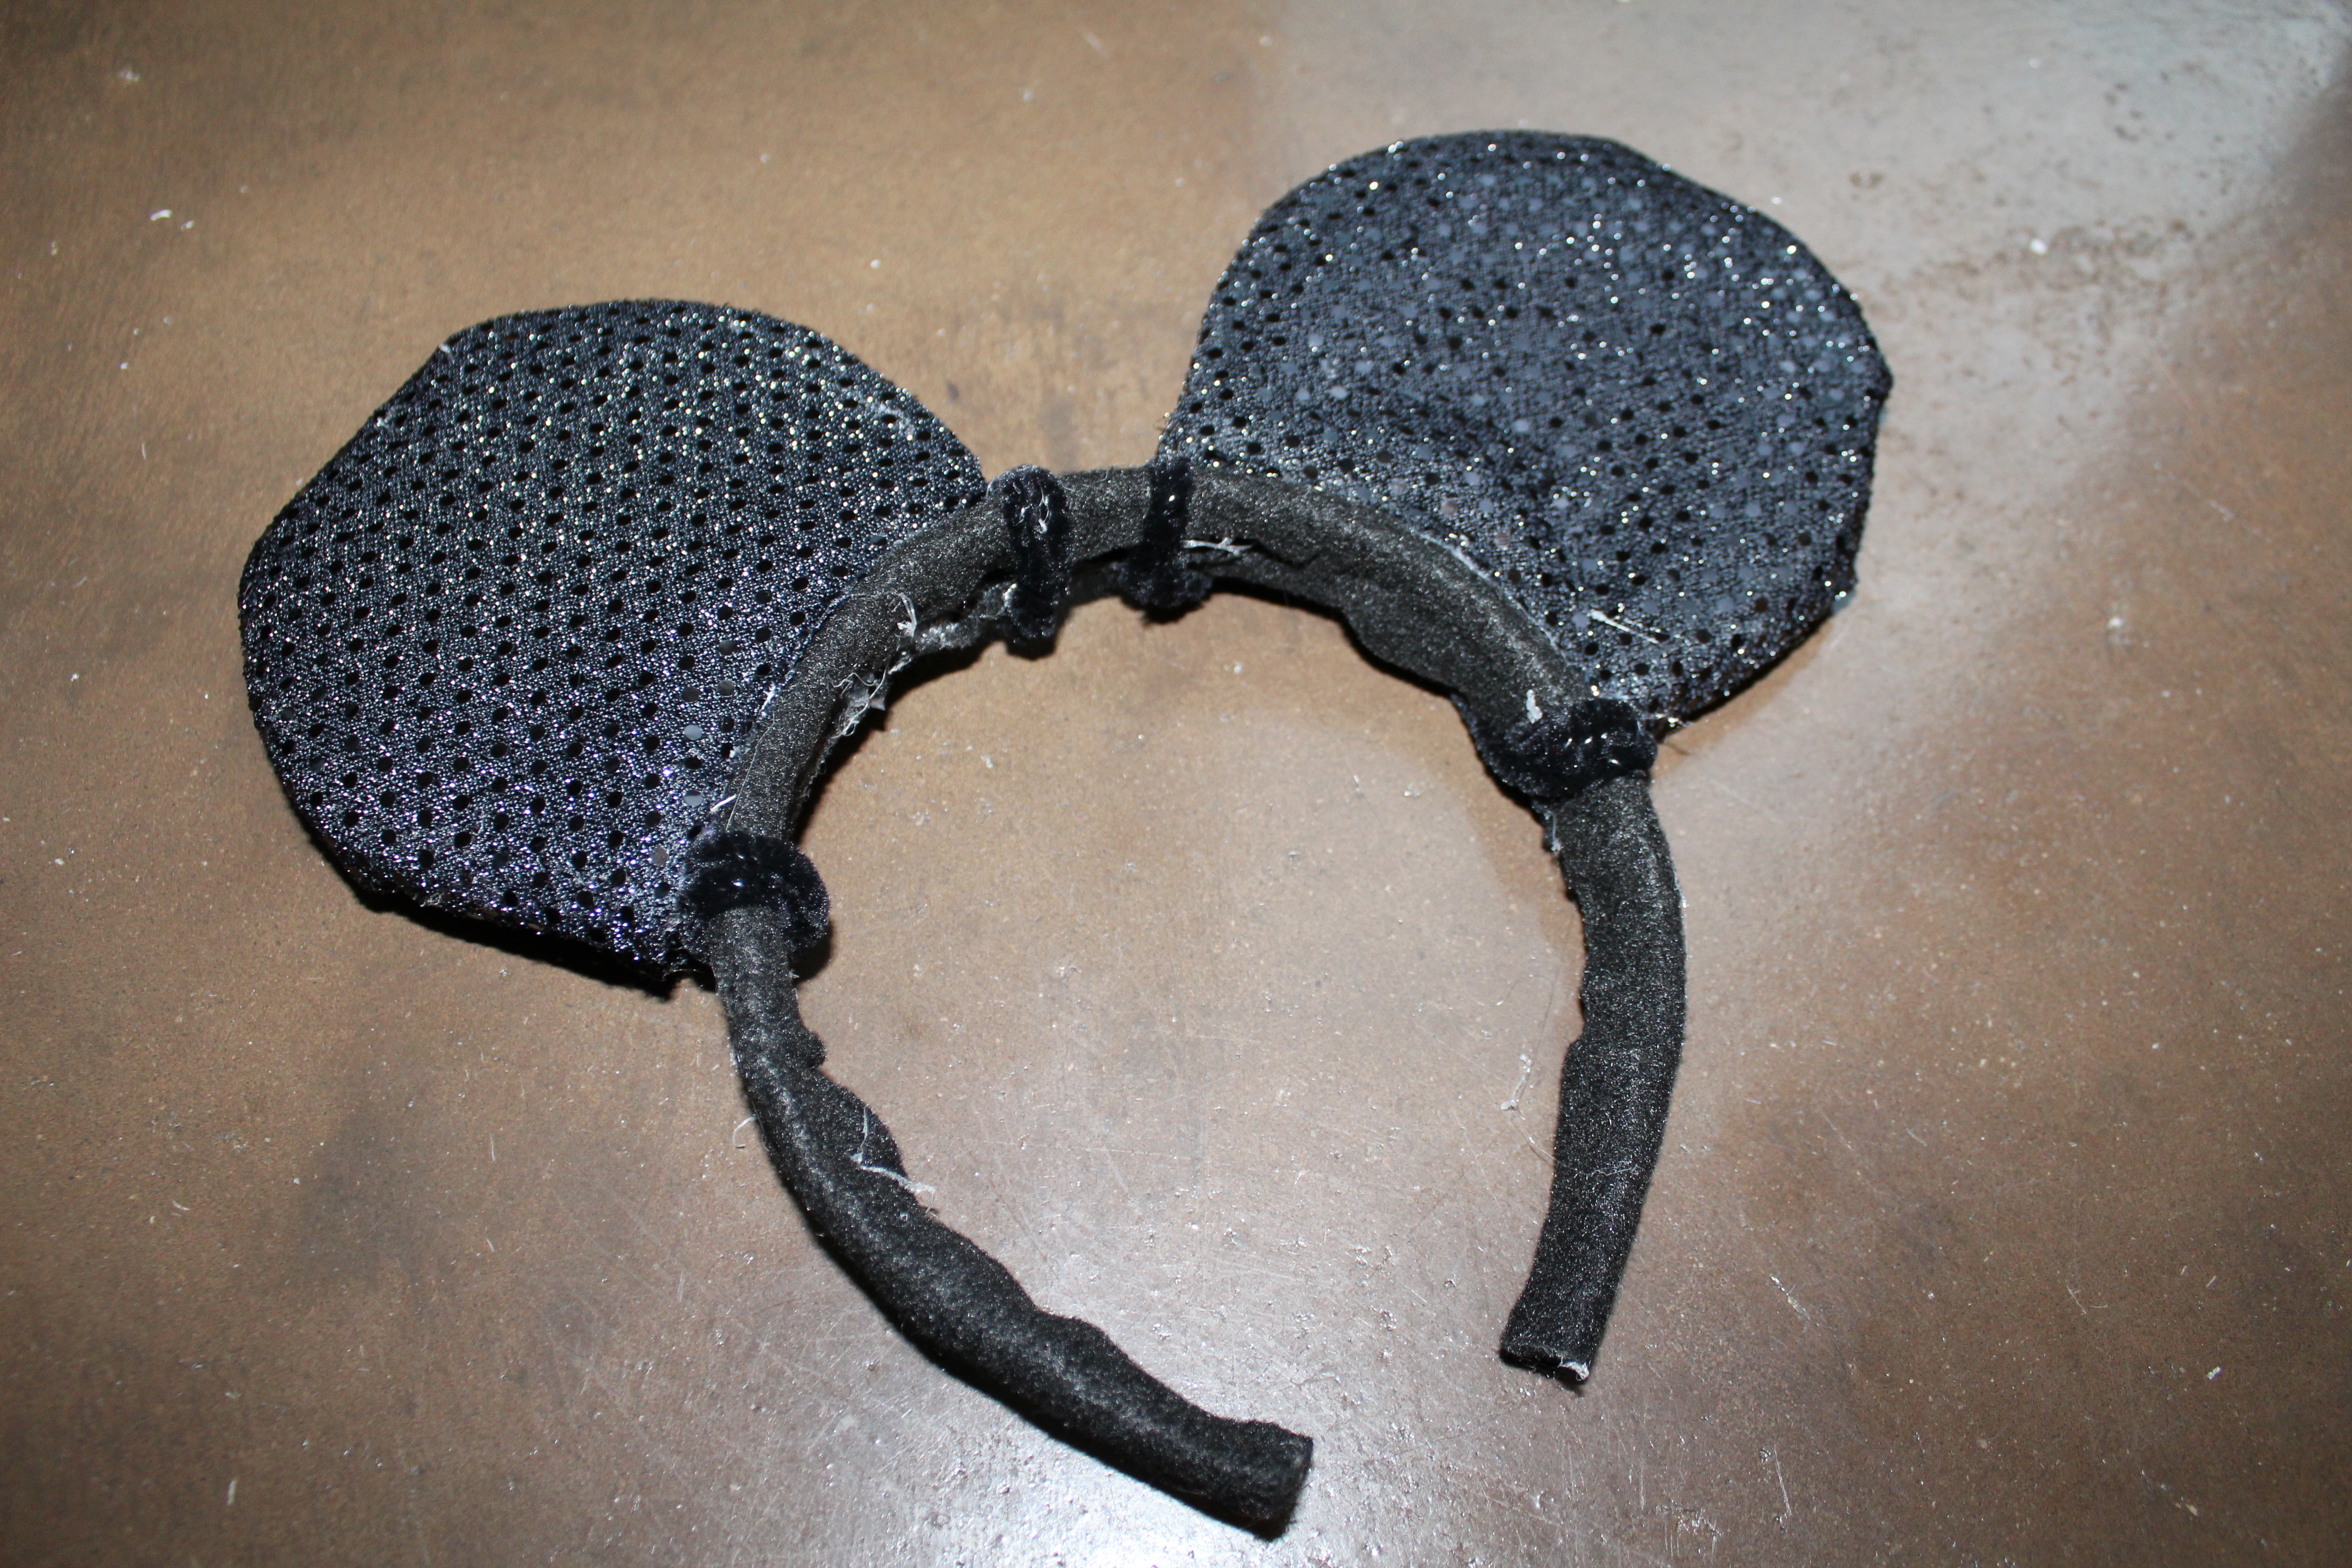
Step 5: Using the rest of the black felt, cover your headband. I hot glue down the center of the headband first. I then trimmed up my edges and folded the remainder, hot gluing it to the underside of the headband. You will have to hold it in place for a bit to ensure that the glue is somewhat dry. If not, you run the risk of it peeling back.

Step 6: Attach an additional pipe cleaner to the side of each ear. You can do this by twisting the small piece that you had sticking out around each pipe cleaner. Then, wrap the pipe cleaners around the headband, securing the ears in place. You may have to play with it a little bit to get it to sit exactly how you envisioned. Once I had my ears where I wanted them, I trimmed off the extra pipe cleaner and hot glued the ears in place on the headband. You will have to hold it a little bit until the glue gets somewhat dry. I also used a bit of hot glue to secure the pipe cleaners to the headband. This would prevent them from coming untwisted in the future.
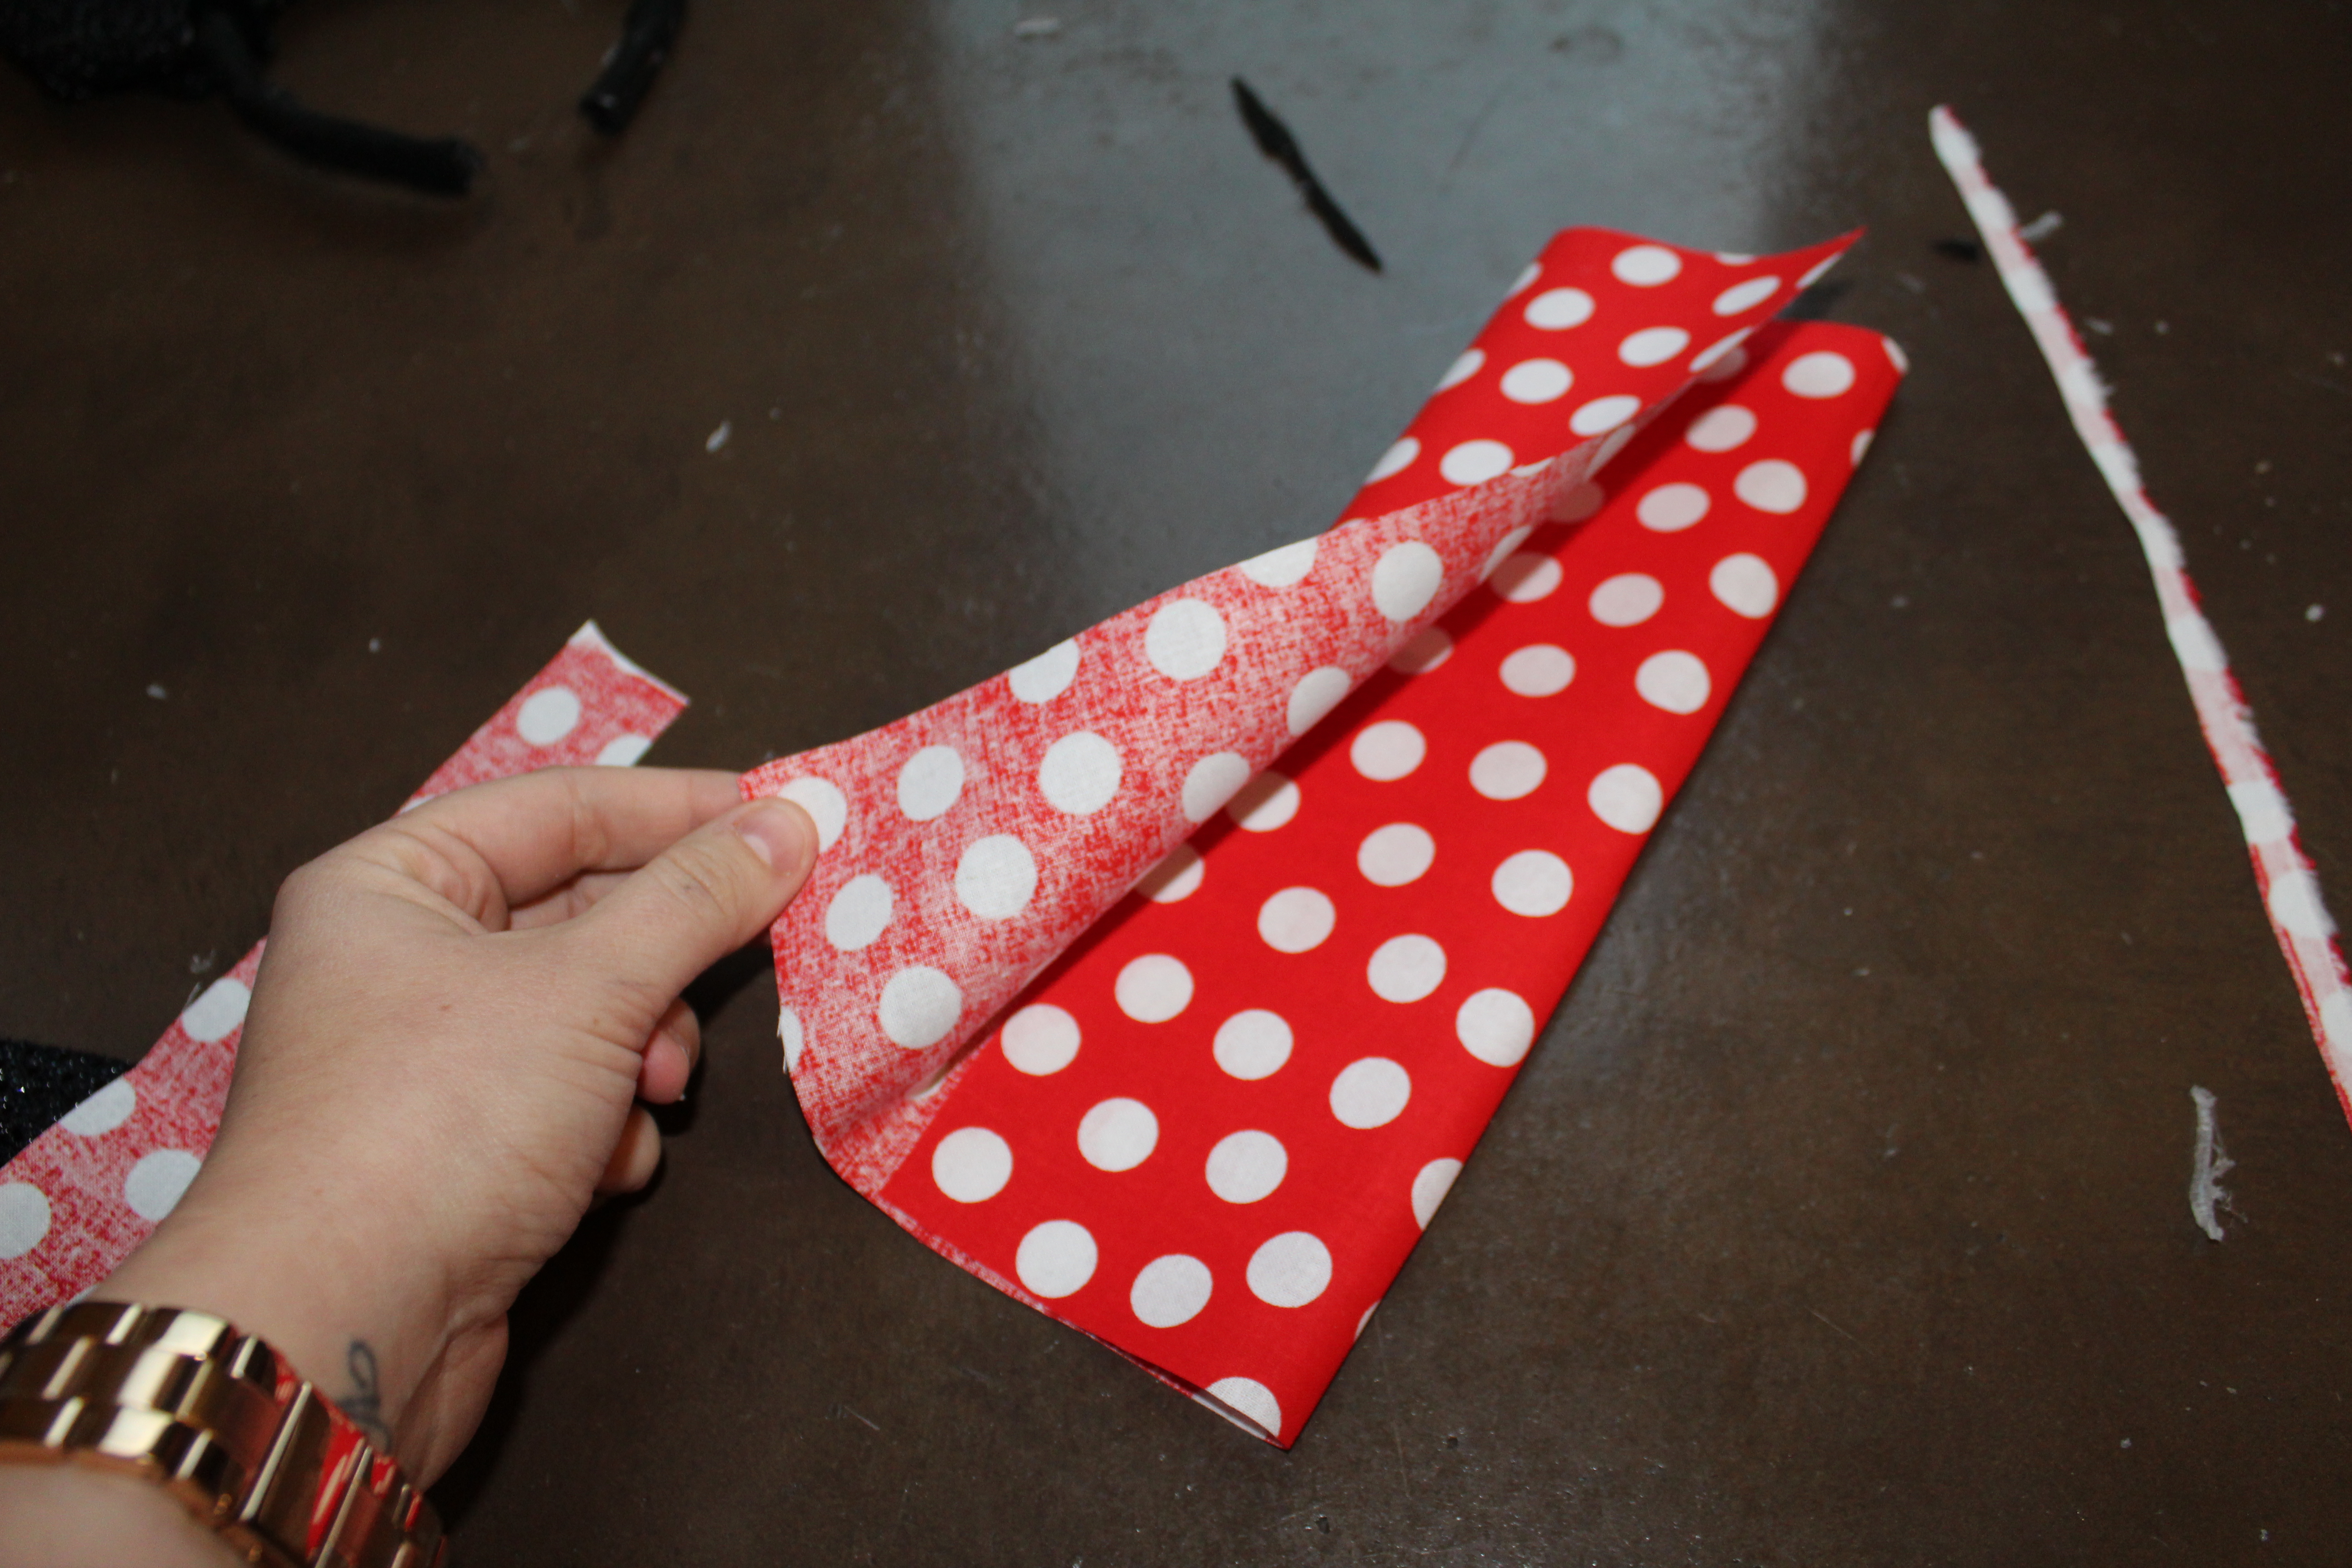
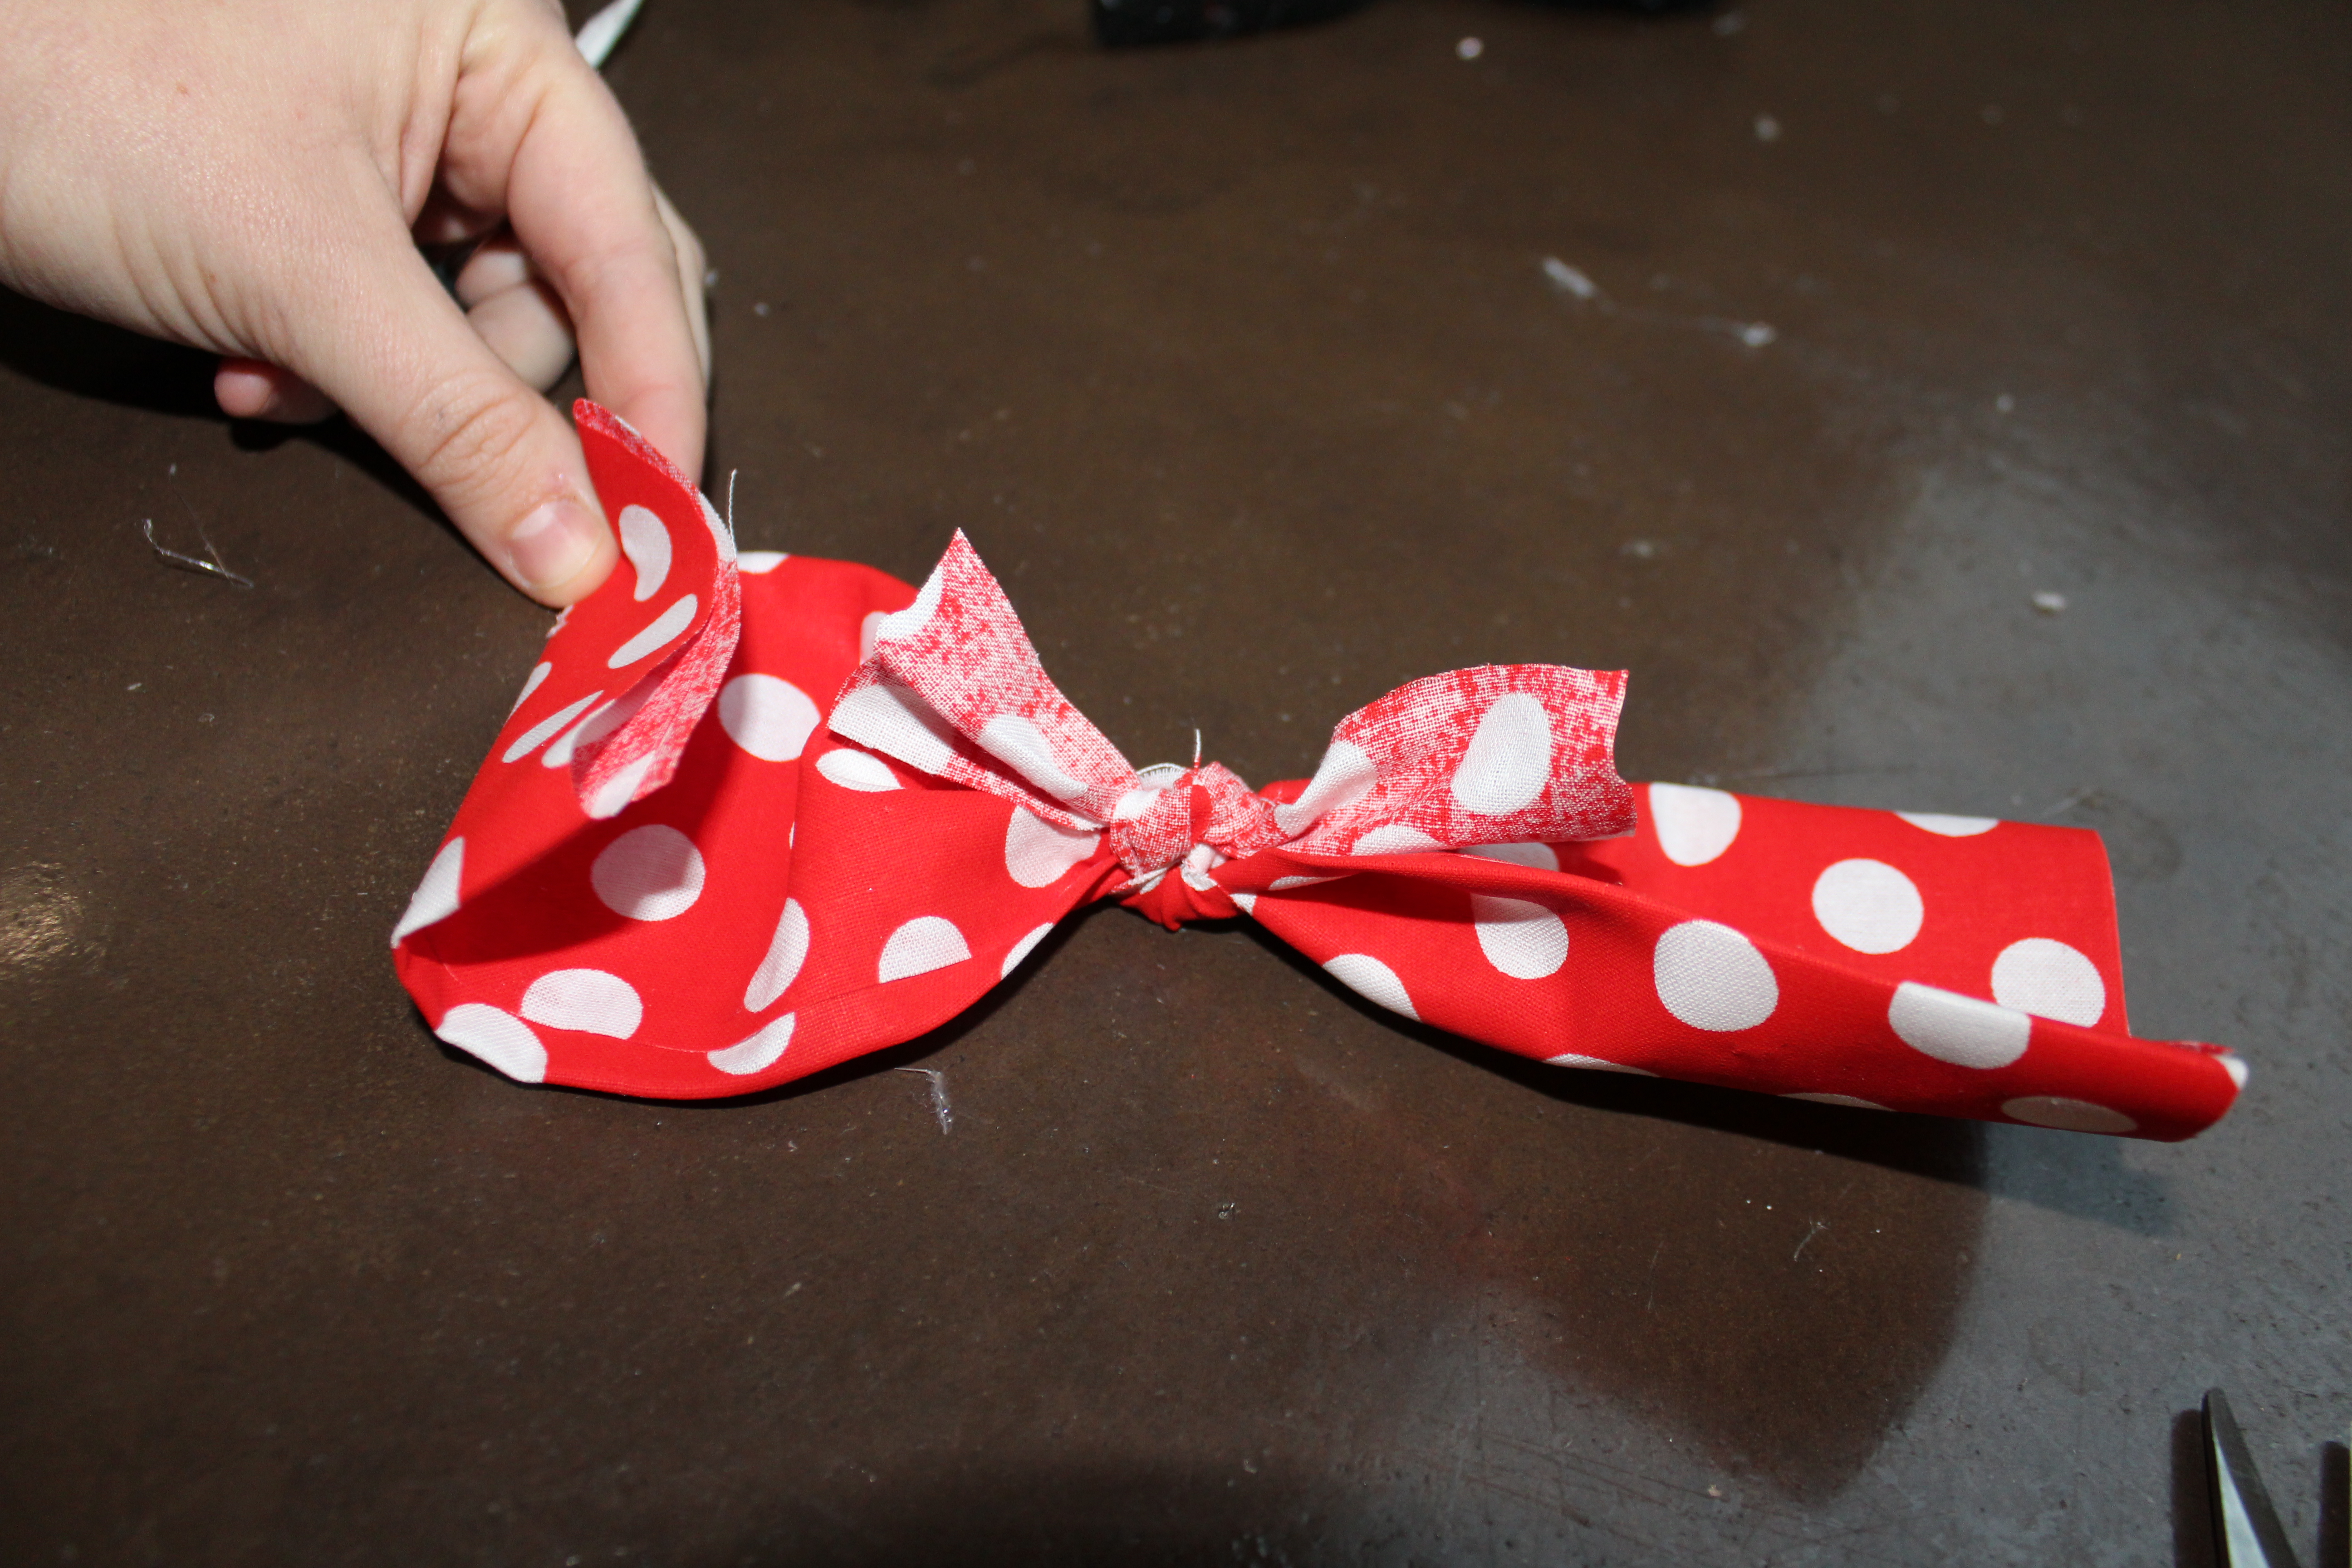
Step 7: While you can make a bow with a sewing machine, I prefer a “no sew” method. I cut the fabric to the approximate length and width that I wanted and folded it into thirds. I secured each fold in place with a line of hot glue. Using one of the strips that I had trimmed of, I then pinched the middle and secured it with the strip. I knotted the strip twice and trimmed of the excess. To give the fabric that classic bow shape, I folded down the edges and glued them in place. After you have finished your bow, secure it in place on your headband with hot glue.


And that’s it! While it was a somewhat lengthy process to make my ears, I love the result! The ears are super thick and very cute. You can adapt these steps however you like. I encourage you to pick different materials and fabrics to create something that is unique and all your own.
To complete my look, I added black lines to my white gloves. This helped them to look more like the ones that Minnie wears. I added little yellow shoes, just like Minnie Mouse! Luckily, I already had the shoes in my own closet. I also used a black eyeliner pencil to draw on a black nose. The total cost for this costume was about $20. While it was a little more, I can definitely use each piece separately. The ears will also be a great addition to my wardrobe for Disney World!